ThriftyFun Logo
Home   Find   Ask   Share   Answer   Join   Index   Login  
 
 User Login:  Username:    Password:      Forgot It?  | Join ThriftyFun!

 - Beauty
 - Budget and Finance
 - Cleaning
 - Consumer Advice
 - Craft Projects
 - Craft Tips
 - Food Tips
 - Garage Sales
 - Gardening
 - Gifts
 - Green Living
 - Home Improvement
 - Organizing
 - Parenting
 - Parties
 - Pest Control
 - Pets
 - Product Reviews
 - Recipes
 - Repair
 - Weddings for Less

RSS Feed
About Us
Media
Advertising
Contact Us
Privacy Statement
Disclaimer

Craft Project: Ribbon Headbands

1x1
Date: 05/23/2008 Topics: Craft Projects > Bath & Beauty | Photos > Crafts  
1x1
Post Feedback | Get Responses | Bookmark | Link | Print | Print (With Feedback) | Rate: Thumbs Up Thumbs Down | Bookmark and Share
Simple Strap Ribbon Headband

Approximate Time 30 minutes

Supplies:

  • 1/2 yard of 3/4 - 1/2 inch wide elastic in a color of your choice
  • different styles of a yard or more length ribbbon in 1/2 inch and 1 inch widths
  • scissors
  • buttons (optional)
  • thread
  • sewing needle
  • measuring tape

Instructions:

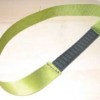
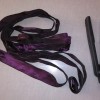
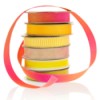
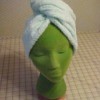
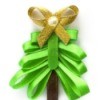
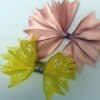
I have tried three different styles of ribbon head bands. You will have to decide which one works best for you.
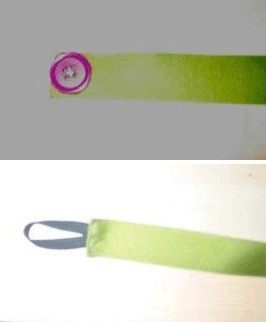
Simple Strap

Measure your ribbon a little over 1/2 a yard around your own head or head of the person you want it to fit so there is about 1 - 2 inch space between the two ends. Alternately you can actually measure the head with the measuring tape and use this as a guide to cut your ribbons. Cut ribbon to that size. Cut a wide piece of elastic just slightly longer than the 1-2" gap you measured between the ends of the ribbon on your head. Hem the two ends tightly over so it doesn't fray, attaching your piece of elastic to each hemmed side. You may either attach the elastic at the time of hemming or after.

Single Strap with Long Ends

Measure a 1 yard strip of ribbon similar to the single strap method but do not cut it. Take a similar sized piece of wide elastic and attach it at the that point on the ribbon to both ends of ribbon leaving two long pieces to hang down. You may then hem the loose ends up slightly or leave them.

LongRibbon269x220.jpg

Loop and button

Measure slightly over a 1/2 yard of desired ribbon around head leaving 1-2 inch gap between ends at back of head (cut it to this size). Hem each end over slightly. Sew an attractive button to one end. Sew a 2 inch loop of thin elastic to the other side, creating an elastic button hole. Wrap around head and secure loop to button.

ButtonRibbon266x322.gif

Voila!

By Mara from Seattle, WA

(1x1 graphic )
Previous: Dream Bars ThriftyFun Next: Beauty Savings
(1x1 graphic )
1x1
1x1
 Feedback
1x1
1x1
1x1

By Diamondee (127) Contact
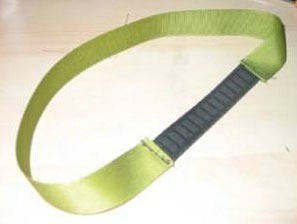
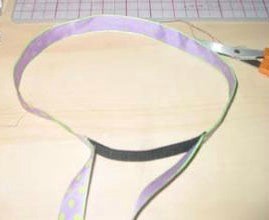
To keep it from slipping off your head, just sew/glue a small peice of cut rubber (band) to the underside of the ribbon. the bands that come with brocolli would work pretty good I would think.

Posted on 05/24/2008 | Report Spam or Abuse

By kimhis (1411) Contact
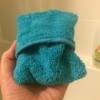
Very clear photos, thanks! Maybe a wider ribbon would have more friction? or a satin outside and a terrycloth inside?

Posted on 05/23/2008 | Report Spam or Abuse

By Cyinda (1317) Profile Contact
I made one of these several months back, but it kept slipping off of my head! ...I tried gluing on some Velcro on to the underside, but it hurt my scalp... Anybody out there got any easy & quick ideas about how to stop these beautiful ribbon headbands from slipping?

* Hmmm... I just thought of something... Maybe if I sprayed a bit of hairspray on the underside??? I wonder if that would help? ...One thing's for sure, the hair spray will surely make the ribbon sticky & dirt will eventually gather, I hope I can easily wash them! ...I guess it depends on what type of ribbon I use.

Posted on 05/23/2008 | Report Spam or Abuse

1x1
1x1
 Post Feedback:
1x1
1x1
1x1

Login using the form on the top of the page to post feedback (if you are a registered user). If you have not yet registered, click here to do so. It's FREE!.

1x1
(1x1 graphic )

© 1997-2009 ThriftyFun.com - Design by Cumuli Design
Disclaimer: ThriftyFun.com cannot accept any responsibility for any injury or damage that you may cause to yourself, others, or property when following any advice given on this site. Read the full disclaimer. If you find any information on ThriftyFun.com or in our newsletters that is either erroneous and/or potentially harmful to others, please Contact Us, immediately.