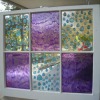
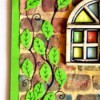
I have an inexpensive and easy tip on how to make faux stained glass windows (or anything glass) using clear Contac paper and any craft store paint for $1.00 or less a bottle. This project is only practical on small windows such as are in your front door or small bathroom windows. Best of all, you can remove it very easily if you don't like the results.
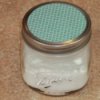
I also put a coat of preservative on it when I was finished painting, also inexpensive.
I used the flash on the camera which threw a glare on the photo. It actually looks like the bottom part of the picture.
By June from Erie, PA

Add your voice! Click below to comment. ThriftyFun is powered by your wisdom!
Hi June, This is terrific. I would love to try this!
Looks wonderful!
cool
You can also do faux stained glass on similar principles using acetate sheets - they do fade over time, tho- how do yours stand up?
Thank you for the instructions and the picture.
I really hope to try to do this soon, maybe
a theme, one for 4th of July or something.
And for Christmas.
Wow, great job June and thanks for sharing. I plan on giving this a try.
Hi June, Thank you for the directions. I can't paint, but I am going to put the contact paper on the window first and tape the picture to the back and then I will be able to "draw" it onto the contact paper. You are FANTASTIC!
Oh, June, this is beautiful! What a smart lady
you are...an incredible project to try. Thank you!

this is so great i am going to give it a try!! thanks for sharing!! Dar in Texas
All the "would like to try this" makes me a little crazy. Who actually did this? I would like to know before I deck out about 20 bucks for supplies.
Editor's Note: The original poster actually did this.
Absolutely love it. Great detailed instructions with very helpful tips. Thank you for posting this!
I found it just as easy to use the black puff paint to outline the design. The varnish I used was very shiny & water-soluable(?) too. It didn't smudge the puff paint at all when I let everything dry for 48 hours first.
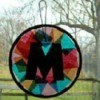
I put the whole picture onto an old piece of glass from a picture frame I had & placed it in my livingroom window by hanging it with fishing line after I drilled small holes in the two upper corners. It's still there after 10 years & washes up like a dream. Oh, I too used the paints available from Wal-mart.
Add your voice! Click below to comment. ThriftyFun is powered by your wisdom!