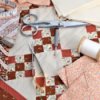
Keep Memorial Day in your thoughts all year! This a simple quilt to make and a nice display of loved ones. You can make a small wall hanging (as shown) or a full quilt. Fun for a beginner, novice or a great way to use your novelty fabrics!
Approximate Time: An afternoon (2-5 hours)
Lay a framing strip good side up on the sewing machine, lay white square on top, edges together. Sew 1/4 inch seam. When you come to the end, lay another square and continue sewing strip. This will save time, thread and fabric (and money.)
Cut the framing strip in between the squares and iron the border away from the white (be sure seam is not under white fabric, it will show through.) Continue to do each side the same way until completely framed out.
Now take the bordering fabric and lay face up on machine (the same way you did for the framing). Sew 2 of the framed blocks to border. Cut and iron.
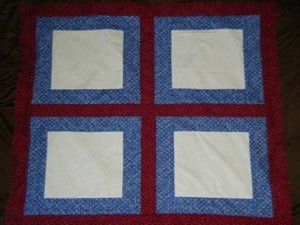
Lay another framed square on the piece you just ironed, meeting the border fabric to a "new" block, and sew/iron. Do this with the other two also. You should have 2 long pieces that go: framed block, border strip, framed block.
Take a border strip to the long side of rectangle block. Sew and iron. Using the same as #4 attach other rectangle. It will look like a large plus sign with the framed squares in between.
Remember how we framed the white squares? Now frame the entire piece. Don't forget to iron! Hint: sew strips together so you don't "run out" This also saves on fabric.
You are done with the quilt top. Finish as you would any quilt. Buy some iron-on photo transfer sheets or make it an autograph quilt with fabric markers. Be creative!
Starchild in Swanton, VT
Add your voice! Click below to comment. ThriftyFun is powered by your wisdom!