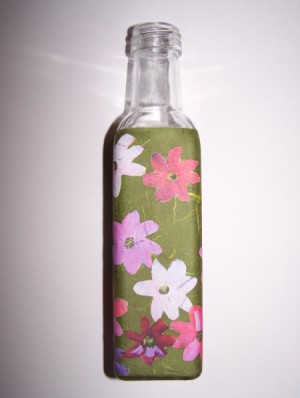
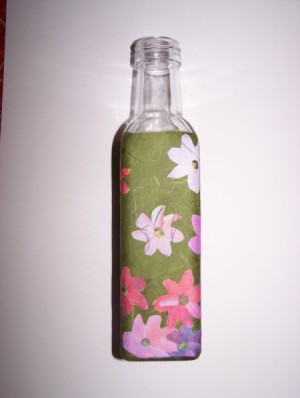
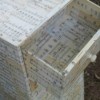
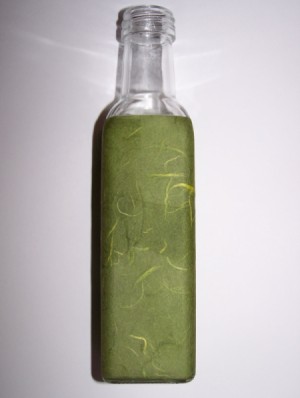
Last year, I received a bottle of bath salts for my birthday. After I had luxuriated in the last of the bath salts, I decided to recycle the bottle. I wanted to fill it up with bath salts again, and by using decoupage techniques, turn it into a special gift for a colleague's birthday.
Approximate Time: 3 hours
Supplies:
- one suitable glass bottle with a cork
- a sheet of green handmade paper
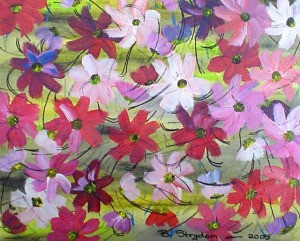
- pictures of flowers
I used pictures of South African cosmos flowers.
- a 10/32 inch paint brush
- fine paintbrush
- Deco Art glue
- Modge Podge
- water-based varnish
- hairdryer
- Old Gold acrylic paint
- a pair of standard scissors
- a few sheets of old newspapers to protect the working area
- an old cloth
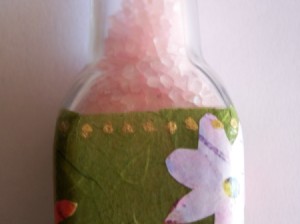
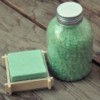
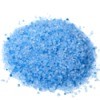
- bath salts in a complimenting color.
- optional: melted candle wax, a few strands of raffia, and a small wooden scoop
Instructions:
- Wash the bottle in warm soapy water and then leave it upside down overnight to dry thoroughly.
- Cut strips from the handmade green paper.
- With the 10/32 inch brush, paint a substantial amount of Deco Art glue to the back of the first strip of green paper. Turn the strip of paper around and put it in position on the bottle, but do not press it down.
- With the brush, spread glue to the front of the strip of paper, lightly applying pressure so that it will stick to the bottle.
- Working from the middle of the strip of paper, and from inside towards the outside, rub out all the air bubbles and excess glue from the back of the strip of paper. Use an old cloth to clear any excess glue from the bottle.
- Repeat steps 3-5 with the other strips of paper, until the bottle has been covered with the green paper.
- Use the hairdryer to dry the strips of paper thoroughly, be careful not to use the highest heat setting on the hairdryer, as the bottle might become too hot to handle.
- Cut out the flowers and decide how they will be arranged around the bottle.
- With the 10/32 inch brush, paint a substantial amount of Deco Art Glue to the back of the first flower. Turn the flower around and put it in position on the bottle, but do not press it down.
- With the brush, spread glue to the front of the flower, lightly applying pressure so that it will stick to the bottle.
- Working from the middle of the picture, and from inside towards the outside, rub out all the air bubbles and excess glue from the back of the flower.
- Use an old cloth to clear any excess glue from the bottle.
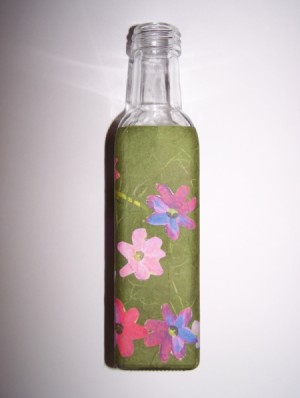
- Repeat steps 9-11 with the other flowers.

- Use the hairdryer to dry the flowers thoroughly, again not using the highest heat setting on the hairdryer.
- With the 10/32 inch brush, paint a thin layer of Modge Podge over the bottle. Remember to paint only over the green paper cover and over the flowers. The Modge Podge will protect the pictures and give the product a smoother finish.
- Dry the bottle thoroughly with a hairdryer.
- Repeat steps 14-15, you need to apply at least 3 coats of Modge Podge, but remember that with every layer, the direction in which the Modge Podge is applied, must be changed from horizontal, to vertical, to horizontal, etc. Also, remember that after every layer of Modge Podge, the bottle must first be dried thoroughly with the hairdryer.
- Using the fine paintbrush and the Old Gold acrylic paint, paint a border pattern around the top of green cover. Make small dots, ensuring that the dots are equally distanced from each other. Allow to dry thoroughly.
- With the 10/32 inch brush, add a layer of water-based varnish to the bottle, again only painting over the paper and flowers. Use the hairdryer to dry the bottle thoroughly.
- Fill the bottle with the bath salts and cork it.
- Optional: Using a low heat setting, melt some candle wax in a small pot on the stove. Use an old brush and paint the melted wax over the cork and top of the bottle to seal the bottle. Tie raffia and the small wooden scoop around the neck of the bottle.
By Benetta from Pretoria, Gauteng