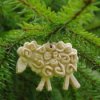
Does anyone have a good recipe for salt dough? I need one that I can brown in the oven as I am making little scented pies, and I don't want them white! Thanks!
Add your voice! Click below to answer. ThriftyFun is powered by your wisdom!
You can tint the dough using tea instead of water, or adding a little instant coffee to the water before you mix.
I saw a lady on HGTV who appeared to be adding Hershey's cocoa powder to her ornament dough to make the color a little bit deeper.
I think what you are looking for is Baker's clay...I used it often for tree decorations...gingerbread men were the children's favorite and they helped make and paint them too:) :
Baker's Clay:
INGREDIENTS:
4 c. unsifted flour
1 c. salt
1 1/2 to 1 3/4 c. slight warm water
DIRECTIONS:
Combine salt and water in bowl. Stir to dissolve salt.
Add flour gradually, mixing with hands.
If dough is too stiff, add more water, a little at a time.
Remove dough from bowl and knead 4-6 minutes. Dough should be warm, soft, and elastic, with no grimy feel.
Shape into desired ornaments or mushroom shapes for plaques, etc.
Press dough through strainer or garlic press for strings, grass, hair. To add pieces for eyes, cheeks, hair, moisten with water before putting in place.
Remember to make a holes for hanging ornaments or insert 1/2 paper clips or ornament hangers in soft dough.
Bake in pre-heated oven 350 degrees for 1/2 to 1 1/2 hours or more, depending on thickness of the piece.
This is the receipe for HOMEMADE SALT DOUGH
Salt Dough
2 cups of salt
2/3 cup water
1 cup cornstarch
additional 1/3 cup COLD water
and acrylic paint or food coloring
Place salt and 2/3 cup water in small saucepan and heat until quite warm.
Remove from heat. Mix cornstarch and COLD water together, add to salt
mixture stirring constantly. Return pan to heat and keep stirring until
mixture forms a smooth mass. Turn out on a plate and cover with damp cloth
until cool. work in color as desired or leave natural. Covered (zip bag)
& refrigerated, Salt Dough will keep indefinitely.
Shape on foil covered cookie sheet and let dry (Several hours in a warm
oven or several days at room temperature). You can sand rough edges with an
emery board when dry.
Just a tip. One year I spent several hundred hours making salt dough bowls and plates decorated with raised elephants, lions, etc. I painted them with craft paints and they were really beautiful. However, salt dough will not last unless you seal the finish. It will absorb moisture from the air and become soft, and even mold. I brushed polyurethane on several items, and was shocked when it completely ruined the painted finish.
If you brush your salt dough with a little water before you bake them, they will get browner.
Add your voice! Click below to answer. ThriftyFun is powered by your wisdom!