Home |  Index |  Submit Request |  Share Photos |  Share Tips |  Active Topics |  New Feedback  |  Contact Us  |  Search
 User Login:  Username:    Password:      Forgot It?  | Join ThriftyFun!

 Popular Topics
 - Beauty
 - Budget and Finance
 - Christmas *
 - Cleaning
 - Consumer Advice
 - Craft Projects
 - Craft Tips
 - Food Tips
 - Garage Sales
 - Gardening
 - Gifts
 - Green Living
 - Home Improvement
 - Organizing
 - Parenting
 - Parties
 - Pest Control
 - Pets
 - Product Reviews
 - Recipes
 - Repair
 - Thanksgiving
 - Weddings for Less

More Topics

Google Search:

Web thriftyfun.com

About:
RSS Feed
About Us
Media
Advertising
Contact Us
Privacy Statement
Disclaimer

Craft Project: 6x6 Baby Album

1x1
Date: 04/30/2008  
1x1
1x1
Post Feedback! | Email Friend | Print | Get Responses | Bookmark | del.icio.us | Link | Rate: Thumbs Up Thumbs Down
6x6 Baby Album
6x6 Baby Album
This is a 6x6 inch album made from hard board and scrapbook paper. Simple embellishments complete it.

Approximate Time 2 Hours

Supplies:

  • 1 pkg 6x6 inch hard board, 6 boards
  • 3 8x10 inch bazzel card stock, different colors
  • 1 package of alphabet stickers, 2 inch
  • 6 12x12 inch sheets of patterned paper
  • scraps of ribbon
  • 6 buttons
  • spiral clip
  • ink pads different colors
  • small vellum envelope
  • 2 tiny clothes pins
  • 4 plain brads
  • 1 dragonfly brad
  • plastic film frame
  • alphabet stamps
  • 1 pkg of baby stickers

Instructions:

BabyAlbum1_300x225.jpg Cover the front of the book with one color of bazzel card stock, cut to fit. I spelled out the baby's name and put the stickers on next. Next and with all the pages I rubbed the edge of the page with an ink pad to give a finished rustic edge. I added a plastic film frame to the front using glue dots. The bear picture was torn from the scraps of one of the patterned papers and again inked. All pages of the book are covered in patterned baby paper.

The second page title is from a scrap of the patterned paper and framed with scraps of bazzel. I added a spiral clip for interest and glued the vellum envelope on for maybe a snip of baby's hair.

The third page has a two different colors of bazzel to make a double mat, again inked. Two buttons with jute cord complete the page. BabyAlbum2_300x225.jpg

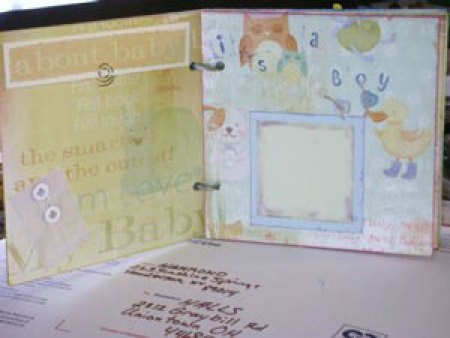
Fourth page has a bazzel mat inked and attached with 4 plain colored brads. Also a plain bazzel blank title embellished with red jute.

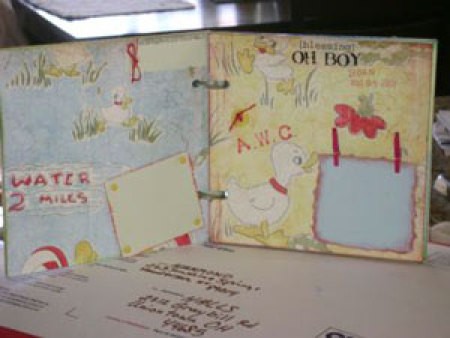
The fifth page has a mat hanging from two tiny clothes pins which are attached with glue dots. I used alphabet stamps to stamp on baby's initial and birth date.

The sixth and seventh pages have a mat with a torn edge from scraps and inked. A faux bow with ribbon embellishes the pages.

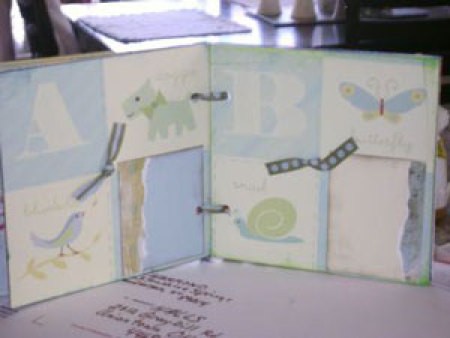
On the eigth page, I use bazzel scraps in squares inked in different colors. I used pop up dots to attach a torn picture from patterned paper scraps.

The ninth page has a double mat embellished with a ribbon and dragonfly brad.

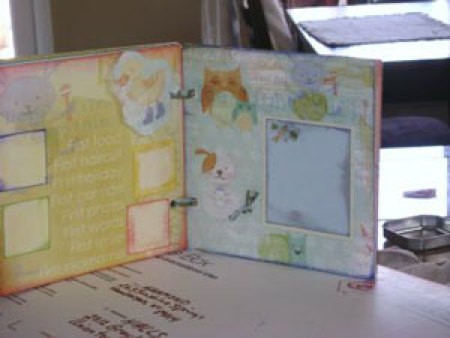
The tenth page I used scraps of bazzel to make a odd shaped mat. Then I placed a piece of rickrack and a button to the mat using glue dots. A baby sticker is used to embellish the page. BabyAlbum3_300x225.jpg

The last page has another bazzel mat with a torn patterned paper edge and a baby boy sticker. I also put a satin flower in the corner using a glue dot.

The back of the book is just torn pictures from the patterned paper and inked.

To hold the book together and as hinges, I tied ribbon through each hole that was already in the boards. I tied in a longer piece of jute with buttons laced on to the top hinge ribbon to add a little more fun.

All in all this was not very expensive. I used a lot of scraps and things that I already had in my scrapbooking desk. You can really use your imagination and stuff you already have to make a book like this.

By Shirley from Henderson, NV

BabyAlbum4_300x225.jpg

Jump to Feedback | Post feedback
Related Links:
Previous: Clean Your Tub with Vinegar and Baking Soda ThriftyFun Next: Hanging Flower Basket
1x1
 Feedback
1x1
1x1
1x1
1x1
 Sponsors
1x1
1x1

No Feedback Yet

Be the first to post feedback! Click here to post feedback.

1x1

Post Feedback:
Login using the form on the top of the page to post feedback if you have registered with ThriftyFun. If you have not yet registered, click here. It's FREE!. If you are not registered you can post feedback as a guest below. Please don't use your email address for your name because spam robots can dredge it from our site. Please do not post your feedback more than ONCE. We need to approve all guest feedback and it may take from minutes to hours for that to happen.
(1x1 graphic )
Your Name

Subject

Feedback

text tool text tool text tool text tool

Image Upload: Add an image to your post! Click the "Browse" button below and select an image from your hard drive. Please only select gifs or jpegs. If you have any problems, just email the image to images@thriftyfun.com


If you want to post your email address for responses from readers, obscure it in some way like put spaces between the name and @ sign and service address with (remove spaces) behind it or name (at) server (dot) com . This is for your protection from those creepy Robots.

(1x1 graphic )

© 1997-2008 ThriftyFun.com - Design by Cumuli Design
Disclaimer: ThriftyFun.com cannot accept any responsibility for any injury or damage that you may cause to yourself, others, or property when following any advice given on this site. Read the full disclaimer. If you find any information on ThriftyFun.com or in our newsletters that is either erroneous and/or potentially harmful to others, please Contact Us, immediately.