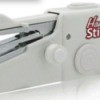
How do I thread a Handy Stitch hand held sewing machine, as seen on TV?
By lorig2009@netzero.com from Phoenix, AZ
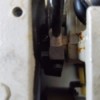
Hopefully this image that I made will make up for the inadequate one in the manual
The numbers in the images match the reference numbers below:
1. Load the Bobbin:

Here are the questions asked by community members. Read on to see the answers provided by the ThriftyFun community.
Does anyone happen to know of any links or personally have any videos of how to hem dresses shorts, etc, with the Mini Portable Handy Stitch Sewer. If there's a step by step video for beginners, that would be AMAZING.
This is a handy machine to have for small emergency projects but for what you are talking about is not what this gadget was made for.
Of course, projects like this can be done but they will not be easy and most likely will look like an 8 year old did the job as even in the demonstration you can see the wavy stitch line.
I've been down this path with a friend (she is petite and has to hem nearly everything she buys) and I can truthfully say, she sometimes almost reached the 'throw it in the garbage point'.
Even with two people holding the material straight it was very challenging and not usually acceptable.
I'm not saying it cannot be done but there are at least 10 complaints to one favorable comment on these machines. The biggest reason seems to be trying to do projects the machine was not designed for.
Everyone has given links to helpful sites so no need for me to mention these.
Following this experiment, my friend knew she had to have something different for her projects and did not need/want a regular sewing machine, she found this one online and recently told me she absolutely loves it.
www.walmart.com/
There are a lot of these slightly larger, but still very portable, machines around so maybe someone might prefer a slightly better machine for larger projects.
www.google.com/
I just received a Singer handheld sewing machine and the arm won't rise high enough to thread the needle. How can I adjust the arm? The rotary knob won't rise any higher than it was in the package.
These are not always the easiest machine to use and ThriftyFun receives questions quite frequently so maybe you can find the answer on this link: There are answers for several brands so just keep looking for yours.
www.thriftyfun.com/
There are quite a few YouTube videos that demonstrate how to use this machine so check some of these out as seeing someone make the moves might help.
www.google.com/
www.google.com/
How do I thread one of these machines?
These are handy little machines but threading seems to be the hardest to understand.
It takes a little practice but very handy to use.
I need help with a step by step procedure for how to thread a Handy sewing machine. I have tried all the steps in every article, even the videos. It is still not working.
Step 1
Put the thread from the bobbin through the first thread guide on the needle arm, through the two plates in the tension control, then through the second thread guide at the end of the needle arm.
Step 2
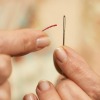
Use the provided needle threader to feed the thread into the eye of the needle.
Step 3
Turn the rotary once so the thread goes under the fastening plate. Lift up the fastening plate and pull the thread out from underneath.
This is a diagram of the Handy Stitch Sewing machine to help you understand it better. Instructions are great, but if you don't see a diagram also it is hard to follow them.
There are many users of this little machine that have threw their hands in the air - and then thrown the machine away but maybe you will be able to understand some of the instructions presented here.
I bought one for a simple sewing project one time and it broke before I could get through a few seams. I'm afraid it isn't a very good product. If possible, I would just return it and get a small sewing machine from a decent brand. Lots of sewing stores sell refurbished sewing machines.
Good luck!
Step 1
Turn the rotary wheel to raise the needle arm.
Step 2
Lift fastening plate, pull the thread out and cut with your seam ripper.
Step 3
Turn rotary wheel again so the needle goes up and down one more time.
Step 4
It will create a loop on backside of your fabric.
If you still need more information go here www.ebay.com/
How do I do the inner threading of the mini handheld sewing machine?
How do I tighten the stitches underneath the fabric?
Tension issues are a problem with many users who posted a review on Amazon. Try looking for a full-sized machine at a garage or estate sale. www.amazon.com/
ThriftyFun is one of the longest running frugal living communities on the Internet. These are archives of older discussions.