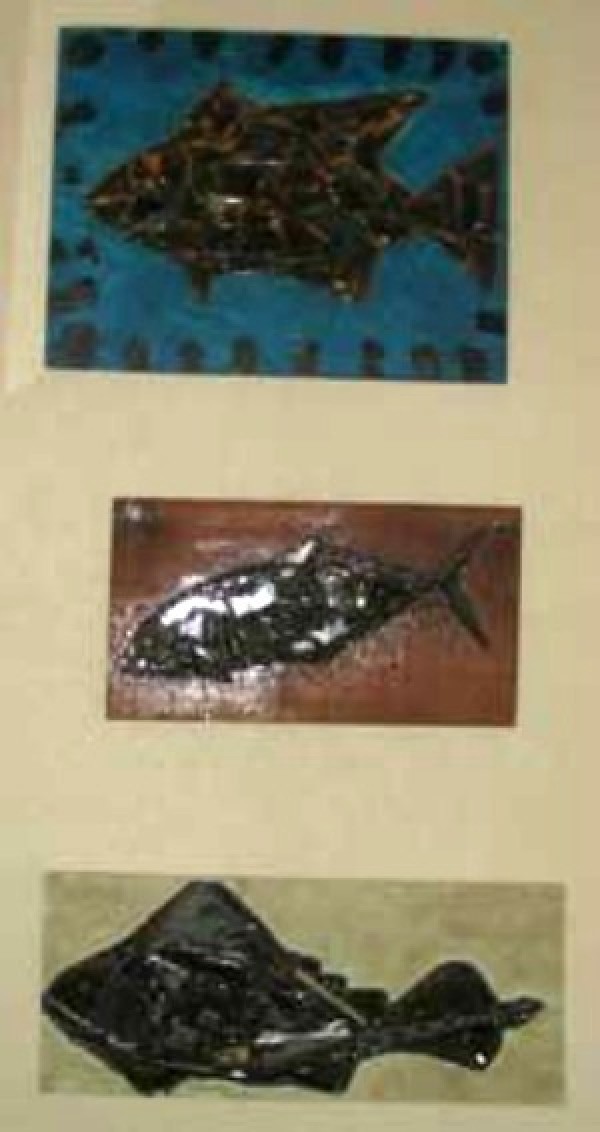
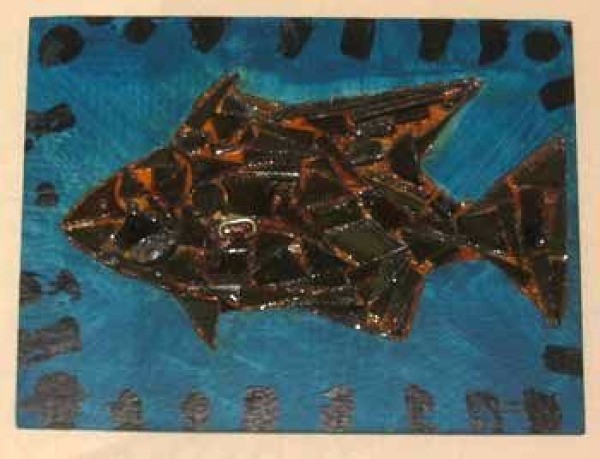
This art project is for the true recycler. By combining old pieces of metal, a scrap of wood, and leftover paint, you can create a primative work of art that depicts the synergy of man and nature. My father creates these unique pieces in his spare time, and they are indeed works of art.
Advertisement
Supplies:
a scrap of wood 3/4 inch to 1 inch thick, and at least 10 inches wide and tall
metal scraps
These can be gathered on the street or found in the garage, also use an assortment of screws, nuts, bolts, washers, nails, and pieces of broken metal from appliances, cars, and other objects.
chisel and hammer
pencil or marker
paint and brushes
varnish or polyurethane
hanger for the back or two cola can tabs
Instructions:
First, sketch the animal (fish, cat, bird, etc.) in a basic outline form on the wood.
Use a hammer and chisel to carve the inside of the sketch so that your metal scraps can be embedded into the wood. (Take your time. This project could take a few days.)
Advertisement
Arrange the metal scraps in the carved area. You may want to arrange them so that one represents an eye, a few others resemble a mouth, and so on. (Again, take your time. Search for the perfect piece.)
Remove the metal pieces, but try to keep them in order.
Pour varnish or polyurethane into the chiseled out area.
Arrange the metal pieces into their prior places within the wood. Let dry.
Pour another coat of varnish or polyurethane onto the metal pieces. Let dry.
Using your left over paint, add color to the background. For a border, you can brush uneven dashes or geometric shapes onto the wood.
Attach a purchased photo hanging assembly or two cola can tabs to the back of the art piece to hang it by.