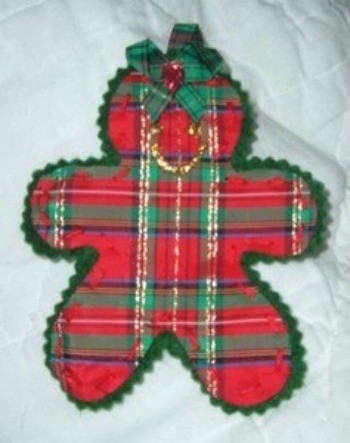
Felt and shiny plaid gingerbread ornament with topstitching, glitter face and ribbon bow.
Approximate Time: 30-60 minutes.
NOTE: Felt markers may bleed! I recommend a pen or pencil as long as you can see it.
Stiffened fabric cuts like paper and doesn't unravel. So, to save fabric, you can cut multiple shapes pretty close to each other.
Learn from my mistake! I used a double strand of crochet thread to top stitch it and it twisted. Use just one strand and it will look cleaner. Top stitch the fabric shape to the felt backing. Once it is centered and you are done sewing, you can crimp around the edges.
I used some pretty plaid fabric for the body and alternate but matching color for the ribbon. You don't have to do the ribbon at all, but if you do, I dropped a bit of red glitter to the center for a nice touch.
If you did angels, for instance, you might want something like gold or silver glitter for the halo, a black felt top hat for the snowmen, etc.
If you chose a really country plaid, you may want to give him a few little buttons on his chest, or choose puff paint and just drop two or three where buttons would be.
Be creative, have fun and remember that you are being thrifty. If the first time doesn't work out, you might be losing about .25 of stuff.
N-JOY!
By Sandra from Salem, OR
Add your voice! Click below to comment. ThriftyFun is powered by your wisdom!
love it.. feel free to make extra for me
Sandra, I have missed seeing your shared craft ideas. I hope all is well & looking forward to those ideas.
Add your voice! Click below to comment. ThriftyFun is powered by your wisdom!