This is the very first project I ever tried using a sewing machine. Like many others, the thought of using a sewing machine was intimidating. After tackling this easy project, I realized that the sewing machine isn't that intimidating. You can go as slow as necessary when sewing the hearts together and you don't need to worry about keeping a perfectly straight line. So if you are like I was and read 'sewing required' and decided it was too hard to try, please keep reading.
Cost: As little as $1. A sheet of felt costs .20 cents at most craft stores and you could get as many as 30-50 hearts from sheet, depending on the size you want.
Approximate time: 30 minutes to an hour depending on desired length and how much of a perfectionist you want to be.
Find a place to hang your garland. Step back and admire.
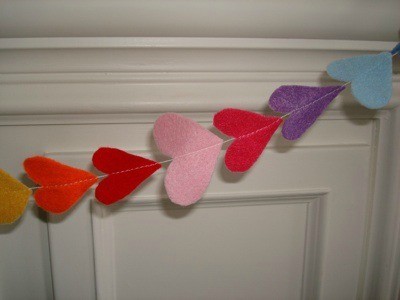
In the close up picture, you can see I used white thread and had a few stitches between each heart. Mine are not perfect, but I think that's what gives it a homemade charm.
By Mom2Gracie from Wheaton, IL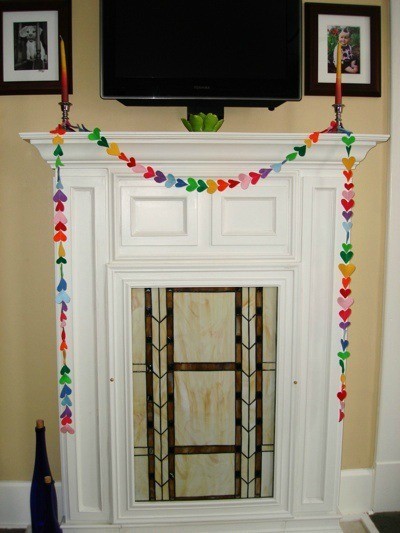
Add your voice! Click below to comment. ThriftyFun is powered by your wisdom!
I just love the idea of heart garland. So perfect. I think I'll make some big fat felt hearts and use it as a runner on my table. Thanks for the inspiration.
Add your voice! Click below to comment. ThriftyFun is powered by your wisdom!