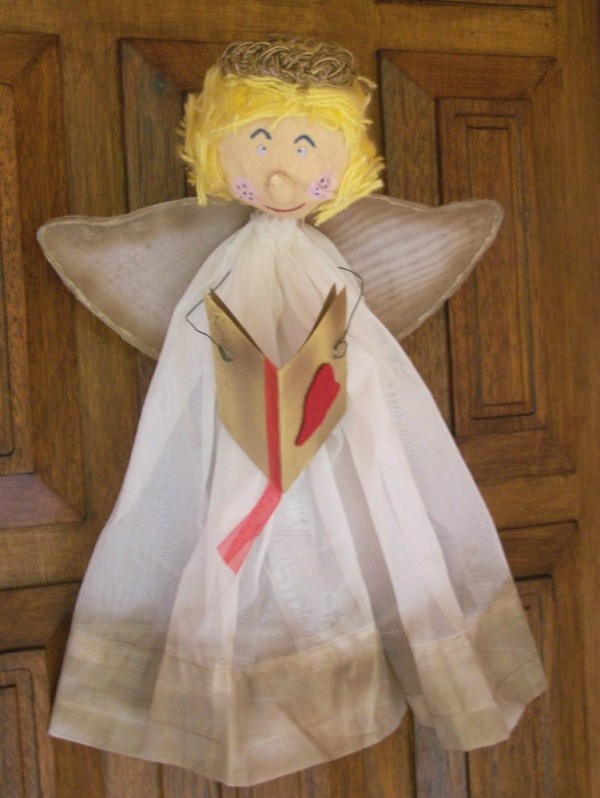
The idea when making this angel was to create a decoration only from scrap material. I rummaged through my craft supplies and found a twig ball that I had used in a floral creation a number of years ago. I also found some red and white leftover felt; flesh-colored acrylic paint; left-over pieces of a net curtain; one pair of wiggle eyes, floral wire, and half a tin of rich gold spray paint. I started racking my brain, and decided to try and see if I could turn these items into a delightful little Christmas angel, without having to buy any additional supplies.
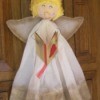
Here is the end result!
Approximate Time: 2 hours
Supplies:
- a twig ball ~ see http://www.save-on-crafts.com/ for a possible supplier.
- one pair of wiggle eyes
- floral wire and floral tape
I had these at hand, but see http://www.save-on-crafts.com/ for a possible supplier.
- one piece of white felt
- left-over pieces of white net curtain
- elastic band, sprayed with the gold spray paint
- left-over red ribbon
- paintbrush
- pair of pliers
- needle and thread
- a pencil
- one small round bead
- flesh-colored acrylic paint
- one small piece of red felt
- yellow wool, cut into short strips
- piece of cardboard
- quick-drying rich gold spray paint
- pair of standard scissors
- quick-drying glue
- few sheets of old newspaper to protect the working area
- acrylic paint or koki pens to add facial detail
- a piece of fishing line
Instructions:
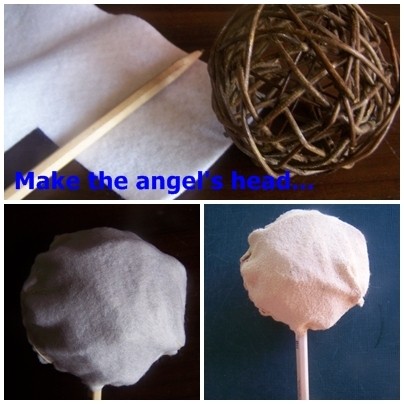
- Glue the pencil to the twig ball and let it dry thoroughly.
- Using the needle and thread, cover the ball with the white felt. Cut small strips from the felt as you sew it around the twig ball, to make it easier to shape the felt around the ball.
- Paint the front part of the felt-covered twig ball and the area around the pencil with the flesh-colored acrylic paint and let it dry thoroughly.
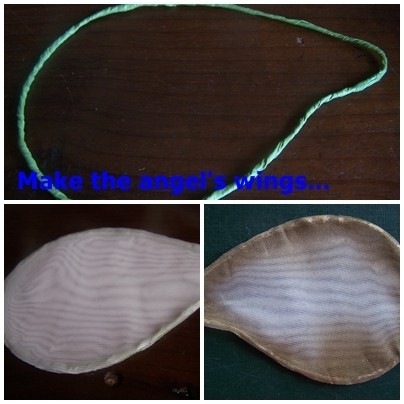
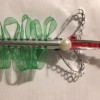
- Use 19 inches of floral wire and bend it into an angel's wing. Twist the one end around the other end where the two ends meet, and cover the whole wired wing with floral tape. Use another piece of 19 inches of wire to make the second wing.
- Spread glue onto the tape-covered wire wing and glue the wing onto a piece of the net curtain. Let it dry thoroughly and then neatly cut off any protruding edges. Cover the back side of the wing in the same manner.
- Repeat step 5 with the second wing.
- Spray paint the wings with the gold paint and leave to dry.

- Use the needle and thread and a small piece of white felt, and cover the small bead with the felt.
- Paint the felt-covered bead with the flesh-colored acrylic paint and let it dry thoroughly. This will be Arielle's nose.
- Glue the strips of yellow wool in place to make Arielle's hair. Leave to dry thoroughly, and then glue the elastic band on top of her hair to make a small halo.
- Paint two pink circles for cheeks and a red mouth. Glue the nose and wiggle eyes in place. Add a few freckles with a koki pen once the cheeks are dry.
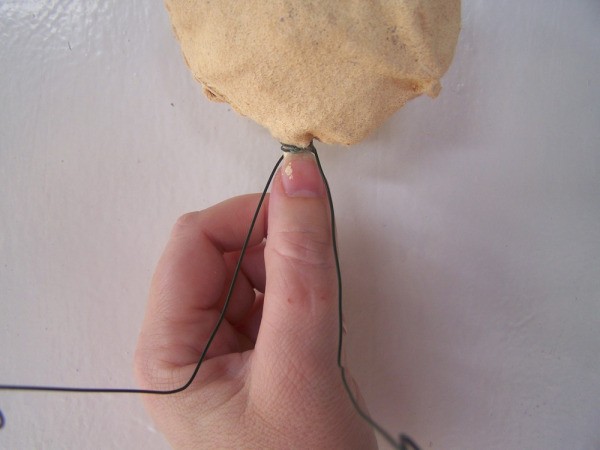
- Use 19 inches of wire and twist it around the pencil to make the arms. Add a drop of glue to keep the wire in place. Bend the wire to make elbows, and make small loops at both ends of the wire to make the hands.
- Cut two long pieces from the net curtain. Spray paint the bottom of each piece with the gold paint and let it dry thoroughly.
- Thread each piece at the top with a tacking stitch and gather the frills together. Glue one piece on the pencil at the front of the angel, and the other on the pencil at the back of the angel, to form the front and back of the dress. Leave to dry thoroughly.
- Glue the wings in place at the back of the dress.
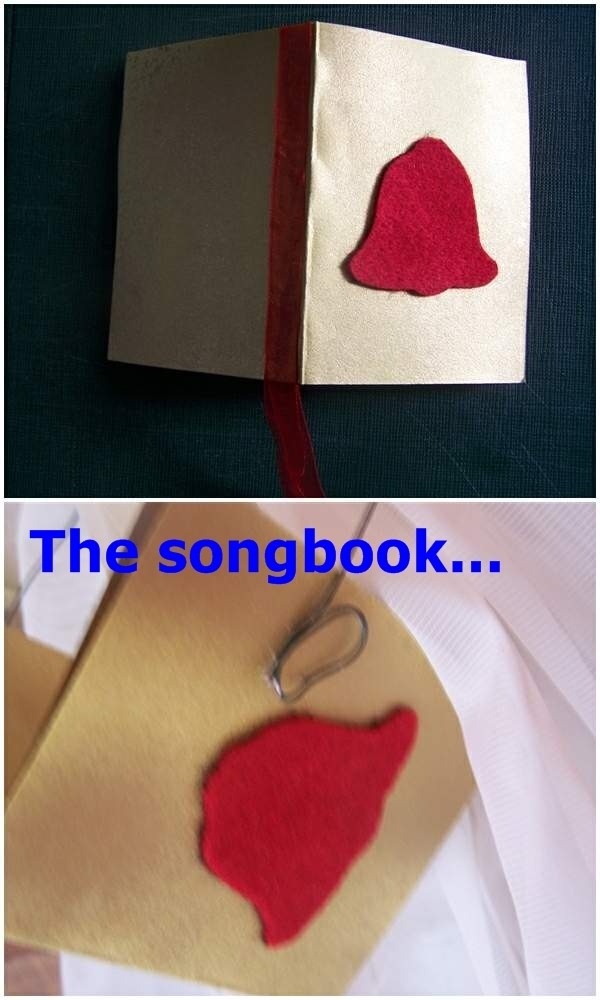
- To make the songbook, cut two pieces, each sized 4 inches x 5.4 inches, from the cardboard and spray paint them on both sides with the gold paint. Let them dry thoroughly, fold each piece in half and glue the pages of the songbook together in the middle where the folds are. Finish it off by adding a little piece of red ribbon in the middle of the songbook. Cut a bell from the red felt and glue to the front of the song book.
- Glue the song book to the angel's hands.
- Add a piece of fishing line around the neck to hang the angel.
Photos included:
Photo 1: Make the angel's head.
Photo 2: Make the angel's wings.
Photo 3: Use wire and twist it around the pencil to make the arms.
Photo 4: Make the songbook.
Photo 5: The completed angel.
By Benetta from Pretoria, Gauteng