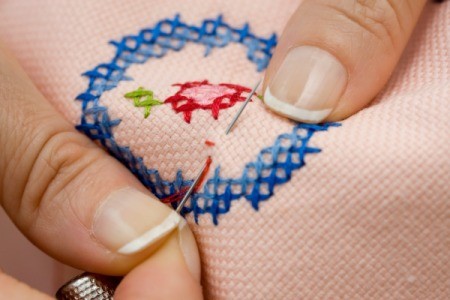
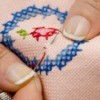
 I have always had a hard time when I am cross-stitching when my hoop won't keep the material tight. I put a heavy rubber band around the bottom hoop and now I have nice and tight fabric.
By Patricia from La Pine, OR
This page contains the following solutions.
To keep from losing my cross-stitch needles all the time, I glued a magnetic strip to the inside lid of the box I keep my embroidery floss in. I no longer lose them, and I can easily find the needle I need.
Just when you think your stitched picture is perfect, take a black light and you will find the missing stitch(es). The white background will glow through where there was supposed to be a thread. This couldn't be any easier!
Here are the questions asked by community members. Read on to see the answers provided by the ThriftyFun community.
I have finished a stamped cross stitch quilt, but when washed the stamped pattern under the stitches is not dissolving. Any tips please?
Thank you.
I have had that happen also and what I have had to do was carefully remove some of the stitches and restitch over the places where it shows to make the marks to cover the color. There are some dyes (especially if this was an older pre-printed pattern) that just don't wash out. That very issue is why--when I was able to stitch--I moved from pre-print patterns to counted stitches. It was harder, but none of those pesky marks!!
Hope it works for you to fix. Post back how it goes!
According to this website it is common and the worst thing you can do is to expose the quilt to direct sun. The best way is to make sure your stitches cover the markings in the first place. www.novascotiaquilts.com/
I am stitching a project on white aida material. For most of the design I am using dark blue. However there is a section that is white floss and it is not showing up.
Any suggestions on how to make the white section show up?Outstanding white on white designs are difficult to achieve and it usually takes more thread than the usual stitch.
I use a magnified Ott light for doing cross stitch, but I still have so much trouble seeing my stitches when I stitch white on white. Is there a trick to help see my work easier?
You can put a piece of black material behind the canvas. This will provide contrast between the white canvas and the white thread.
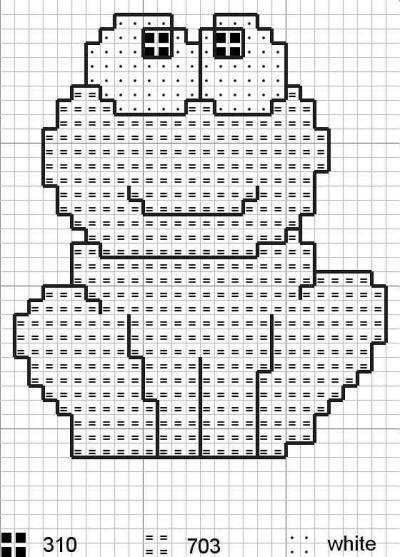
Frog Cross Stitch
By Pat Giles
By Donella
By Hope
By Nancy
By Mary Lou

Post your ideas below.
I have been cross stitching for about 30 years on and off. I had a stroke 4 years ago and had to learn to cross stitch with my non domimant hand. I bought a sit on frame at a craft show that has been my salvation. I was used to not using a hoop as I worked after having creases that I couldn't get out. But after the stroke I couldn't hold the material as I worked. I make presents every year for people now. There are several magazines to choose from that you can get from the bookstores. Some are more difficult than others. But once you get the fever for cross stitch there is no going back. DMC has a website with patterns and tips.
Hi,
I just learned cross stitching. I already stitched few small patterns, but what really bothers me is that, all of the back of my cross stitch work is messy. Is there a way I can make it neater? Especially when stitching a border pattern which requires moving further from an area to another (2-4 blocks away)?
There is a special "knot " for cross stitching. I learned it while quilting, it is quite flat and adequate for cross stitch. Hold a long piece of floss. Gather both ends. Put them thru your needle. Pull thru so you have a 2 inch tail and a loop. Begin in the back of your first stitch. Pull thru until there is only a small loop at the back. Continue to complete the first stitch by slipping needle thru fabric as you normally would, still keeping the little loop on the back. Now that you have pulled the needle thru to the back again, slip the needle thru the loop and gently tighten. Flat knot !
I have a very involved dragonfly I'm about to start. My cloth is tea stained aida cloth. I count 14 within each inch so I'm assuming it's 14 as apposed to 11, 18, or 24 correct?
Also can I just fold the cloth to find the middle starting point or am I gonna have to do math to figure a starting point?Yes and yes.
The fold method is OK if you are not concerned how large the actual pattern will be in considering how much cloth you will need. Years ago, one fold method for me in a pattern ended up short of cloth so never again!
I removed misplaced cross stitches. There will be no cross stitches in this area now. The material is stretched. You can tell that there were stitches that have been removed. Is there any way to make the material taut again?
Thanks.
Have you tried pressing it with your hot iron?
when you get the piece done, by hand put it in real warm water... then lay out flot adn dry...
or you can lightly pull in one direction at the same level as the removed stitches and then pull the other way...
Steam it over a teakettle.
I lightly spay the area with a mist of clean water, and leave it to dry, this seems to work ok
I have done many cross stitch projects in the past, but I have never done a blanket before. I have just found out I am going to be a grandmother so I decided to do a baby blanket. It is quite a large project and I am running into some problems. I am concerned because as I work on it some of the stitches are starting to look kind of fussy and worn. I admit I am a bit of a perfectionist and I am also worried about it needing to be washed repeatedly. I assume that it probably should be for show rather than use. I am concerned that the stitching will come undone when washed. Also it is a kit and the blanket is quilted so I am wondering if I could sew fabric to the back once it is finished so the thread work doesn't show.
Also I am used to using hoops with smaller projects and I am not sure what frame to try. I looked for a scroll frame, but couldn't find one to fit. I bought a snap frame, but I have to keep moving it around because it doesn't fit either and is awkward because of the left over material hanging off. I have never had a problem sorting out the colors of thread, but this time they are not labeled and I am having a heck of a time figuring it out! Any advice would be greatly appreciated!
Might be much easier (!) to consider turning the blanket into a wall hanging or try another project entirely?
Addendum to first reply-may also be easier on the new parents instead of worrying about a beautiful baby blanket. No matter how careful the parents may be, the blanket stitches may be damaged, the blanket may need washing, etc.
My mother made several of these baby blankets (quilts) for the grandchildren. She tried her best to not have stitches showing on the backside. This method is more time-consuming than putting the needle all the way through the fabric each time, but it solves the problem of having to cover the back when finished. These are beautiful quilts, but were not used for the babies, just as wall hangings and heirlooms because so much time and effort went into making each one. She always put her initials on them, which I thought was a nice touch. Good luck with yours. I'm sure it will be beautiful and very much appreciated.
Hi - I would suggest a large quilting hoop. They are designed for just that Hope this was helpful
I have made a tiny snip on my fabric in a place on the cross stitch pattern where there are no stitches to cover it up. Help!
By Darlene from Red Lion, PA
Hi. Ive done this too. Dont panic. Cut a small square of cotton fabric and the same size squre of bondaweb and iron it on the back of the snipped bit. It will be tougher to push a needle theough but it will stop the snip showing and fraying. Hope that helps hon.
Thank you so much for this answer. I have a cross stitch blanket made for and used by my 4 grandchildren (the eldest now 21) which a mouse found very appetizing. Could not just toss it, so your answer is perfect. Thanks again. Bev
I am working on this cross stitch pattern and I need to change the colors in the hand to that of an African-American Baby. I could really use your help.
Go for 2-4 shades lighter than the color you are using for skintone.
Count how many different shades there currently are in the cross stitch, and what colors they are. then, choose the appropriate color-tone that you want to use, and match the different shades to the ones that are listed on the chart. Exp: If there are four different shades: white, light tan, med tan, and dark tan; you might want to use med tan(or dark), light brown( or med), med brown(or dark), and dark brown(or black), depending on the shading that is used. Also, if you want a really unique look, try using one strand of a color with another, to get a very realistic shading effect. it looks amazing.
I started my yarn work journey with crochet and I enjoy making blankets and scarves as gifts for people. I wanted to kick it up a notch by putting logos of their favorite sports teams on them or maybe a music note, something that suits them.
I am not sure how or where to start when it comes to taking this next step. Any suggestions?This shouldn't be too hard:
I am doing a cross stitch and some of the stitches, after I am finished with a square, are coming undone. Is there something I can do to stop this? Someone said maybe a fabric glue?
Not sure how your problem occurs, however, you might not be pulling some stitches tight enough against the base cloth. Another possibility is the quality of the floss you are using; it may stretch after you have stitched part of the pattern. I do not know if a fabric glue will solve the problem but I think the best way to fix the problem is to try to restitch the loose areas. A pain, I know!
I am stitching a flower and want to add a hummingbird. Can I reduce it? The image I want to use is 11 holes per inch, my material is 7 holes per inch. Will this reduce the size of the image so it is not overpowering to the rest of the picture?
By Red
The larger the number of holes per inch in your fabric, the smaller your picture will be because you can fit a lot more stitches into a smaller space.
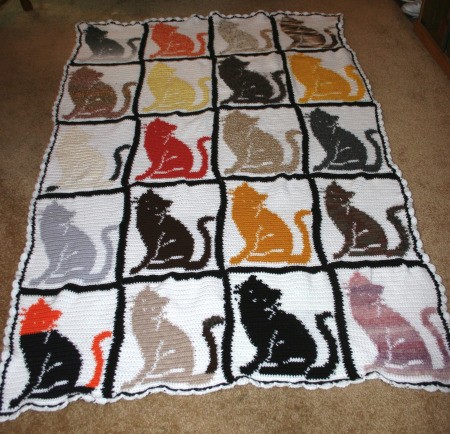
If you are up for the challenge of routinely changing your yarn, this project is for you. This page is about using cross stitch patterns for crochet.
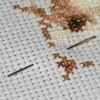
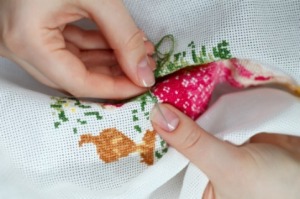
This is a page about fixing mistakes on counted cross stitch projects. For small errors, you might be able to ignore the mistake and keep going. However, larger mistakes may need to be removed and started over.