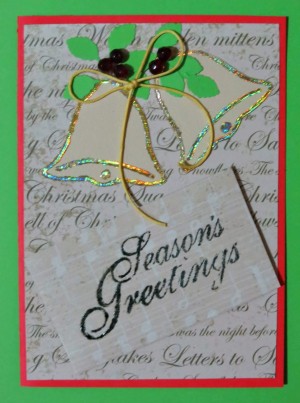
 Make a Christmas card with chiming bells to spread a message of joy during this festive season. The bells serve as a visual reminder of the spiritual reason behind Christmas, and the recipient of this card will be sure to feel blessed when receiving this card.
Total Time: one card
Yield: 40 minutes, including drying time for Super-tack glue
Supplies:
- 5.6 x 8.2 in red cardstock
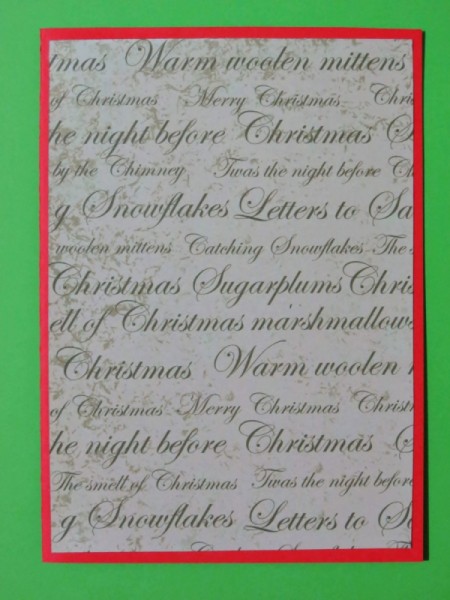
- 12 x 12 in Christmas scrapbook paper from Upikit, product code #MC004
- left-over piece of vanilla cardstock
- left-over piece of leaf green cardstock
- golden craft foil
- Foilart Super-tack glue pen
- black pigment ink stamp pad
- clear embossing powder
- 5 small red beads
- 0.1mm wide waxed yellow colored cord
- 3D self-adhesive foam squares
- bell-shaped cookie cutter
- leaf-shaped paper punch
- standard scissors
- ruler
- pencil
- clear-drying craft glue (such as Bostik Clear)
- hairdryer
Steps:
- Score the 5.6" x 8.2" red cardstock in half to create a card sized 5.6" x 4.1".
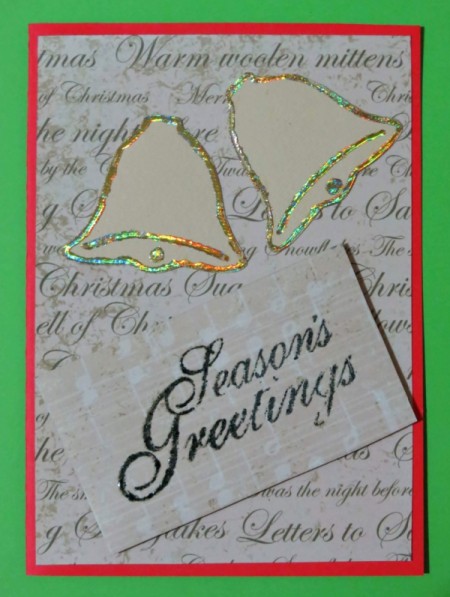
- Cut a piece sized 5.4" x 3.7" from the Upikit scrapbook paper.
- With the fold at the left, centre and glue the scrapbook paper to the front of the card.
- Place the cookie cutter onto the vanilla cardstock and trace all around it. Repeat so that you will have two bells. Cut the bells out.
- Add Super-tack glue all around the outline of the bells, and add some detail to the bottom part of the bells.
- Allow the Super-tack glue to dry for about 20 minutes. When the glue is wet, it is blue, but when it is dry it becomes transparent.
- Press the foil down on the glue. Remember that - of course - the golden side of the foil must be on top.
- Lightly rub the foil over the areas where you have added glue with the Super-tack glue pen.
- Carefully lift the foil. On the areas where you have added glue with the Super-tack pen, some of the foil will stay behind.

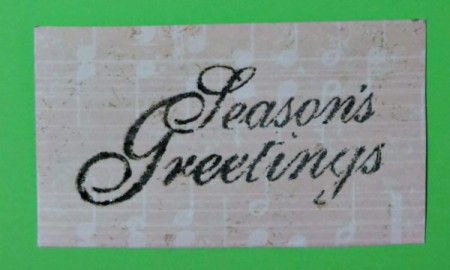
- Cut a rectangle from the Upikit scrapbook paper ~ the rectangle should be big enough for the "Season's Greetings" stamp to fit on it. Cover the stamp with the black ink and transfer the image onto the rectangle.
- While the ink is still wet, sprinkle a liberal amount of embossing powder over the wet ink. Shake off any excess powder and use the hairdryer to emboss the powder. The powder will turn shiny once enough heat has been applied. Allow to dry thoroughly.

- Use the 3D self-adhesive foam squares to add the "Season's Greetings" rectangle to the bottom of the card.
- Glue the two bells in place at the top.
- Punch 9 leaves from the leaf green cardstock and glue around the top of the bells.
- Use the beads to add some cherries.
- Make a bow with the yellow cord and glue it to the card.