Ann Winberg Silver Post Medal for All Time! 306 Posts
December 28, 2010
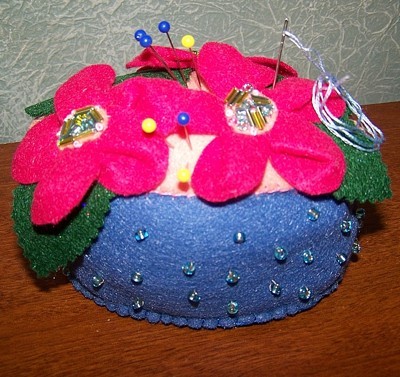
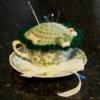
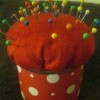
This fun project makes a large pin cushion that would also be pretty just sitting in your sewing room. Any sewing enthusiast would be thrilled to receive a handmade gift such as this.
Approximate Time: 6 hours
Advertisement
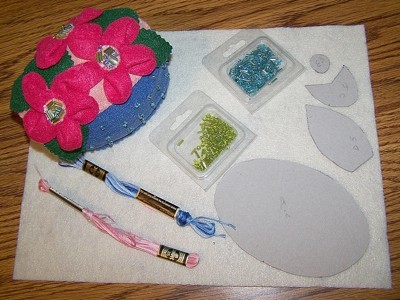
Supplies:
scraps of felt or felted wool
dark pink for petals
light pink for centers
green for leaves
scrap for bottom and top oval
2 2 1/2 inches x 7 3/4 inch base sides
glass beads of choice colors
optional buttons for flower centers
Instructions:
This fun project makes a large pin cushion that would also be pretty just sitting in your sewing room. Any sewing enthusiast would be thrilled to receive a handmade gift such as this.
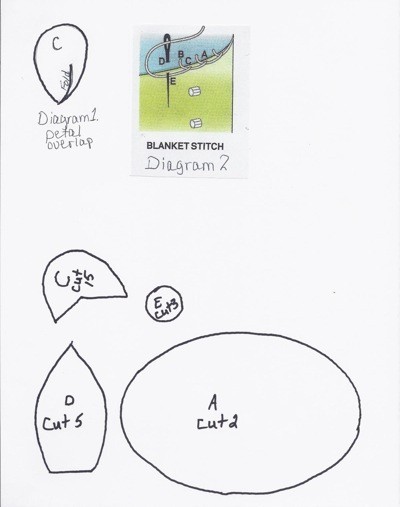
Trace the patterns onto light weight cardboard, then trace onto your felt. Notice I have written on the pattern pieces how many of each you need.
Advertisement
With your petal cutouts, overlap the points until you have a petal shape as in diagram 1.
Baste the point and repeat with all 15 petals.
Arrange 5 petals for each blossom slightly overlapping the points, baste the points together.
Center a light pink center over the center of your blossom then make a small stitch through the center around the edge down through each petal. These will be hidden by your beads.
Now using 2 strands of pink floss stitch your beads in place, there is no pattern to this just what-ever pleases your eye. I made several French knots randomly to finish my centers. You may choose to use a button instead, but please consider the beads: they really add some pizazz and charm to the finished product.
Repeat for all three blossoms.
Arrange your three blossoms and the five leaves on one of the two bases you have cut out. Pin, baste in place, then with matching embroidery floss stitch them in place around the centers and under the fold on each petal or glue in place if you choose.
Advertisement
Stitch beads in a zigzag pattern 3/4 inch apart around your two 2 1/2 inch x 7 3/4 inch side pieces leaving at least 3/4 inch free of beads around all sides.
Stitch the narrow ends of your side pieces together with a 3/4 inch seam and finger press the seams open. I put a line of glue along the seam to hold it flat.
Match the ends of your oval with your flowers stitched on, with the seams of your sides pieces you just sewed together. Using 2 strands of floss, your choice of color, do a blanket stitch to sew the two together catching 3/4 inch on each edge. See diagram 2.
Repeat the blanket stitch on the other edge, but leave one side open for stuffing, stuff with polyfill, then finish stitching the opening shut. You should be able to print out the diagram page on regular copy paper for the correct size to match the side rectangles.