social

Making a Mosaic Ball Decoration


Silver Post Medal for All Time! 408 Posts
April 9, 2015

mosaic ball on glass dish with decorative beads
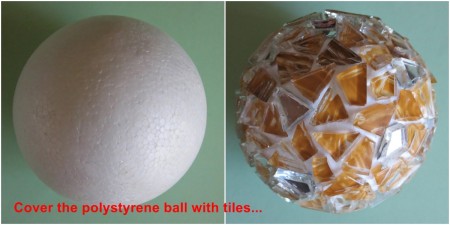
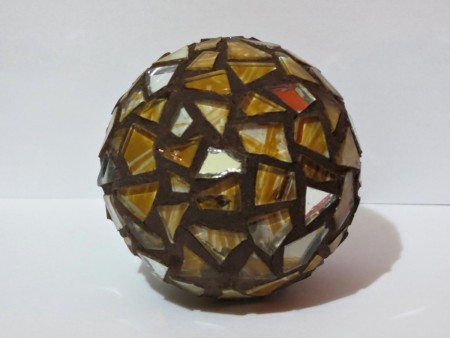
Summer is the time to bring homage to "out with the old, in with the new". Adding new elements to your décor does not need to cost an arm and a leg. Turn an ordinary polystyrene ball into a beautiful décor item for your house and add a fun element to your lounge.

Advertisement

Total Time: Weekend project ~ includes drying time for grout

Yield: one mosaic ball

Supplies:

  • 1 polystyrene ball with a diameter of 3 inches
  • brown-and-white splash glass mosaic tiles
  • regular mirror mosaic tiles
  • dark brown grout
  • clear-drying craft glue (for this project, Ponal wood glue was used)
  • safety glasses
  • double-wheel mosaic tile cutter
  • small sponge
  • old soft cloth
  • old mug
  • a few sheets of old newspapers to protect the working area
  • small plastic container and spoon
  • cotton earbuds
  • methylated spirits

Steps:

  1. Use the tile cutter to cut the mosaic tiles into smaller shapes. To make the monkey ball more interesting, use tiles cut to different sizes and shapes.
  2. Glue the tiles to the polystyrene ball one at a time. You only need enough glue to hold the tile in place, so use a small drop of glue to secure each tile. After every three tiles that have been secured, allow the ball to rest on a old mug, so that the glue can dry before adding more tiles. This is to prevent the tiles from sliding off the rounded surface.
  3. Advertisement

  4. Once the whole ball has been covered with tiles, allow the glue to dry thoroughly before proceeding with the next step ~ in hot weather, it is usually best to wait approximately an hour to allow the glue to dry thoroughly. When the glue is completely dry, you will not be able to move the tiles any more.
  5. Funky Mosaic Ball Decoration
     
  6. Now it is time to grout. Add a few heaped spoonfuls to an old, small plastic container and then add a few drops of cold water until the grout is the right consistency ~ the grout should not be runny.
  7. Use your finger to spread the grout over the ball. Gently press the grout in between all the tiles, carefully ensuring not to leave any air pockets below the grout.
  8. Advertisement

  9. Allow the ball to rest on the mug for 10 to 15 minutes, so that the grout can dry.
  10. Use a damp sponge to gently wipe away any excess grout from your surface. Rinse the sponge constantly. The sponge must only be damp, not wet.
  11. Use a damp soft cloth to gently wipe away any grout from the tiles.
  12. Allow the ball to dry for an hour or two.
  13. A glass ball with a funky pattern.
     
  14. Use cotton earbuds and methylated spirits to completely clean the surface of the tiles.
  15. Display the ball with multi-colored glass pebbles, or make more mosaic balls and fill a vase with them.
  16. Funky Mosaic Ball Decoration
     
    Advertisement

Comment Pin it! Was this helpful? 7
Read More Comments

May 15, 2017

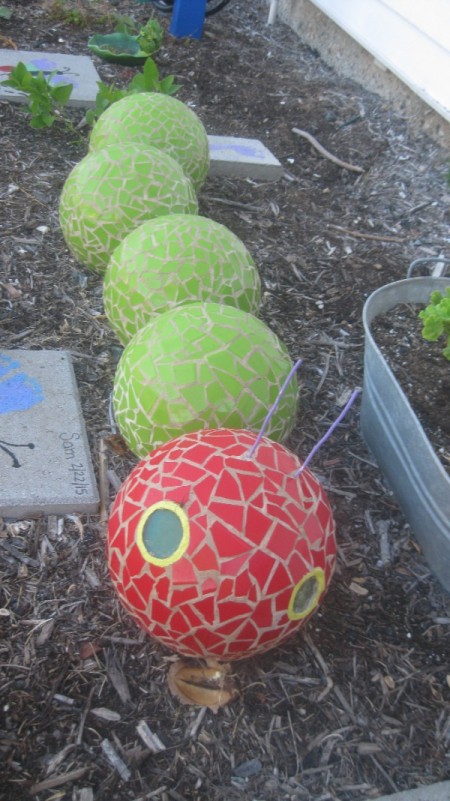
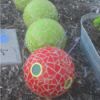
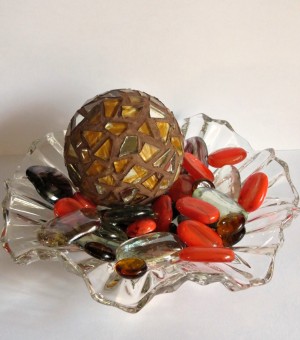
Broken tile mosaic finish makes this recycled bowling ball project fun to do and gives you a cute piece of garden art. This is a page about mosaic bug bowling balls.

caterpillar

Read More... Pin it! Was this helpful? 1
In This Page
Categories
Crafts Home Decor DecorationsJanuary 22, 2020
Pages
More
🍂
Thanksgiving Ideas!
🎃
Halloween Ideas!
Facebook
Pinterest
YouTube
Instagram
Contests!
Newsletters
Ask a Question
Share a Post
Categories
Better LivingBudget & FinanceBusiness and LegalComputersConsumer AdviceCoronavirusCraftsEducationEntertainmentFood and RecipesHealth & BeautyHolidays and PartiesHome and GardenMake Your OwnOrganizingParentingPetsPhotosTravel and RecreationWeddings
Published by ThriftyFun.
Desktop Page | View Mobile
Disclaimer | Privacy Policy | Contact Us
Generated 2022-10-25 13:58:24 in 3 secs. ⛅️️
© 1997-2022 by Cumuli, Inc. All Rights Reserved.
https://www.thriftyfun.com/Making-a-Mosaic-Ball-Decoration.html