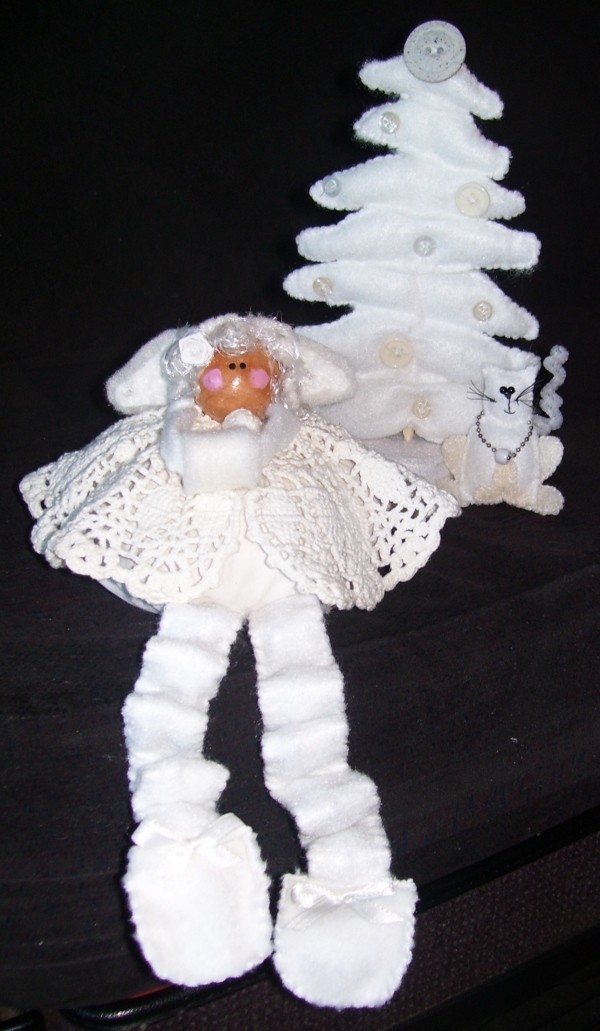
I like making a craft now and then where I use only what I have on hand, so it helps to keep my scrap pile under control. I attempted to do just this when wanting to make a Christmas present for a friend. I loved the results and made a larger version which is the project you see here. I was thrilled with the all white effect, but you can make one using colors and perhaps, a green tree. You can also adapt this project to make any size angel you would like. Just choose the appropriate size wood ball for the head to fit the size circle you are using for the body.
Approximate Time: Time will vary
Advertisement
Supplies:
soft white material
white felt
batting
6 white pipe cleaners
glue
needle, thread, and pins
1 1/2 inch wood ball
bits of white doll hair or white yarn
trims and decorations of your choice
16 oz. dried beans, such as pinto
dab of black and pink paint
wood stick, such as a fireplace match, for the tree
Instructions:
Angel Directions:
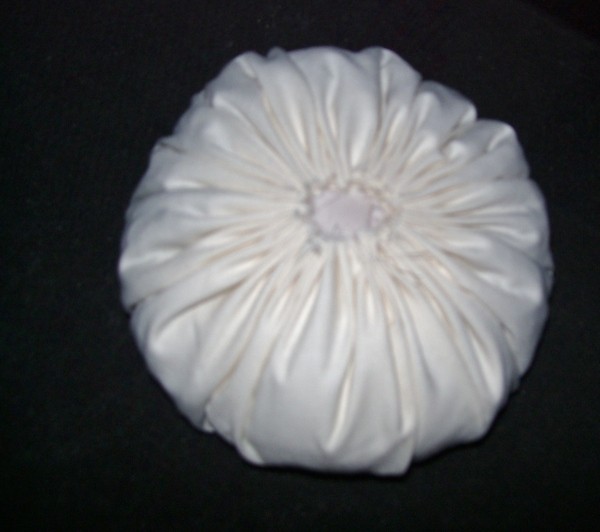
Cut a 12 inch circle from white material.
Make a running stitch all around outer edge and pull to gather, leaving opening approx. an inch wide.
Pour 16oz. of dried beans inside gathered circle. (I used white pinto beans). Lay a small circle inside pouch, on top of the beans to help contain them.
Stitch around gathered opening to secure well.
Advertisement
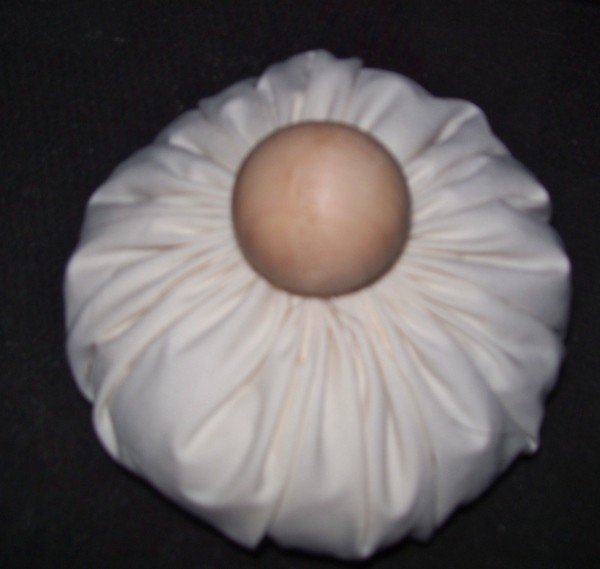
Glue wood ball on opening of gathered circle with beans. Allow to dry completely.
Cut hat from white felt or flat type batting.
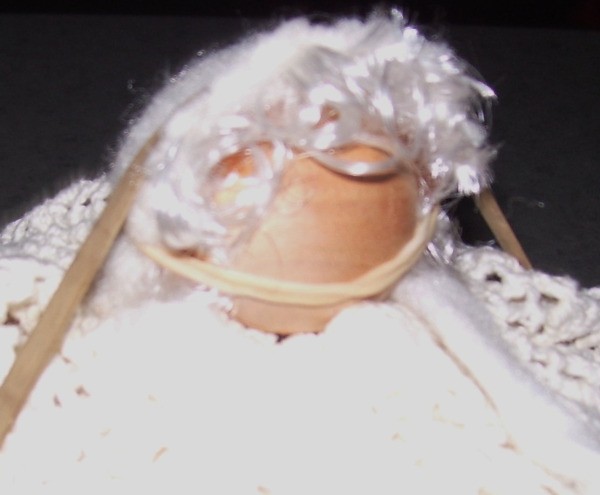
Sew small amounts of hair along rounded edge brim of hat, using white thread. Wait until the hat is glued on to the head before trimming any hair. Put aside.
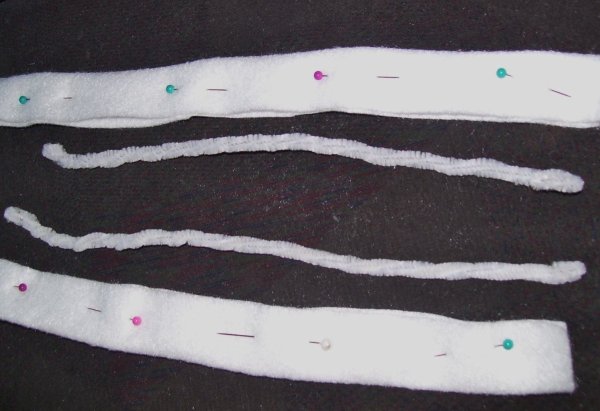
Cut 4 strips of white felt 12 inches long and 1 inch wide for legs.
Take 2 pipe cleaners and twist them together. Bend the ends into a small loop so the sharp wire on the ends does not stick out. Repeat with other 2.
Advertisement
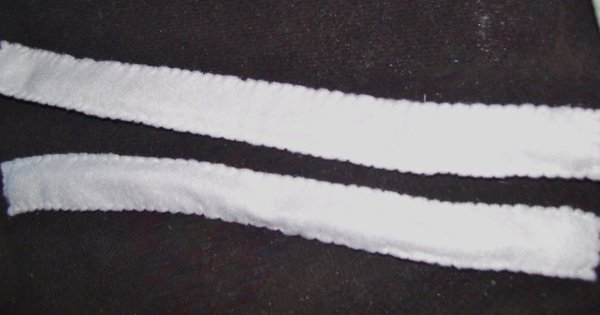
Take one set of twisted pipe cleaners and lay it between 2 of the 12 inch strips. Pin all edges. Whip stitch all edges closed with pipe cleaner inside.
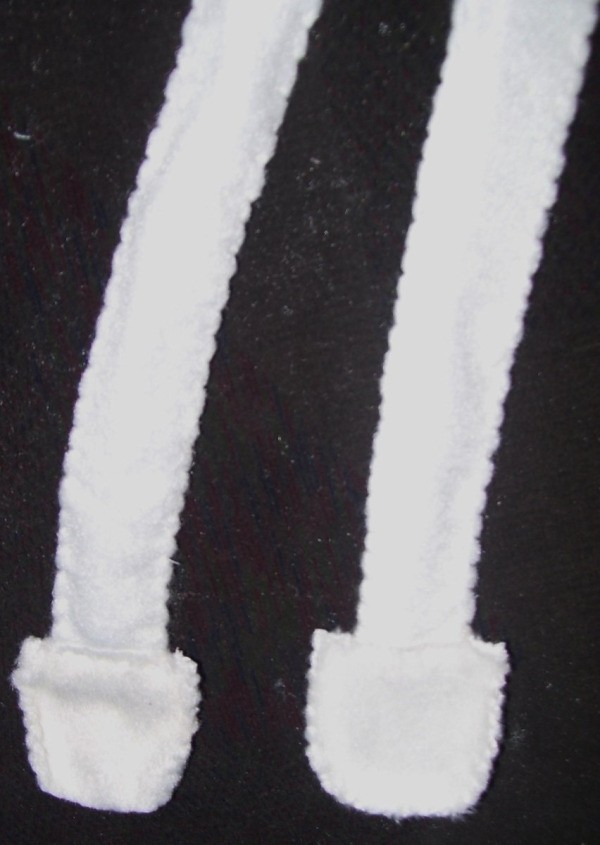
Cut out 4 foot pieces. Take 2 and lay 1 leg strip in between about 1 inch inside. Whip stitch the foot together. Repeat for other foot and leg. Put aside.
Cut a strip from white felt 10 inches long and 1 inch wide for arms. Fold in half and pin. Whip stitch all sides closed.
Lay center of arm strip to center of back of head at neck. Lay the strip flat on body and pin to body, bring ends of arm strip to the front. Stitch arms to body securely, stopping just in front of face on both sides.
Advertisement
Bring ends of arms together in front to form a loop and stitch the ends together.
Lay the center of the flat end on hat (with hair on the inside) in the center of the back of the head, as you did the arms. You want the hat to cover the arms in back. Stitch the flat end of the hat to the body bringing each side around the sides of the head. Fold hat back and run glue around the inside edge at the top of the hat. Flip hat brim forward and press hat to face and hold until glue is set. You can wrap a couple of rubber bands over head and hat to hold firm while glue sets.
Cut a strip from batting 6 inches long and 1 inch wide. Wrap around hands in a roll for muff and glue end. Clip with a clothespin until glue sets.
Cut out wings. The wings in this project have a layer of batting between. If choosing to add that layer, cut a wing shape from batting, slightly larger. Put wing pieces together and stitch edges with white thread. Make stitch lines all over wings, sewing on small clear or white beads in the process.
Advertisement
If wanting a halo, take 2 white pipe cleaners and twist together. Make a loop at one end for halo and bend it forward so it will sit on top of head. Measure long end against the angel's back and cut off excess. You will be laying the wings on top of the halo stem so you don't want it any longer then that. Stitch halo stem onto back. Lay wings on and stitch into place.
Use a ball top straight pin or the end of a paint brush and dip into black paint. Make 2 dots for eyes. Brush a little pink paint on for cheeks. When dry, give the face a coat of clear nail polish if desired.
Christmas Tree Directions:
Advertisement
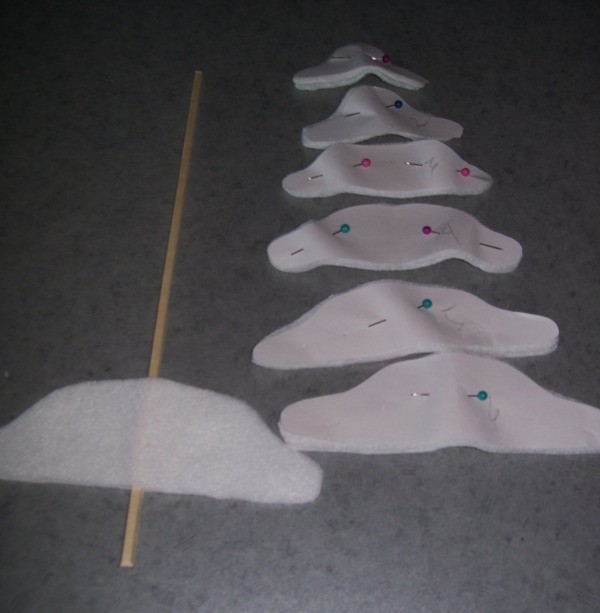
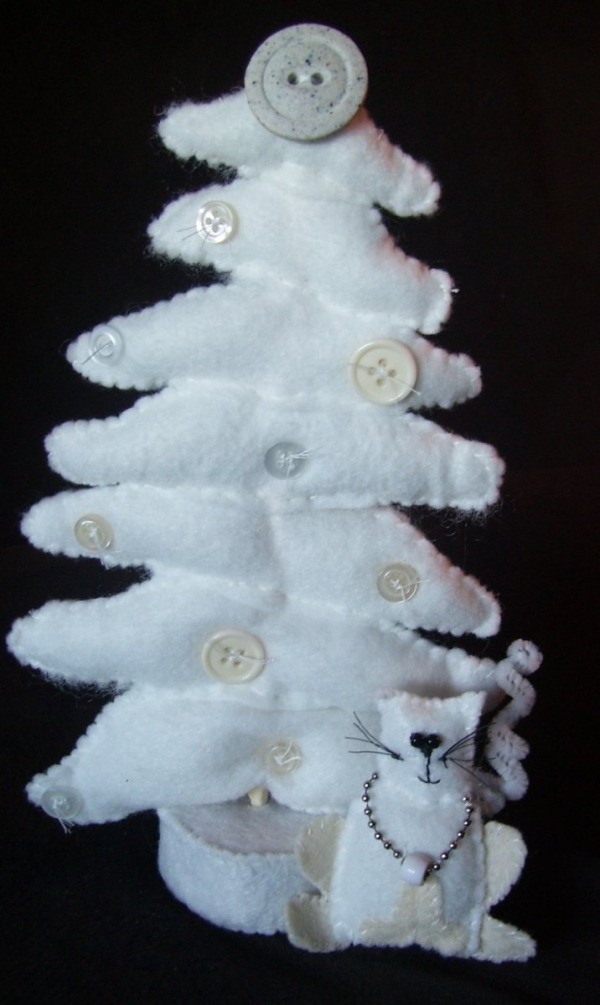
You will need something to use for the base and stem of the tree. The base of this tree is a slice from a tree branch, then covered in felt. After making a project for a teacher using the container tube that tall fireplace matches comes in, I had a supply of tall sticks from the matches so I used one for the tree stem.
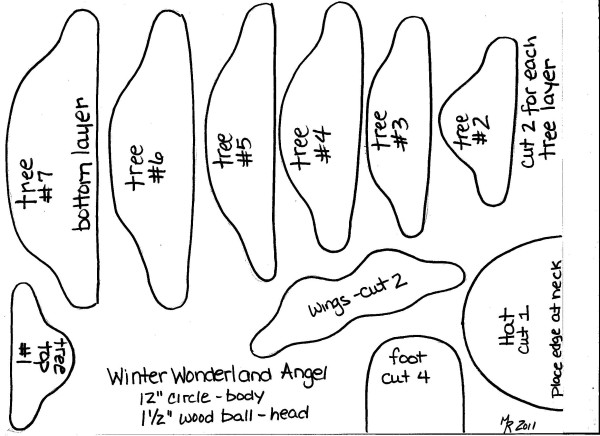
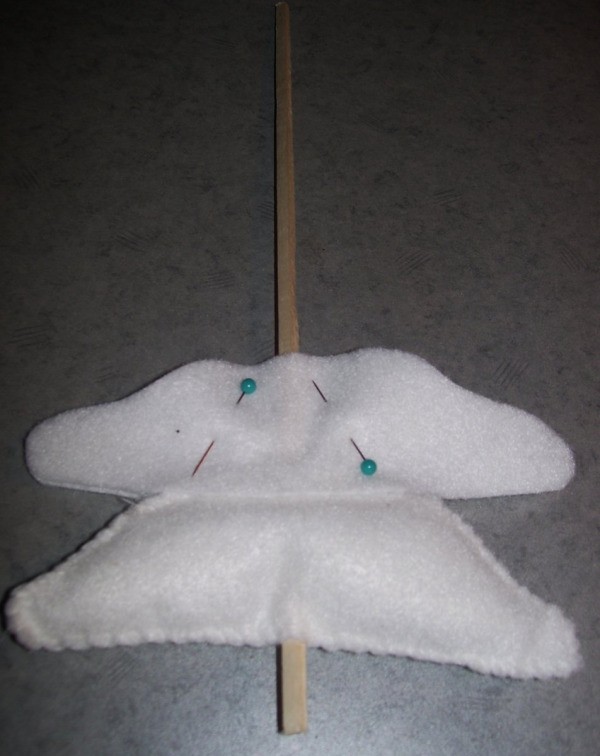
Cut layers for tree from white felt, using pattern. Be sure when sewing on tree layers, to leave enough stem exposed to fit into your base. Start with the #7 layer, which is the bottom of the tree. You will be stitching each layer closed but inserting a small amount of stuffing as you go.
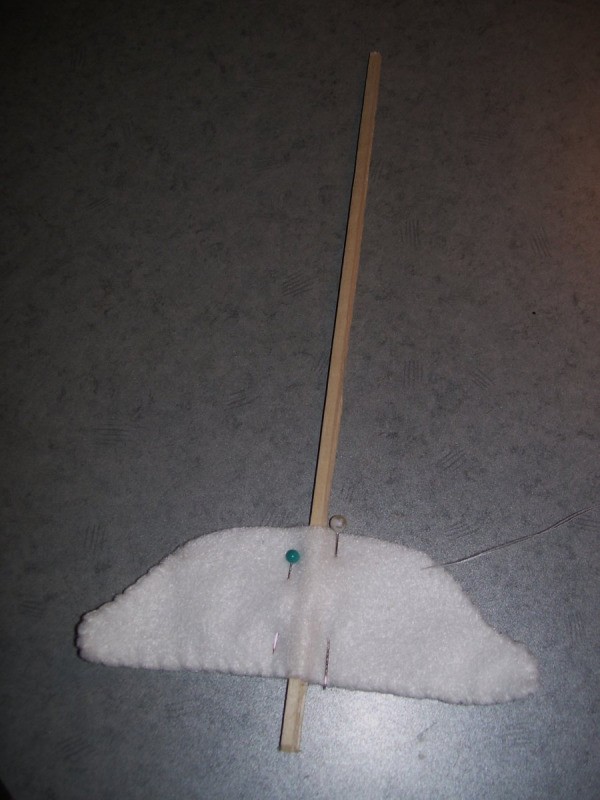
Lay stem in between and whip stitch edges closed, going over the stem a few times on top and bottom to secure.
Overlay #6 layer slightly on top of #7 and repeat by stitching to secure. Do this with each layer until all 7 are in place.
Decorate the tree, if desired. Put a dab of glue on bottom of stem and insert into your base.
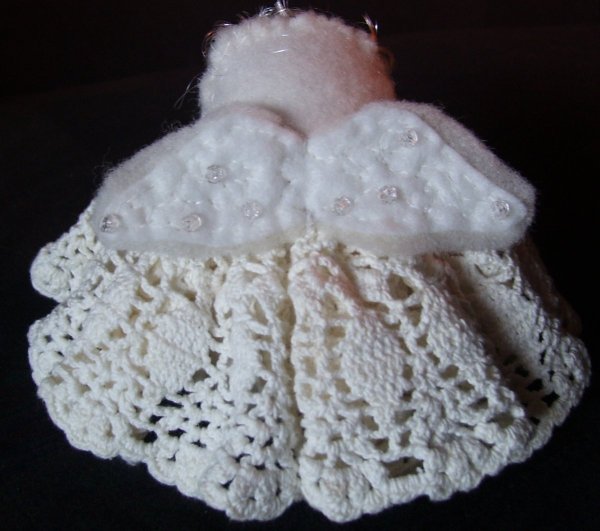
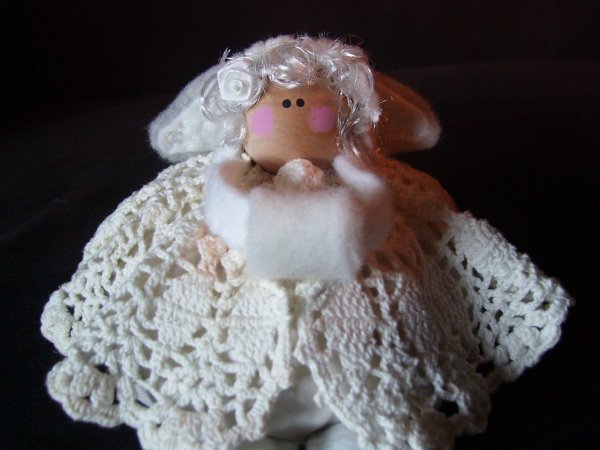
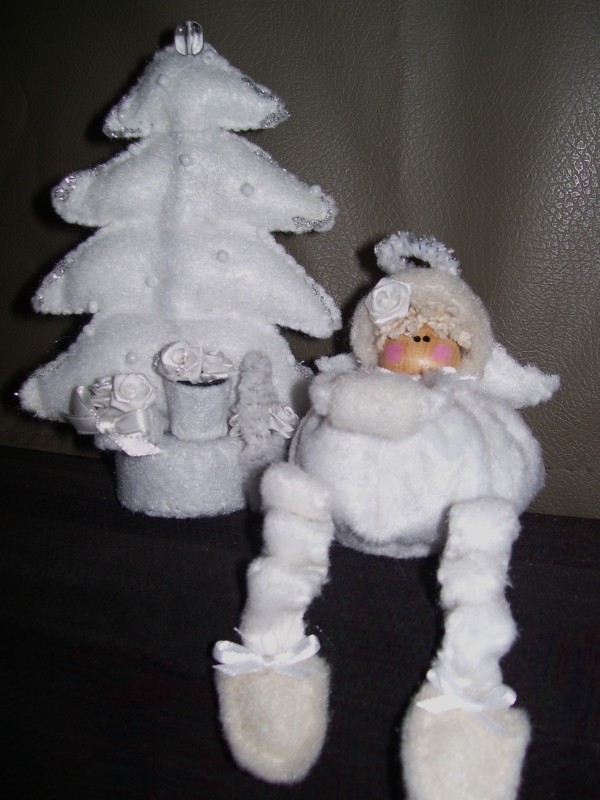
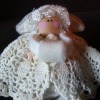
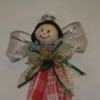
The tree in the smaller version has white beads on it and both angel and tree contain mini white roses. This larger tree was decorated with white buttons and a white rose on the angel's head. I recently found a beautiful crocheted collar in a thrift store and decided to dress my angel here using that. The body was still made using the white 12 inch circle and the collar was gathered using a running stitch and placed over the head and body, then stitched down at the neck.
Tip: The angel and tree could be dressed in a variety of ways and you can make a very special one as a wonderful gift by using an item that has meaning to the person you will give it to. For example, if you have a new Mom, try using an article of the baby's clothing as an overlay on the body of the angel, as I did with the collar. Have someone serving in the Military? Make the angel's wings using a patch or emblem of the branch they are in. Or decorate the tree with little sentimental items.