social

Plant Labels for Vertical Shoe Holder Planter

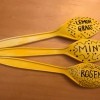
This is a method for making plant labels that are weather resistant and pretty, for the project presented in Birds and Blooms Magazine by Kirsten Sweet. The designer did not give measurements for the labels she made. So I came up with my own. There is no intent here to take credit from her. Plus she mentioned using ultra-firm stabilizer and iron-on adhesive. When I went to buy some I found it to be very, very expensive. I had to find a more economical way. (Besides, I don't get along with irons.) So here are my instructions for the labels. Labels with plant names.


Approximate Time: 2-3 days for glue and sealant to dry.

Advertisement

Supplies:

  • glue: Aleene's "OK To Wash-It", permanent fabric bond.
  • plastic canvas, medium weight for bases - 3 sheets, (13 1/2 x 10 1/2 inches each = 300 square inches.)
  • pretty fabric, as coverings for the bases - 24, (6 x 6 inch squares.)
  • fabric canvas, medium weight for covering bases - 1 piece, 10 x 10 inches.
  • Sharpie brand permanent marker, fine tip
  • sealant: Thompson's Water Seal*
  • binder clips, 24 - 1 inch wide

*Do not use Mod Podge! It caused several problems after 6 days!

Instructions:

  1. Cut plastic canvas in to 24 pieces for bases. Each base should measure 2 1/2 x 3 1/2 inches.

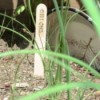
    Note: You may use any base material that is weather resistant.

  2. Cut pretty fabric into 6x6 inch squares.

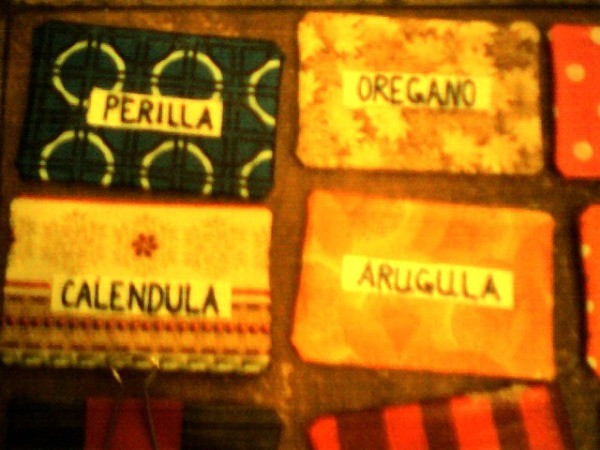
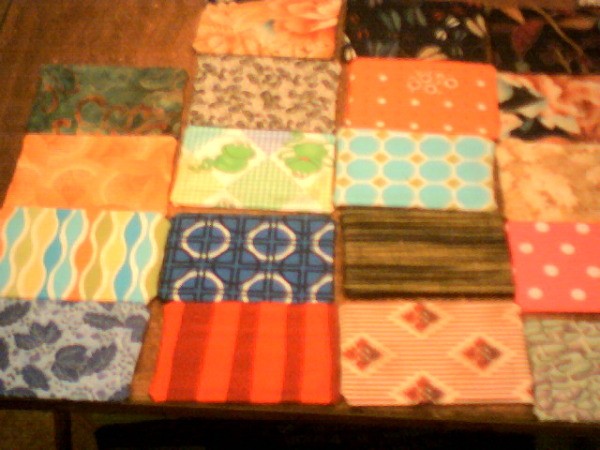
    Note: It's fun to have a different pattern for each base. I went to my neighborhood fabric shop and looked through their "scrap" box. Nicely, already cut squares of over 40 different patterns!

  3. Advertisement

  4. Glue the pretty fabric around the bases of plastic canvas just like you would wrap a gift. Do this in steps, allowing the glue to dry a bit between steps so the tackiness will help each layer of fabric hold. Not much is needed so be judicious.

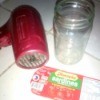
    Note: Aleene's "OK To Wash-It" is very sticky and takes a long time to dry. So be patient. This makes the labels water proof and washable, which is needed as the labels will get wet each time the plants are watered. When I thought I was finished, there were still tiny sticky spots, so I put some baking powder on those spots.

  5. Unmarked plant labels.
     

  6. While the glue dries work with your heavy duty fabric canvas.
  7. Cut the fabric canvas into strips that are 1/2 to 3/4 inch wide, then cut lengths that are long enough to write the name of the plant and still fit on the bases.
    Advertisement

    Note: You may use wider strips of fabric canvas, but it will cover more of your decorative background. The name of the plant doesn't need to be seen from far away. The label is for the person growing the plants.

  8. Using the Sharpie, write the names of the plants on the fabric canvas. One method for doing this is to write the name on the long strip first then cut the strip. However, remember that your base is only 3 1/2 inches long. Another method is to write the name on a small piece of paper first, measuring and adjusting till it's right, then doing it on the fabric canvas.
  9. Once the glue on your bases is dry enough to handle easily and your ink from the Sharpie is dry, glue the labels onto the bases in the center. Let everything dry completely before next step.
  10. Advertisement

  11. It's best to seal it properly. Using the Thompson's Water Seal spray one side of each of the bases with a generous but not extremely thick layer of the sealant. Let these dry completely before continuing.
  12. Now turn your bases over and repeat step 8. Let everything dry completely.
  13. Use binder clips to attach labels to pockets of shoe holder.

    Note: There are binder clips that have pretty decorations on them also. So there is no need to use plain black.

  14. Hang the shoe holder from a strong door or fence or from nails placed through the grommet holes at the top of the holder into some wooden surface, fill each pocket with soil, plant the seeds, water your seeds, clip on a label!

    Note: The hanging shoe organizer I found was from www.casa.com. It was the only one I found with a bamboo top edge, which I felt might support the weight of the soil better than one with a cloth top edge.

    Advertisement

    By JazzyMe from Los Angeles, CA

    Editor's Note: JazzyMe doesn't have a completed photo of the vertical planter as she is giving it as a gift.

Add your voice! Click below to comment. ThriftyFun is powered by your wisdom!

 
June 2, 20120 found this helpful

Great idea very nice!

 
June 4, 20120 found this helpful

Actually you could use paper or cardboard & cover with Clear Contact paper & it would be a lot less expensive.

 
June 4, 20120 found this helpful

Thinking you could use "junk mail" credit cards for these!


Add your voice! Click below to comment. ThriftyFun is powered by your wisdom!

 
In This Page
Categories
Home and Garden Gardening Creative PlantersMay 30, 2012
Pages
More
💘
Valentine's Ideas!
🍀
St. Patrick's Ideas!
🎂
Birthday Ideas!
Facebook
Pinterest
YouTube
Instagram
Categories
Better LivingBudget & FinanceBusiness and LegalComputersConsumer AdviceCoronavirusCraftsEducationEntertainmentFood and RecipesHealth & BeautyHolidays and PartiesHome and GardenMake Your OwnOrganizingParentingPetsPhotosTravel and RecreationWeddings
Published by ThriftyFun.
Desktop Page | View Mobile
Disclaimer | Privacy Policy | Contact Us
Generated 2024-01-27 11:37:49 in 3 secs. ⛅️️
© 1997-2024 by Cumuli, Inc. All Rights Reserved.
https://www.thriftyfun.com/Plant-Labels-for-Vertical-Shoe-Holder-Planter.html