
I almost decided against submitting this tip because I lost a couple of the pictures I had planned to use in the article. Then I decided someone may really like and use this tip, even with a missing picture or two.
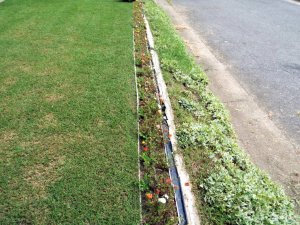
The above picture appears elsewhere on TF. I used it here to illustrate what lush vegetation can be grown in rain gutters that have a depth and width of a mere 4 inches. Many different plants can be grown in these border gutters, it's just a matter of knowing which plants have a small or shallow root system. In this case, purslane can make rather large plants while maintaining a small root system.
A note on purslane. It is said to do best when grown under hot, dry conditions and in poor soil. I have found this not to be true. Purslane will survive conditions so hot and so dry, most all other plants would perish. This does not mean it prefers and will thrive under these conditions. The above picture is proof. To get this lush growth, the plants were fed regularly and the soil was kept moist at all times. In fact, the growth was almost rampant. I was pruning and removing a 5 gallon bucket of growth at least twice a week.
See picture # 3
http://www.thriftyfun.com/Growing-Purslane-Portulaca.html
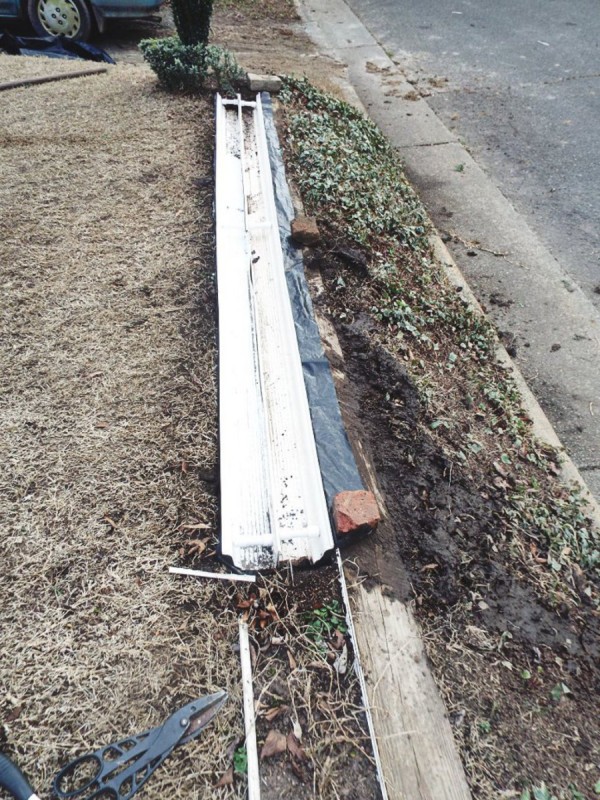
The next picture shows the cut out in the lawn that held the gutters. I can't show excavating the cut out as it has already been done. I lifted the gutters from the cut out for a reason and it was then I decided to do this article.
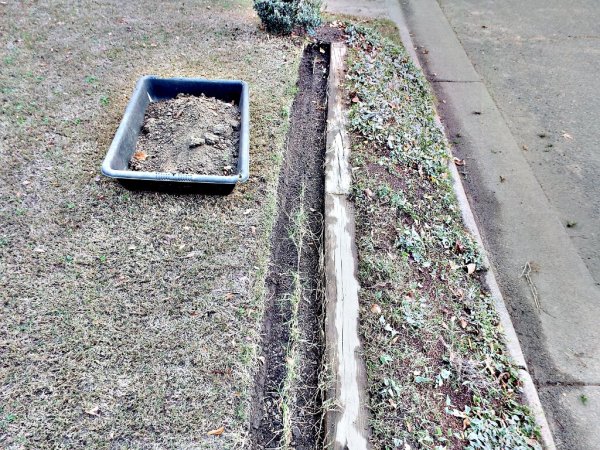
This area was once just a grassy slope. It was difficult to mow and was unsightly. My plan was to add soil to level the lawn and then create a bank of ivy along with a border of flowers. I hauled at least a hundred 5 gallon buckets of soil from a grave yard 200 feet away. I then added 6x6x8 timbers to hold the soil in place. The picture shows I have already sprigged in quite a few ivy plants in the bank to get things started
The original cut out was made with a shovel. The finishing touches were made with a hand held hoe. I tried to keep the cut out as straight and as level as possible. I kept a piece of gutter handy to keep a check on my depth and width. The narrow lip of gutter next to the timber fits neatly over the timber. This helps keep things straight and even, too.
My reason for lifting the gutters at this time can be seen in the picture. My lawn is Bermuda grass. With its tendency to spread, it was impossible to keep it from growing up between the double row of gutters. As hard as I tried to keep the gutters so close together no grass could grow through, it managed to do so, anyway.
To solve this problem, I lifted the gutters and laid down a double layer of medium/heavy weight black plastic. The plastic was cut to allow 2-3 inches extra on either side. The plastic works very well. So far it has kept 100% of the grass from coming up between the gutters. I am sorry that one of the pictures I lost was that of the plastic in place.
The gutters I purchased are vinyl. They come in 10 foot sections at less than $5 each. I bought enough to make a double row 50 foot long. I also bought a couple 10 foot sections of electrical conduit and end caps. These were to help keep the gutters straight.
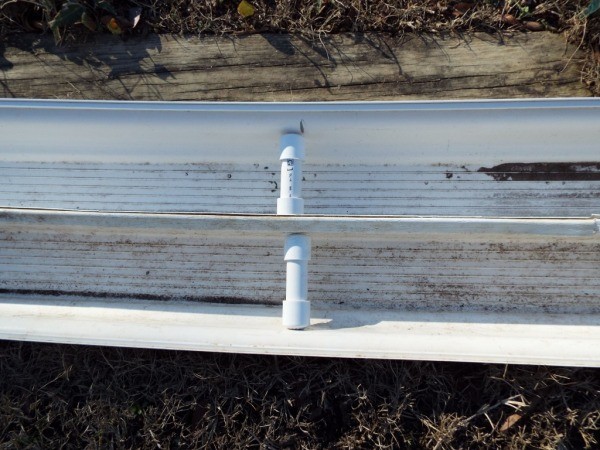
With the pressure from the soil against the walls of the gutters, the gutters have a tendency to flair open, and they do so, unevenly. Either end will flair much wider than the center. To solve this, I cut the conduit into 3 inch pieces and attached an end cap on either end. Working with one piece of gutter at a time, I screwed the conduit with caps to the interior of the gutter at about 18 inch intervals, making sure there was a piece very near each end. Again, I don't have a picture of these conduit pieces attached to a single gutter before joining two together.
I am not a handy man, rather, an improvisor. The next step was a bit of a hassle, but I figure most any handyman could come up with a better method than me. In order to keep the gutters in straight alignment, I wired them together in pairs. It made for easier handling and would help the gutters from shifting away from each other.
I placed two gutters together, and with a heated nail, I burned a hole through both, a half inch from the top and at 16 inch intervals. Using the heaviest gauge wire I had handy, I threaded it through the holes in both gutters and secured them together. There might be some type staple or other fastener that would work better, but that's for the handy man.
With the black plastic in place and my gutters joined together into double 10 foot sections, I placed the gutters into the cut out and returned the soil, then trimmed the plastic, leaving an extra inch.
You may think I forgot to add drain holes to the gutters. Not so. They are not necessary in this case. With the gutters being so shallow, you might have trouble keeping the soil moist during hot summer days. So, no drain holes. And too, grass would grow through the holes.
Here is last year's picture.
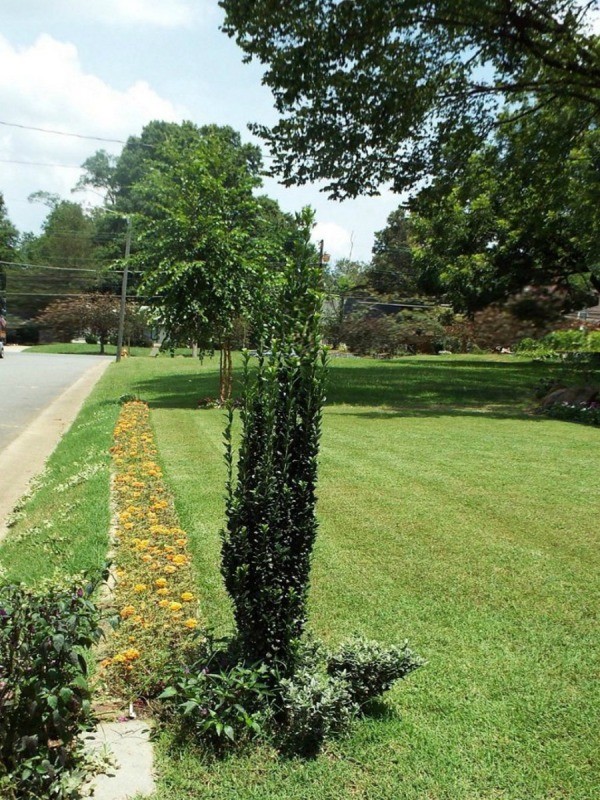
There are several reasons I can't show you a nice picture of the finished product for this year. I had to wait til it was overcast to take a picture. That meant all the moss rose blooms closed up. I had to use 2, 4-D on the Bermuda, hence all the brown spots (back to Fescue, this fall). And it will be a couple more years before the ivy has filled in. At that time, it will completely hide the timbers. And hopefully it will have smothered out all the Bermuda now growing in it.

There was quite a lot of work in this project. For most people wanting to try sunken rain gutters as border containers, it should be much simpler and easier. First, most would use a single row of gutters, so there would be no wiring together, although I do recommend using the conduit and caps even on a single row. There would be no hauling dirt or placing timbers. And there would be no need for black plastic with one single row with no drain holes.
This whole project was my own idea. It keeps the border neat. It helps keep weeds out. And usually, though not shown in the last picture, the gutter is covered in flowers and is not visible. A weekend project most anyone could handle.
Add your voice! Click below to comment. ThriftyFun is powered by your wisdom!
Apparently Doug knows nothing about script continuity. The article is salvaged though, by 'last year's picture'.
I think this is a wonderful article and project. Doug never claimed to be a writer, Charlotte. I really like this idea. We are moving back to NY State next month and I will be using this project so generously shared in our new residence.
Right on!! Easy to follow (AND remember) each step and still not boring - that's what you call good instructions.
Thanks, I have been waiting on this posting and my son is buying our gutters today.
Betty, SHUSH! Wouldn't want me to get a swell head, now would you. Don't answer that!.
And my instructions are lacking. I forgot to mention the conduit, actually plumbing pipe, was 3/4 inch x 10 ft sections. I did mention they were cut into 3 inch sections. With the end caps in place, they are a perfect fit.
You spoke too soon, didn't you. Don't answer that either.
Only a gentleman would bring his "omission" to our attention. My son had no problem figuring everything out and will start clearing the trench next week. May not have pretty borders until later or even next year but a lot less trouble keeping it looking neat.
So your son is buying your gutters today, is he? Well, all I can say is, 'Sister you'd better be breaking out those kneeling pads, cause when I get down there, I'm expecting those border edges to be as manicured as what you see in this picture'.

Add your voice! Click below to comment. ThriftyFun is powered by your wisdom!