social

Bucket Wind Chimes


Bronze Feedback Medal for All Time! 149 Feedbacks

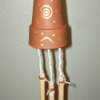
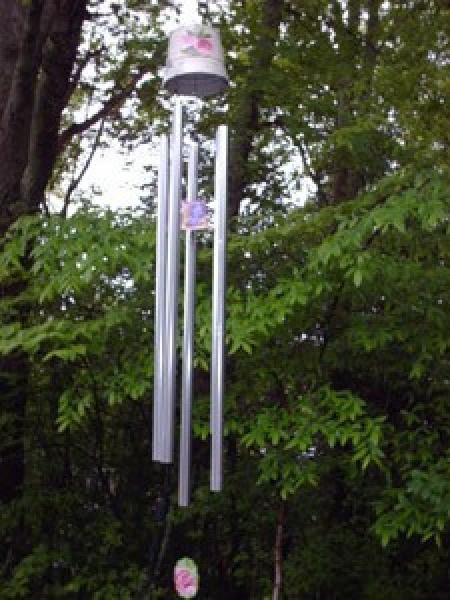
Make use of old tin buckets and turn them into wind chimes. When the large chimes I bought broke from the wood ring on top that had rotted from the winter weather, I used my tin buckets as the base and bonger to give them new life and a prettier look.

Advertisement

I turned my buckets upside down to keep water drained out and love the look, but you could easily keep them upright and follow the same directions and even fill the bucket with soil and flowers planted in it to hang over and look beautiful too.

Approximate Time: 1 hour or less (drying time of painted design if desired)

Supplies:

  • large tin bucket (for your top base)
  • old chimes or any chimes make from pipes/brass tubes/metal tubes etc)
  • smaller tin bucket as your bonger
  • fishing line or nylon string to hang the chimes and buckets
  • wooden scrape as the spinner
  • tiny bolts (to use to secure your strings for hanging)
  • nail to hammer the holes in the buckets
  • hammer
  • paints of choice to paint a design theme on your buckets and spinner
  • assorted brushes to paint with
    Advertisement

  • clear spary paint as finished sealer

Instructions:

Note: If you are painting your buckets and spinner do that first. Let them dry completely then add 2 coats clear spray paint as a sealer. Then put all together with instructions that follow.

  1. Take your largest bucket, turn it up side down and using your nail as your hole maker hammer holes in the buckets bottom (this will be your top of the bucket for hanging). Hammer in 3 holes with 2 located directly across from each other (for the nylon string to hang the bucket, the hole in the center is for the spinner to hang from.)
  2. Then hammer 4 holes in the bottom side of the bucket while it is still in the upside down position evenly spaced out in 4 places around the bucket. This is where your chimes will hang.
  3. Advertisement

  4. Do the same to your smaller bucket (which is your bonger) but only put one hole in the center of the bottom after you have turned it up side down.
  5. Take your nylon string or fishing line (I used black nylon string) and run a long piece through the bottom of the bucket on each side and tie it at the sides in knots to secure it for hanging.
  6. Run your string or fishing line down through the center hole you punched and tie it off in knots to secure it in place and let as much needed hang down to add your smaller bucket next (turned up side down) then your wooden spinner last at the end. You would have drilled or nail punched a hole through your spinner to run your string through and tie it off in knots to secure it as well.
  7. You can tie the nuts into the under section of each string you tie to keep the strings in place to make it more secure and not have to worry about the string coming through the holes you punched.
  8. Advertisement

  9. If your chimes already have holes in one end of each one run your string or fishing line through the holes on the chimes and leave your desired length of string hanging from under your bucket and then tie off and knot the chimes to secure them. Do all 4 chimes this way.
  10. Hang and enjoy.

Note: If you use your buckets in the upright way filled with soil and plants keep in mind they will be heavier when hanging. I used heavy gauge plastic coated wire to hang the chimes high up in to the tree top and just tied it off and around a smaller tree so I could easily take them down if needed. The chimes themselves are about 6 foot tall so I wanted a large tree to hang them in. I painted a cabbage roses and hummingbird theme on each of the buckets and wooden spinner.

Advertisement

By Julie from TN

wind chime
 

Add your voice! Click below to comment. ThriftyFun is powered by your wisdom!

 
March 7, 20100 found this helpful

Hi just a suggestion if you would like to protect your black string, fishing line or what ever sort of string you use! use some wax from your candles when they melt then when the wax has cooled dip a finger and thumb and wipe it along your string to protect it from the wet. It is like a protection from weather or use surfboard sort of wax and rub the wax along your strings it will make the strings you use like there water proof.

Advertisement

Another is just a plan crayon and rub it along the string either way it should help, hope you like or enjoy my suggestion for you or those who are making this project, lovely work though.


Add your voice! Click below to comment. ThriftyFun is powered by your wisdom!

 
In This Page
Categories
Crafts Garden & Yard WindchimesJune 10, 2009
Pages
More
💘
Valentine's Ideas!
🍀
St. Patrick's Ideas!
🎂
Birthday Ideas!
Facebook
Pinterest
YouTube
Instagram
Categories
Better LivingBudget & FinanceBusiness and LegalComputersConsumer AdviceCoronavirusCraftsEducationEntertainmentFood and RecipesHealth & BeautyHolidays and PartiesHome and GardenMake Your OwnOrganizingParentingPetsPhotosTravel and RecreationWeddings
Published by ThriftyFun.
Desktop Page | View Mobile
Disclaimer | Privacy Policy | Contact Us
Generated 2024-01-23 09:16:23 in 3 secs. ⛅️️
© 1997-2024 by Cumuli, Inc. All Rights Reserved.
https://www.thriftyfun.com/tf15840919.tip.html