Here's a fun project to make using a bleach bottle and yarn for a nice Easter display or gift. Can also be made into a small purse.

Instructions:
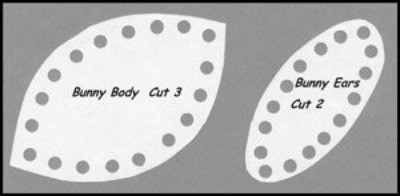
- Using full size patterns Download PDF File
- Use a Magic Marker, draw and cut 3 body pieces and 2 earpieces from the bleach bottle.
- Punch holes around the edge of each one as indicated.
- Make 2 sc in each hole around the sides with 4 sc in each end hole. Repeat for each piece.
The body piece is 5 inches from point to point and the ear piece is 4 3/4 inches from end to end. The size can vary some if you need it larger or smaller.
To assemble:
- Lay two body pieces together and stitch together along one curved edge from one point to the other.
- Lay the third piece against one of the first two pieces and, again, sew along curved side from one end to the other.
- Now take the two sides that are still free, and sew up about an inch and a half from each end, leaving an opening in the middle. You should have a pouch that, when you place your thumb on one end and your fingers on the other and squeeze slightly, the pouch opens.
- With the Magic Marker, blacken the top of the paper fasteners. These will be the eyes as well as holding the ears in place.
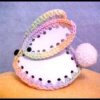
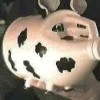
- Using the photo as a guide, fasten the ears in place and glue on the pompom nose and tail with your hot glue gun. Now you have a cute little Bunny to insert 'treasures' inside to the delight of your favorite child.
- Add a ribbon to make a purse!
By Harlean from Arkansas
Comments
By Sandra (Guest Post)
February 24, 20050 found this helpful
Cute! Thanks Harlean.

Harlean
Bronze Post Medal for All Time! 148 Posts February 25, 20050 found this helpful
Note from author:
Due to transfer variances, the body pattern piece looks a little lopsided. To remedy this problem, draw around the bottom half of the pattern from point to point. Then reverse and match up the points and draw the same side for the top half. Or just print it out, resizing if necessary, fold in half at the points, then cut out along the bottom side. This will give you the correct shape to continue.
Harlean from Arkansas
By Carol from Prairieville, Louisiana (Guest Post)
March 6, 20080 found this helpful
"This is a great classroom party favor. I have made them for my son's preschool classes, kindergarten and 1st grade. I love the simplicity of the pattern although I did substitute fun foam for the bleach bottle since I make so many at a time the bleach bottles tend to be hard on the hands after a while."