social

Fabric Luggage Tag

While on vacation in Hawaii I was lucky to discover a native woman who made different craft items. The luggage tag was among her beautiful items. I bought a few and thought they were so cute that I had to make some. You can use them as re-usable gift tags and choose from an endless selection of fabrics; wedding, honeymoon, sports, floral, tropical, animal etc.

Advertisement

Approximate Time: 1 hour

Supplies:

  • 1/4 yd. of fabric
  • 1/4 yd. lightweight fusible interfacing
  • sewing machine
  • scissors
  • thread to match fabric
  • small piece clear vinyl sheeting
  • tissue paper
  • card stock or old card
  • charm or memento, if desired

Instructions:

  1. Cut 2 pieces of fabric 4 1/4x5 3/4 inches. Cut one end in a curve, as in picture. Cut one 14x2 1/4 inch strip of fabric for the strap. Cut 2 pieces of fusible interfacing 3 1/2"x 5" cut one end in a curve. All seam allowances are 3/8 inches. Pieces cut out of fabric to make a tag.
     

  2. Fold the strip of fabric (lengthwise), right sides together and stitch. Stitch 1 end of the strip so you can turn it right side out. After turning right side out, cut off that stitched end to avoid bulkiness. Iron the strap and topstitch both long edges of the strap.
    Advertisement

  3. Place fusible interfacing on the wrong side of your 2 other pieces of fabric, center it, iron on interfacing (bumpy side down) press for about 10 seconds (read manufacturers directions, they might be different than mine).

  4. With right sides together machine stitch around the edges, but leave a 2 inch opening in the top of the tag for turning and for inserting the strap. Turn right side out, iron. Insert the strap ends in the 2 inch opening, center it and pin in place. Top stitch, close to the edge, around the entire tag, you'll be top stitching the strap into place. (don't stitch over that pin). Sewing fabric tags.
     

  5. Cut a 2 3/4x3 1/2 inch piece of clear vinyl. Place on the tag, centered but a bit lower to the bottom. Place tissue paper over the vinyl and zigzag stitch* in place along 3 edges of the vinyl.
    Advertisement

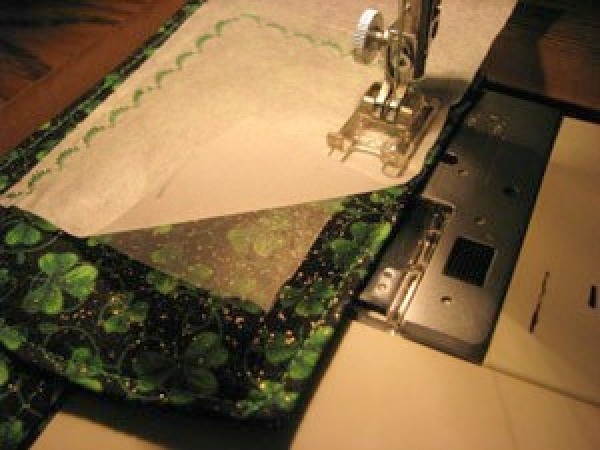
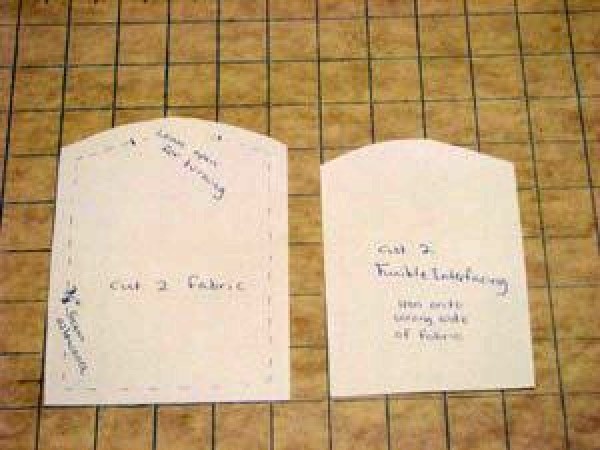
    *I used a scalloped stitch, you could use zig zag or whatever you like. You might want to practice with a small piece of vinyl and scrap fabric first, to see what stitch you prefer. Tear away the tissue paper. The finished luggage tag.


  6. For the name tag, cut a piece of card stock to fit under the vinyl. I used Print Shop on my computer to print the design on the name tag. You can use parts of a greeting card if you want design on the insert. You can embellish with a charm or memento from a trip. Paper information to place inside the tags.
     

Hope you enjoyed this project!

By Deb H. from East Brunswick, NJ

Add your voice! Click below to comment. ThriftyFun is powered by your wisdom!

 
April 20, 20090 found this helpful

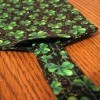
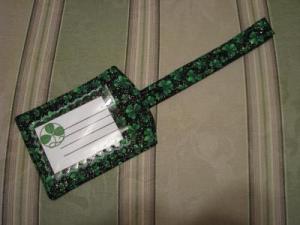
Hi Deb H. here! I just wanted to show the finished luggage tag!


April 20, 20090 found this helpful

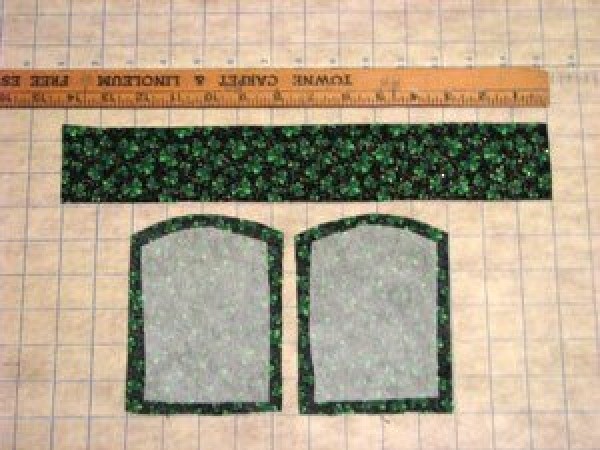
Deb H. again! SEW sorry! I forgot to include that a 1/4 yard of fabric makes 4-5 luggage tags. Cut wisely and you should get 5.

 
April 21, 20090 found this helpful

How is it attached to the luggage?


Bronze Feedback Medal for All Time! 108 Feedbacks
April 21, 20090 found this helpful

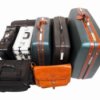
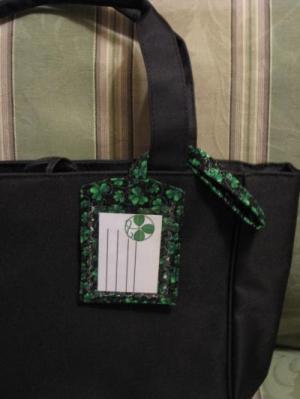
This is a good idea, especially when you are trying to claim your luggage at the airport. Using something easily recognized makes finding your luggage much simpler.

 
April 21, 20090 found this helpful

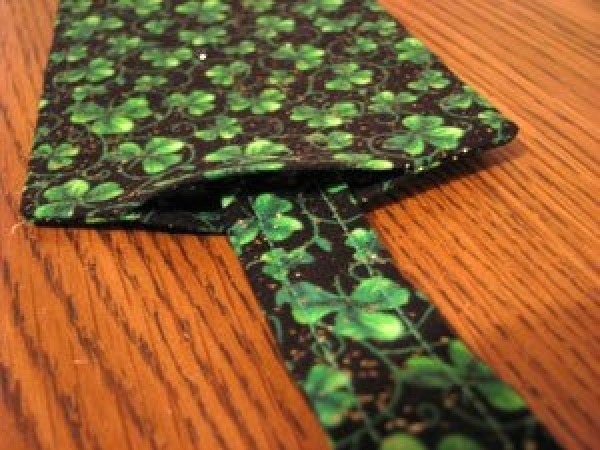
To attach to the luggage, drape the long strap of the luggage tag around the handle on your luggage, take the bottom part of the luggage tag and put it through the loop of the long strap. Pull slightly to tighten. Hope the picture gives you the idea.


Add your voice! Click below to comment. ThriftyFun is powered by your wisdom!

 
In This Page
Categories
Crafts SewingApril 20, 2009
Pages
More
🐛
Pest Control
🌻
Gardening
👒
Mother's Day Ideas!
Facebook
Pinterest
YouTube
Instagram
Categories
Better LivingBudget & FinanceBusiness and LegalComputersConsumer AdviceCoronavirusCraftsEducationEntertainmentFood and RecipesHealth & BeautyHolidays and PartiesHome and GardenMake Your OwnOrganizingParentingPetsPhotosTravel and RecreationWeddings
Published by ThriftyFun.
Desktop Page | View Mobile
Disclaimer | Privacy Policy | Contact Us
Generated 2024-04-15 20:19:06 in 3 secs. ⛅️️
© 1997-2024 by Cumuli, Inc. All Rights Reserved.
https://www.thriftyfun.com/tf50816967.tip.html