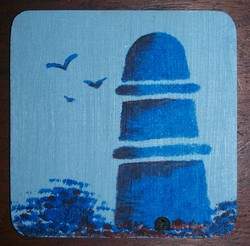
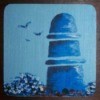
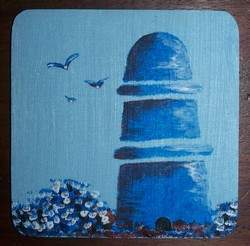
By using the colors found on Delft glassware, and a stencil with a nautical theme, one can change ordinary wooden coasters into something quite extraordinary.
Approximate Time: 45 minutes
Supplies:
- four small wooden coasters, easily obtainable from most craft shops
- acrylic paint in five colors
In the example I used cloud grey for the background. For the design, I used phthalo blue, burnt umber, lamp black, and titanium white.
- a thick paintbrush, as well as a thin paintbrush
- a fan-shaped paintbrush will work very well to add grass to the design
- a pre-cut stencil
In the example, I used a stencil of a lighthouse.
- fine sanding paper
- one small sponge for the sponging
- one sheet of old newspaper
- a dry cloth to dust the coasters
- quick-drying spray varnish
- quick-drying glue
- felt in a matching color, to glue to the bottom of the coasters
- a pair of ordinary scissors
Instructions:
- Sandpaper all four of the coasters thoroughly. Dust well with a dry cloth before starting to paint.
- Paint all four the coasters with a coat of cloud grey. Make sure that all the edges are well covered with paint. Allow the paint to dry thoroughly before continuing with the next step of the project.
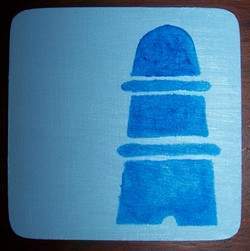
- Now use the phthalo blue paint and the stencil. Place the stencil on the appropriate place on one of the coasters and hold it down with one hand while painting, so that it will not move while applying the paint.
- Dip the sponge into the phthalo blue paint and remove excess paint from the sponge by dabbing it on the sheet of newspaper. Then paint the stencil design onto the coaster by repeatedly dabbing all over the design. Carefully, lift the stencil and repeat this step on all the coasters. Leave to dry thoroughly.
- Now, use the fan-shaped paintbrush and the phthalo blue paint. Add some bushes and grass to the design. Also add a few birds in the sky. Repeat this step on all the coasters. Again, leave to dry thoroughly.
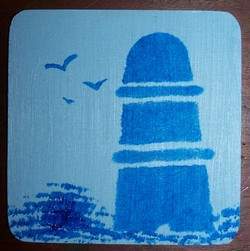
- Next, use the lamp black paint to add a door to the lighthouse.
- Using the lamp black and burnt umber paints, add some shadows to the design. Again, leave to dry thoroughly.

- Now, use the titanium white paint to add some highlights. Again, leave to dry thoroughly.
- To protect the paint from wear and tear, apply one coat of the quick-drying spray varnish.
- Lastly, cut the felt to the correct size and glue to the back of each coaster, so that the project will have a neat finish.
By Benetta from Pretoria, Gauteng