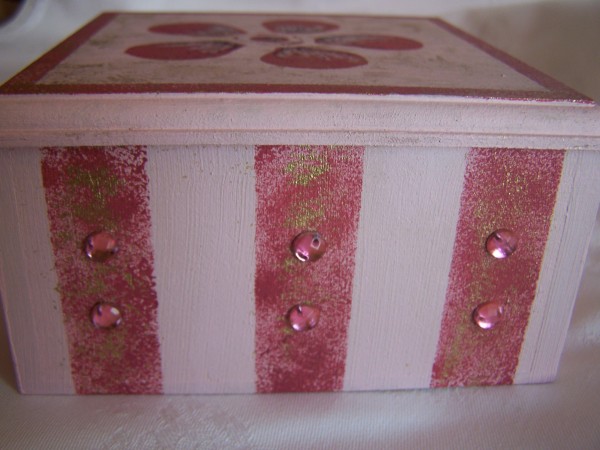
I like giving small, personalized gifts to my friends. I am especially fond of giving handmade soap bars that I buy from a fellow crafter. I decided to make this candy-striped trinket box, so that giving a bar of soap will become something extraordinary.

Approximate Time: 45 minutes
Supplies:
- wooden box with a loose lid, available from most craft shops
- paint in the following colors: soft pink, plum, and pale gold
I used Dala Craft Paint, as this paint dries to a smooth matte waterproof finish,
but any other paint suitable to be used on wood will do.
- medium-sized paintbrush ~ a 10/32" brush works well
- fine paintbrush
I used a 2/32" brush.
- low-tack masking tape with a width of 0.5 inches
- fine sanding paper
- small craft sponge
- 1 old sheet of X-ray film
- utility knife (Stanley knife)
- pencil
- ruler
- quick-drying glue
- approximately 24 pink rhinestones
- Artline 210 Fineliner pen
- quick-drying spray varnish
- old sheets of newspaper
- an old cloth
- To finish it off: a piece of tissue paper and a bar of handmade soap.
Instructions:
- Sandpaper the whole box thoroughly. Dust well with a dry cloth before starting to paint.
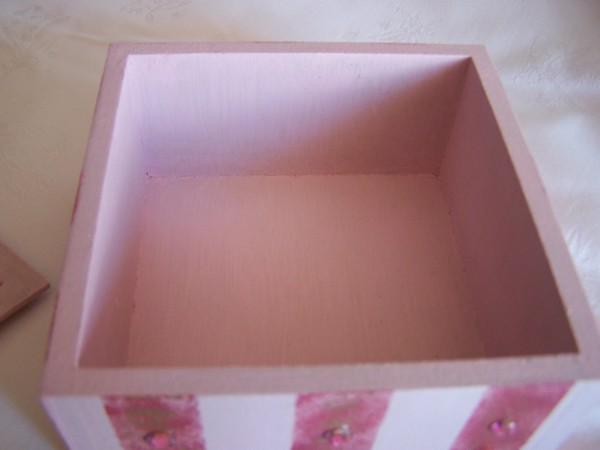
- Start off by giving the whole box a base coat with the soft pink paint. Work on a sheet of old newspaper to protect the working area. Remember to use brush strokes that go in one direction and make sure that the insides of the corners are also well covered with paint. Do not paint the outer bottom of the box, though.
- Allow the paint to dry thoroughly.
- Apply the masking tape in straight lines on the bottom part of the box, carefully ensuring that the spacing between the lines is even.
- Use the sponge to "paint" the plum lines. Dab the sponge into the paint, and remove the excess paint by dabbing it onto a sheet of newspaper first, before applying it to the wooden box.
- Allow the paint to dry thoroughly before removing the masking tape.
- Turn the box around and lightly sandpaper any excess paint off the outer bottom of the box, so that the project will have a neat finish.
- Draw a picture of a daisy on the X-ray film, and use the utility knife to cut out the stencil.
- Using masking tape, stick the stencil to the lid of the box, ensuring that the stencil is spaced evenly from all sides of the lid of the box.
- Use the sponge to "paint" the stencil with the plum paint. Dab the sponge into the paint, and remove the excess paint by dabbing it onto a sheet of newspaper first, before applying it to the stencil, so that the excess paint will not seep underneath the X-ray film.
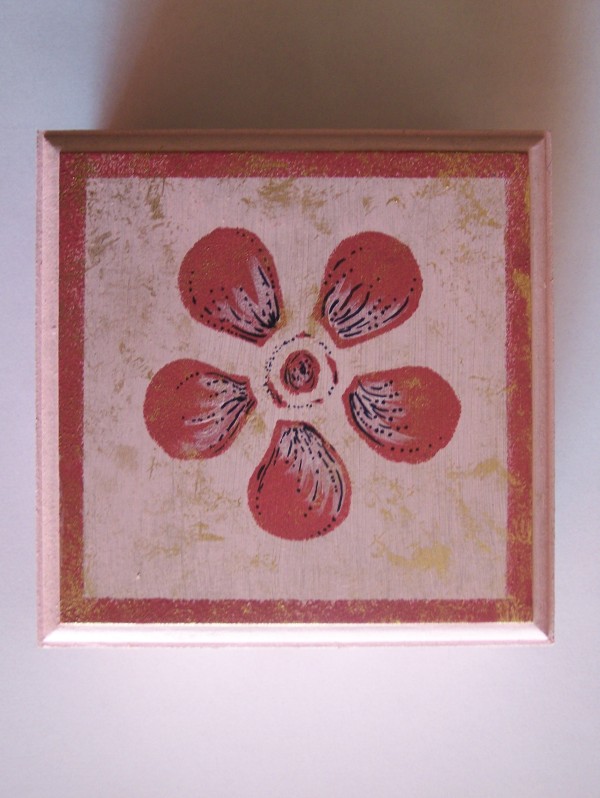
- Allow to dry before removing the stencil.
- Use the ruler and pencil, and lightly mark a frame 0.2" all around the edges of the lid.
- Using the masking tape, tape the sides of the frame so that the paint will not overflow, and paint it with the plum paint, again using the sponge to "paint" with.
- Allow to dry before removing the masking tape.
- Using the sponge, lightly dab some gold paint on the lid, making sure not to exceed the frame. Also dab gold lightly over the plum lines on the bottom part of the box.
- On each of the plum lines, paste two pink rhinestones. Use tweezers to more easily handle the rhinestones.

- With the fine paintbrush and soft pink paint, add some detail to the daisy. Add the finishing touches with the Artliner 210 Fineliner pen.
- To protect the paint from wear and tear, apply one coat of the quick-drying spray varnish. Remember not to hold the can too close to the box when spraying, and do not spray too much varnish, as this will cause the varnish to run.
- Allow to dry thoroughly.
- Line the box with a suitable piece of tissue paper, before adding the handmade soap, and voila!
By Benetta from Pretoria, Gauteng