A friend gifted me with erasers from an old school house. I was thrilled. I decided to create "back-to-school" gifts for teachers. The finished erasers would also work as gifts for Christmas or the last day of school.
Advertisement
Chalkboard erasers are also available at discount, craft, or office supply stores. I used my Cricut Expression to cut out the letters and the shapes, but the letters could also be printed by hand or stamped. The paper apple could also be substituted with a small, painted wooden apple, button, or charm.
Approximate Time: one hour
Supplies:
decorative paper
ruler
scissors
felt chalkboard eraser
black sticky-backed vinyl
Cricut Expression
Doodletype Cricut cartridge
Country Life Cricut cartridge
scraps of red, green, and brown paper
stick glue
Mod Podge
paintbrush
raffia
craft glue
miniature wooden school bell or jingle bell
Instructions:
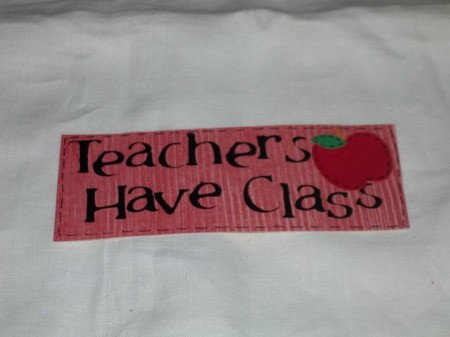
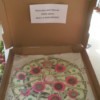
Cut a 1 7/8-inch wide by 4 7/8-inch long rectangle from decorative scrapbook paper or wallpaper. If your eraser is a different size, measure the paper label on the top. I used a faded red paper to contrast with the bright red apple, but you could use any color you desire.
Advertisement
Place black sticky-backed vinyl on your Cricut cutting mat. Insert the Doodletype Cricut cartridge and load the mat. Set the blade at 6, the pressure at 3 and the speed at 3. These settings are the stand-by settings I use for cutting vinyl. They provide a nice clean cut through the vinyl and the backing paper.
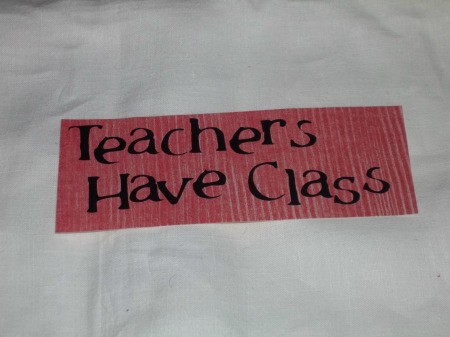
Adjust the cutting size to 3/4 inch. Type in "Teachers Have Class". Cut the letters. The actual size of the vinyl I used for one eraser was approximately 1 1/4 inches wide by 9 1/2 inches long. You can use scraps or cut from the top of a new sheet.
Peel the backing from the vinyl letters. Using the photo as a guide, arrange the letters on the paper rectangle. I find that placing every other letter up slightly and down slightly from each other offers a nice layout and eliminates the need for measuring a straight line.
Advertisement
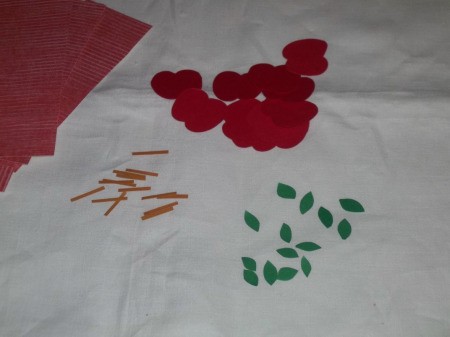
I cut the apple on my Cricut using the apple image on the Country Life cartridge. This image has a whole apple and a cut apple attached to it. I cut it out at 1 3/4 inches using red paper. Once cut out I used scissors to cut off the shape of the sliced apple, the leaf and the stem. This left me with a whole apple measuring approximately 1 inch tall. Using scissors, I cut a thin, short strip from brown paper for the stem and a small leaf (football) shape from the green paper.
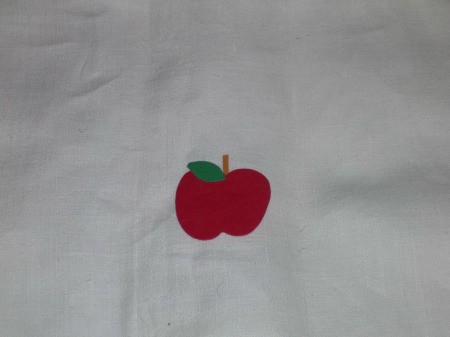
Using stick glue, glue the bottom of the stem to the back of the apple, allowing it to extend from the top. Glue the leaf to the front of the apple.
Advertisement
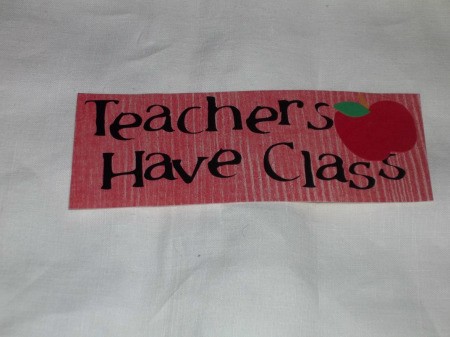
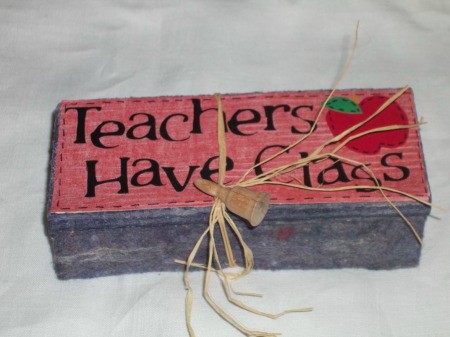
Apply glue to the back of the apple and using the photo as a guide, stick the apple to the paper rectangle.
Apply a thin layer of Mod Podge or thinned craft glue to the top of the eraser. Center the paper rectangle on the glue and press firmly with your fingers to remove wrinkles and bubbles.
Using a fine tip black permanent marker, make small dash marks around the edge of the paper rectangle, apple, and leaf.
Wrap a length of raffia around the center of the eraser and tie into a knot. Trim the ends as desired. Apply a dot of craft glue to the knot and place a miniature wood school bell or a jingle bell on the knot. Allow the glue to dry.
Those kind of erasers are great for removing lint, etc. from clothes. When I taught, I kept a clean one in my desk for removing lint, chalk dust, etc. from clothes.