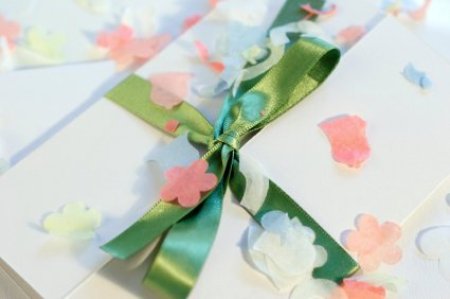
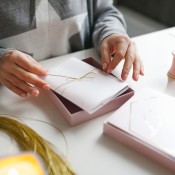
 Well, to start off with, I am getting married. This is my (and his) second time. I have been divorced for 17 years, so I wanted it to be special without spending much. I looked over numerous types of invitations and they were very costly, even to buy software and make your own. So, I thought I would not only make my own, but also make my own paper.
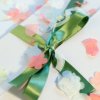
I started by finding different ways to make paper, I have never done so. I looked at many internet ideas and than came up with my own. I used mostly junk mail to make the paper pulp. I then got this idea from an online paper supplier to make "plantable" paper. This is where you add flower seeds to the mix.
The end product, through trial and error, was just what I wanted. I was able to create my own design the way I wanted, and my guests will be able to plant the invitation in the Spring and grow some special flowers.
By Katryn from Chester, VT
This page contains the following solutions.
Tips and ideas for making your own wedding invitations. Post your ideas.
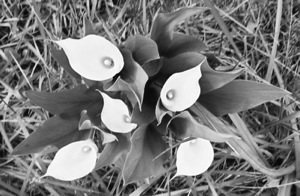
These are my calla lilies. I used this photo to make my wedding invitations. They were lovely! I used the picture in black and white.
You can make your own wedding invitations look stunning (just as stunning as some letterpress stationery) by using carefully selected fonts and dingbat illustrations.
Here are the questions asked by community members. Read on to see the answers provided by the ThriftyFun community.
My fiance and I are trying to find ways to cut down the cost of our wedding and are thinking about printing our own invitations. I was wondering if anyone has done this for their own wedding and how the invitations turned out?
I don't really want to spend the money on the do-it-yourself kit if it's not worth it.You can do your own invites by doing the following;
Decide what size invite you would like to have first. Then, set up your page layout to the size of the paper that you would like. Go to a paper or stationery store in your area and choose your paper (it does not have to be a do it yourself kit) Paper-Source.com has great paper, and I'm not sure what area you are in but in Chicago there is a store called XpedX that has a great selection as well. The great thing about making your own is that you will spend minimal monies on the paper and be able to add such great embellishments. for example, say you choose a pretty card stock (ivory paper) - usually a pack of 10 sheets is $3.50 per sheet which = about $0.35 per sheet, if you choose a quarter sheet size invite, divide that by 4 and it's not even $0.10 per invite - add clear vellum over the top for another $0.10 and some ribbon @ about $0.05.
GOOD LUCK!
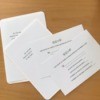
I printed my own invitations. I just bought a print shop software and printed them at home. The great thing is that once you have the software you can make all kinds of cards and posters. Including the software it only cost me about .15 per invite. Just buy envelopes at the dollar store and away you go.
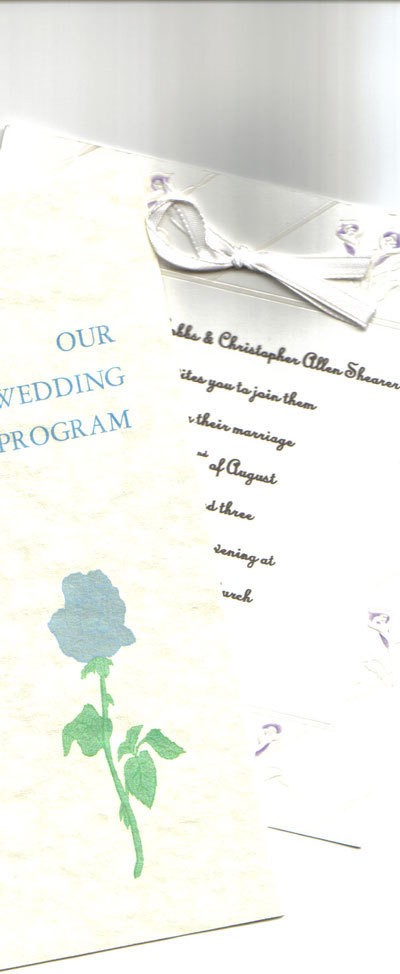
For my wedding I ordered a paper that had cream roses on the border and a cream inside to write on. I order them it from a place called paper direct (www.paperdirect.com) I found a font that I liked and printed them myself. I found cream with a gold inside envelope at Office depot. I still have enough over to write notes on and even with postage it wasn't too bad of a price. Hope this help
For my wedding I ordered a paper that had cream roses on the border and a cream inside to write on. I order them it from a place called paper direct (www.paperdirect.com) I found a font that I liked (Mono Corrisive) on my home computer and printed them myself.
I am a wedding planner and couples today are looking for all kinds of ways of cutting expenses for the wedding and reception without making them look it. Today brides are printing their invitations, place cards, parking passes and anything else they can. Go ahead and have fun!
For my sister's wedding, we found print-your-own-invitations at Michael's and I printed them using a font she chose in the color she used in her wedding. They looked expensive and no one knew the difference! The invitations came with an envelope and tissue paper.
My local Wal-Mart, in the office supplies section, has a do-it-yourself printable kit of wedding invitations with envelopes to match. If I remember correctly, it was a set of 25 cards/envelopes and sold for $9.99.
We printed our own invitations and they turned out great. It happened by coincidence-- I went to OfficeMax just to get some printer paper, and they had a BUNCH of clearance racks outside. I bought all the wedding invitation stationary they had out on clearance. The invitations also came with smaller note cards which we are still using. (The wedding was almost 3 years ago.) After making the purchase, I compared my clearance price to the WalMart price and I found I had saved about 50% PLUS I got all those smaller note cards. That was probably the middle of June, when I found the invitaitons on the clearance rack.
Printing your own invitations is a great money saver and few will be able to tell if they are not from a printshop if you are very careful with spelling, line breaks, wording. Rule: the plainer, the better. Fancy, frilly, overly decorative screams amateur.
Line breaks are important. Keep names together on one line. Keep ideas, dates, locations, together on groups of lines. Break lines where they make sense.
For example, don't write:
Mrs. Sally
Jones and Mr. Bill
Bennet invite you to
the wedding of...
Instead write:
Mrs. Sally Jones
and
Mr. Bill Bennett
invtie you to the wedding of their daughter
Susan Bennett
For a more professional look use black ink. Colors are fun, but don't work well on formal invitations printed at home. Stay away from clip art and little pictures of flowers, etc. This will also scream "amateur."
Good luck and a happy marriage to you.
Scrapbookers and Stampers are currently big into the wedding invitations. it would definitely have to fit your personality. The ideas are endless!
We made our invitations by hand too. It took ages and ages but was well worth it.
I drew a picture and scanned it in, and printed it on the same coloured card, then ripped squares of contrasting tissue and woven paper which I layered and stuck the little picture on top.
I cut out hearts of matching tissue paper, and put them inside the cards and the effect was gorgeous.
Good luck, you'll enjoy it!
all the best for your married life!
If you are creative on the computer, than yes, it's worth. If not than they will be ok, but you will have to spend extra money for a wedding invitation program (software). This is what I do, my problem is finding the blank invitations at a reasonable price for me and my clients. Now if you have any suggestions let me know. fulloffire2006 @ aol.com (remove spaces.)
there is a great website to help all of you making your own invitations! www.verseit.com has all the different wordings and correct grammer for any style of wedding! another idea is going to a local paper or printing shop, usually if they are printed in house they will be A LOT cheaper than through a catalog!
Good luck to all...
I would consider trying Quality Quick Print, they have all sorts of samples straight from the vendors, and make them way cheaper than what you would buy online. I saved $200.00 on cheapo invitations.
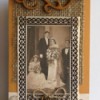
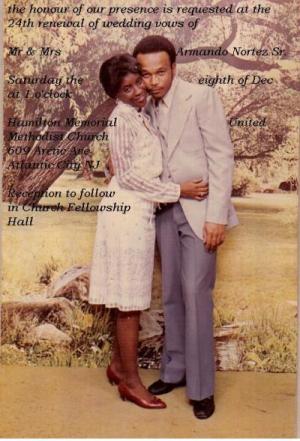
I have been married for 24 years and I want to use my first wedding day picture on my invitation. Can I do this on a blank invitation? I saw some at Walmart, a pack of 50 for $15. Would they be okay?
I am currently planning my wedding. I bought my thank you cards and wedding invitations from Walmart. On the box is a website that shows you how to print them and it comes with test sheets so you don't mess up your invitations.
GOOD LUCK!
I found a site where you can print off their desigsn on your home printer for free! Just amend the wording and print. You need a color printer and a Microsoft Word.
http://www.wedding-invitation-ideas...
Some of them are blank and some of them have suggestions for jazzing them up.
They'll save you a fortune though!
I printed both my wedding invitations as well as my programs, and bought a kit for each. I recommend this option because you can tweak the wording and font to your liking and personalize with ribbon, colored paper, etc. You could save even more by tracking down/buying the materials yourself and foregoing a kit, but I was only engaged for about 2.5 months and I didn't have time for all that!
I printed my own--didn't have time to go to printer-they came out completely professional. I just wished I had thought through a theme first because I couldn't find similar place cards or thank you notes and had to change the colors. Also I purchased a second package of invitations product which had downgraded and I went all over trying to find the same package I bought the first time. The paper stock had been a higher quality. If I were doing it again, I would get the larger qty in one box so it would run consecutive.
How do you make single gatefold cards for wedding invitations?
www.creativepapercrafts.net/
I found this pattern for you there are lots of weeding stamps and stickers that I found at a dollar tree that you could use on the cover. Also wedding confetti and keepsakes you'll be amazed.
More ideas for making wedding invitations: www.cheap-wedding-success.co.uk/
Get out your ribbon, glitter pens and coloured pencils because making your own wedding invitations is easy!
Good luck with your gatefolds.
I try to keep things simple. I create a 4"x6" flat card invitation; get wedding coordinating color 12"x12" card stock or scrap book paper, cut it in half & then each half into 8" long strip; measure in from each end 4" & fold (or center the flat card on the 6"x8" strip and fold in the sides) so they meet in the middle to create your gate.
Once you have your folds glue or double stick tape flat card into position in your folder; wrap ribbon around card and tie in front (ribbon can be secured in back w/dbl stick tape or glue). Alternative closures: Coordinating sticker; punch hole in 1/4" from edge of paper in the center, insert ribbon & tie; or cut folder paper 1/2" to 1" longer (9"-10") so they overlap and use self-adhesive velcro dots. Any other imbellishments is up to you.
Hope I didn't forget anything.
I would like to know how to make your own wedding invitations out of colored envelopes, with little to no cost?
By Nancy
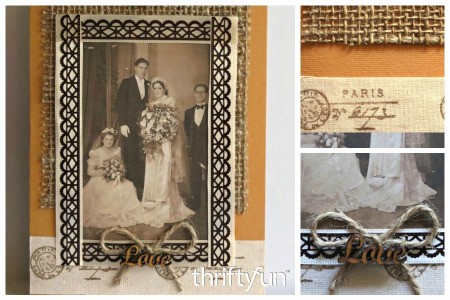
Including an old family wedding photo on your homemade wedding invitation leads an air off rustic or vintage charm. This page gives instructions for making a rustic country wedding invitation.
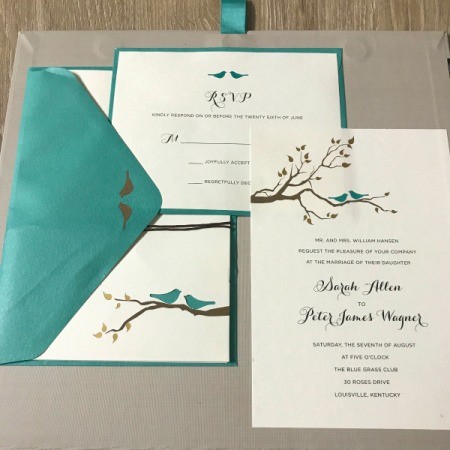
Save money and make your wedding invitations at home with a kit that contains everything you need. All you need is a printer and time.
This is a page about designing your own wedding invitations. You can add a personal touch and save money by designing your own wedding invitations.