Follow ThriftyFun
 

Crafts Contest Results

This contest had 4 contenders. You can view the winning posts below.

Started: June 11, 2012

Ended: June 17, 2012

Voting Ended: June 24, 2012

Contest Entries: 4

Winners: Arielle (Christmas Angel).

Enter a Contest!

Arielle (Christmas Angel)
contest winner icon
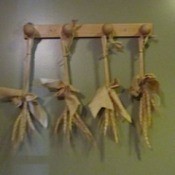
The idea when making this angel was to create a decoration only from scrap material. I rummaged through my craft supplies and found a twig ball that I had used in a floral creation a number of years ago. I also found some red and white leftover felt; flesh-colored acrylic paint; left-over pieces of a net curtain; one pair of wiggle eyes, floral wire, and half a tin of rich gold spray paint. I started racking my brain, and decided to try and see if I could turn these items into a delightful little Christmas angel, without having to buy any additional supplies. Here is the end result!

Approximate Time: 2 hours

Supplies:

  • a twig ball ~ see http://www.save-on-crafts.com/ for a possible supplier.
  • one pair of wiggle eyes
  • floral wire and floral tape
    I had these at hand, but see http://www.save-on-crafts.com/ for a possible supplier.
  • one piece of white felt
  • left-over pieces of white net curtain
  • elastic band, sprayed with the gold spray paint
  • left-over red ribbon
  • paintbrush
  • pair of pliers
  • needle and thread
  • a pencil
  • one small round bead
  • flesh-colored acrylic paint
  • one small piece of red felt
  • yellow wool, cut into short strips
  • piece of cardboard
  • quick-drying rich gold spray paint
  • pair of standard scissors
  • quick-drying glue
  • few sheets of old newspaper to protect the working area
  • acrylic paint or koki pens to add facial detail
  • a piece of fishing line

Instructions:

  1. Glue the pencil to the twig ball and let it dry thoroughly.
  2. Using the needle and thread, cover the ball with the white felt. Cut small strips from the felt as you sew it around the twig ball, to make it easier to shape the felt around the ball.
  3. Paint the front part of the felt-covered twig ball and the area around the pencil with the flesh-colored acrylic paint and let it dry thoroughly.
  4. Use 19 inches of floral wire and bend it into an angel's wing. Twist the one end around the other end where the two ends meet, and cover the whole wired wing with floral tape. Use another piece of 19 inches of wire to make the second wing.
  5. Spread glue onto the tape-covered wire wing and glue the wing onto a piece of the net curtain. Let it dry thoroughly and then neatly cut off any protruding edges. Cover the back side of the wing in the same manner.
  6. Repeat step 5 with the second wing.
  7. Spray paint the wings with the gold paint and leave to dry.
  8. Use the needle and thread and a small piece of white felt, and cover the small bead with the felt.
  9. Paint the felt-covered bead with the flesh-colored acrylic paint and let it dry thoroughly. This will be Arielle's nose.
  10. Glue the strips of yellow wool in place to make Arielle's hair. Leave to dry thoroughly, and then glue the elastic band on top of her hair to make a small halo.
  11. Paint two pink circles for cheeks and a red mouth. Glue the nose and wiggle eyes in place. Add a few freckles with a koki pen once the cheeks are dry.
  12. Use 19 inches of wire and twist it around the pencil to make the arms. Add a drop of glue to keep the wire in place. Bend the wire to make elbows, and make small loops at both ends of the wire to make the hands.
  13. Cut two long pieces from the net curtain. Spray paint the bottom of each piece with the gold paint and let it dry thoroughly.
  14. Thread each piece at the top with a tacking stitch and gather the frills together. Glue one piece on the pencil at the front of the angel, and the other on the pencil at the back of the angel, to form the front and back of the dress. Leave to dry thoroughly.
  15. Glue the wings in place at the back of the dress.
  16. To make the songbook, cut two pieces, each sized 4 inches x 5.4 inches, from the cardboard and spray paint them on both sides with the gold paint. Let them dry thoroughly, fold each piece in half and glue the pages of the songbook together in the middle where the folds are. Finish it off by adding a little piece of red ribbon in the middle of the songbook. Cut a bell from the red felt and glue to the front of the song book.
  17. Glue the song book to the angel's hands.
  18. Add a piece of fishing line around the neck to hang the angel.

Photos included:
Photo 1: Make the angel's head.
Photo 2: Make the angel's wings.
Photo 3: Use wire and twist it around the pencil to make the arms.
Photo 4: Make the songbook.
Photo 5: The completed angel.

By BessieBessie from Pretoria, Gauteng

4 0SharePrintFollow
Paper Seed Circles (Plantable Paper)
These recycled paper seed circles make lovely gifts! All you need is scrap paper, a blender, some flower or vegetable seeds, and some type of screen. The easiest screen to use is a cheap metal cooking splatter screen, or you can make an instant screen by cutting a square from a pair of old pantyhose or tulle fabric remnant, and clamping it in an embroidery hoop.

Approximate Time: 20 minutes, plus drying time

Supplies:

  • screen
  • torn up paper
  • blender
  • water
  • seeds, flower petals, dried leaves, etc.
  • sponge

Instructions:

  1. Blend torn up paper with water until it makes a slurry. We made a lovely pink seed card using white copier paper and bits of red tissue paper. You can also add flower petals or bits of dried leaves to the pulp as you blend it for added texture. Or you can add the petals after you blend.
  2. Working over a bowl, pour the paper slurry slowly onto the screen until it makes a small circle.
  3. Sprinkle seeds on the circle and press them down gently into the pulp so they won't pop off the surface when the rounds dry.
  4. Press out excess water from the rounds with a sponge, and carefully transfer the circle to a sheet of paper to dry.
  5. When seed rounds are dry, they're ready to plant or give as a gift.
  6. For a gift, print or write a bit about the flowers and attach to the seed rounds, or include the info with the seed round.
  7. Plant rounds in a pot or ground, covering with a thin layer of soil. Water well, and soon you'll have flowers or vegetables!

By GuinevereW from AZ

pink flower
3 0SharePrintFollow
Triple Tree Wood Decor Using a Scroll Saw
These are scroll sawed trees with real bark.

Approximate Time: 4 - 5 hours

Supplies:

  • 8 ft. by 1/2 in. board
  • scroll saw
  • acrylic light green paint
  • dark green spray paint
  • 1 dowel 1/4 inch
  • real tree bark
  • wood glue
  • tree branch 3 -4 inch diameter by 4 inch high
  • sand paper
  • drill bit size of dowel and drill

Instructions:

  1. Cut tree shapes to your height and own pattern.
  2. Sand the rough edges.
  3. Drill a hole for the dowel in both the tree shape and the log.
  4. Put glue in holes and add dowel.
  5. Paint the light color on each tree.
  6. Stand up the trees and spray paint (outside) the edges and outer part of tree leaving the lighter color inside.
  7. Find bark from an old branch or purchase from a craft store. Glue on bark. The bark is glued around a cylinder of wood (branch).
  8. Stand and enjoy.

By Louella from Billings, MT

Painted trees standing in corner.
2 0SharePrintFollow
Dried Wheat Stalk Decoration
This is a quick and fun way to liven up any room with dried, mature wheat stalks.

Approximate Time: 1 hour

Supplies:

  • wooden knob board
  • dried wheat stalks
  • ribbon
  • rubber bands

Instructions:

Purchase a peg board. Attach rubber bands to dried stalks of wheat. Cover the bands with fabric strips to your color liking. Hang on the knobs.

By Louella from Billings, MT

Tied stalks hanging from pegs.
1 0SharePrintFollow