marie cecchini Bronze Post Medal for All Time! 204 Posts
December 14, 2007
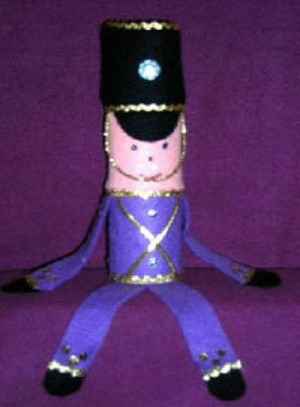
This may look like it has a lot of parts, but it's really very simple to put together. When your soldier is finished, he will sit on a tabletop or bookshelf. Crafting Time: 45 minutes to 1 hour
Advertisement
Materials
cardboard bath tissue tube
felt - purple, pink (or other skin color), black
small gold rickrack
gold cord
sequins
1 large "jewel"
fabric paint: blue, black, red
glitter glue (optional) this may be used as a substitute for the sequins and "jewel"
scissors
craft glue
Instructions
Cover the bottom half of your cardboard tube with purple felt. Cut 2, 1 x 4 inch pieces of purple felt for the legs and 2, 1 x 3 inch pieces of purple felt for the arms.
Glue one end of each arm to the tube, just above the bottom half (which you covered with purple felt).
Glue one end of each leg to the inside of the tube front at the bottom.
Cover the top half of your tube with pink (or other skin color) felt. The pink will cover the tops of the arms.
Cut a half circle of black felt for the hat brim. Glue this to the top of the pink felt. Cut a rectangle of black felt to fit around the tube and glue one side of this around the top of the tube to complete the hat.
Advertisement
Cut four oval shapes from black felt for the hands and feet. Glue these at the ends of the arms and legs.
Glue a gold cord chin strap for the hat down the sides of the face and around the "chin". Glue crisscross strips of gold cord across the front of the purple "coat".
Glue gold rickrack at the end of each sleeve, at the end of each pant leg, around the top and bottom of the coat, and around the top and bottom of the hat.
Decorate the sleeves, pant legs, and coat with sequins or glitter glue. Glue a jewel to the front of the hat. You can also create a jewel with glitter glue.
 This may look like it has a lot of parts, but it's really very simple to put together. When your soldier is finished, he will sit on a tabletop or bookshelf. Crafting Time: 45 minutes to 1 hour