Craft Projects > Christmas > GiftsDecember 30, 2009

Making Fleece Throws

I used to be 5 foot 6 inches, but now I am possibly 5 foot 4 inches since I got old and started shrinking. I have always had trouble with the fleece throws you buy at the store. Most are not long enough for me, let alone my 6 foot 4 inch son or my 5 foot 11 inch daughter in law.

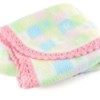
I stewed and fussed about this for a long time and finally got some fleece fabric in 2 1/2 yard pieces and made throws for the whole family. Since fleece doesn't ravel or fray like woven fabrics a hem wasn't necessary. I just straight stitched around all 4 edges to keep the shape of the fabric stable. If you want to you can spend all that extra money on blanket binding but that really isn't necessary.

The very best part is they love them! DH brings up what a good idea that was every time he sprawls out on the couch. I found my fabric on sale and I already had miles of thread so it didn't cost a great deal to bring all this pleasure.

By MartyD from Houston,TX

Feedback

Read feedback for this post below.

By
07/22/2010

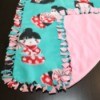
I have made 3 of these just for my house and more than that for family/friend gifts! I love mine and they get used all the time. The only thing is, is that I hate sewing. So, I bought 2 different colors of fleece (mine match, but I guess it doesn't have to if you want it to be reversible) in 2½ yd panels and laid them on my floor with the wrong sides together. I made a cut every 3 inches (and cut out a square on each corner) and then tied the two fabrics together. It probably only took me an hour or so from start to finish, and it's really warm because its double the fabric! I love projects I can start and actually see the results almost instantly. And, it can just be thrown in the washer and washed normally. :)

Related

Archived Discussions

Below you can read previous posts and comments about this topic. The discussions on this page has been archived 1 time. Select a discussion and read the feedback here.

(Archived Dec 30, 2009)Making Fleece Throws

Tip: Making Fleece Throws

I am not a "crafty" person but I still wanted to figure out how to make some gifts for Christmas and save a bit of money at the same time. I found the ideal thing for those people like myself who are not talented at making nice gifts.

Try fleece throws! You don't have to do any sewing at all! All you need is the fleece and a good pair of scissors! Then just tie! It's easy and everyone loves them! There are even kits in some stores, though they are sometimes more expensive than just buying the fleece.

If you think you need some instructions to follow it would be worth buying the kits. Otherwise, just ask around or go on the internet for instructions on how to make these beautiful, warm throws for gifts. I haven't found anyone yet who did not love them!

By Robin from Washington, IA

Feedback:

RE: Making Fleece Throws

When you make the fleece throws, you need to by 48 inches of 2 types of fleece (coordinating colors) one for the front and one for the back. Remember to cut out 4-5 inch squares from each of the 4 corners to keep the corners square when you are finished. (Try a piece of paper first and you'll understand why.) Then cut 1 inch strips of both pieces of fleece all the way around the 4 sides (I cut mine together) and then tie all the way around. Hope this helps. (11/22/2005)

By Tuppertil

RE: Making Fleece Throws

What do you mean "tie" - where do you tie? I would like exact, specific instructions, because there is no photograph of the finished throw. (09/11/2006)

By Mary

RE: Making Fleece Throws

When you cut the fleece into strips, you tie each strip together to the opposite side of the fleece you cut. (09/11/2006)

By imaqt1962

RE: Making Fleece Throws

Oh, I think I've figured out what you're getting at! My compliments, it's pretty clever. Basically, you're making a 2-ply blanket. Here's how it's done:

Get two pieces of fleece, 10 inches longer and wider than you want (example: if you want a blanket that's 36 inches on a side, get two pieces of fleece that are 46 inches on each side). Two contrasting solids, or a pattern and a coordinating solid would probably work best.

Cut a 5-inch square out of each corner of each piece. You should end up with two pieces of fleece that look like really fat plus-signs (in addition to eight 5-inch squares). Set the squares aside for another project. Iff you can sew, they would probably make a nice matching 2x2 pillow or possibly a stuff-sack if the blanket fits in it.

Cut 5-inch long fringe at 1-inch intervals on all four sides of both pieces. You may want to faintly mark this out on the wrong side of the fleece with chalk or pencil before cutting.

Be a "little" anal-retentive about this, because you'll need to have the same number of fringe strands for each piece.

If you started with two 46-inch square pieces, you should end up with two 36-inch square pieces that have an extra 5 inches fringe on all four sides.

Put the WRONG sides of both pieces together so that you have two layers. Each strand of fringe in any given layer should have a counterpart on the other layer.

Using an overhand knot (the kind of knot you use to keep the end of a string from fraying) tie one strand of fringe from each layer together so that it resembles a tassel. (Remember how we said that the number of fringe strands on both pieces should match? This is why.)

Continue around the blanket until all the fringe is tied off.

Tah-dah!

This would be a great gift for someone who just got a new car -- especially if the two pieces of fleece match the paint and upholstery! (12/03/2008)

By Clueless

Post Feedback

Your thoughts are welcomed and appreciated. Enter your feedback here!

Feedback:

Image Upload:

Add an image to your post! Click the "Browse" button above and select an image from your hard drive. Please only select gifs or jpegs. If you have any problems, please contact us.


facebook like arrowLike ThriftyFun on Facebook

Browse Topics

Over 80,000 tips, recipes, questions & crafts.

Ask a Question

Submit a question to the TF community.

Subscribe to ThriftyFun Newsletters!

Email: