ThriftyFun Logo
Home   Find   Ask   Share   Answer   Join   Index   Login  
 
 User Login:  Username:    Password:      Forgot It?  | Join ThriftyFun!

 - Beauty
 - Budget and Finance
 - Cleaning
 - Consumer Advice
 - Craft Projects
 - Craft Tips
 - Food Tips
 - Garage Sales
 - Gardening
 - Gifts
 - Green Living
 - Home Improvement
 - Organizing
 - Parenting
 - Parties
 - Pest Control
 - Pets
 - Product Reviews
 - Recipes
 - Repair
 - Weddings for Less

RSS Feed
About Us
Media
Advertising
Contact Us
Privacy Statement
Disclaimer

Patching Hole Left From Removal of Ceiling Light

1x1
Date: 10/05/2007 Topics: Home Improvement > Walls | Readers Request > Home  
1x1
Post Feedback | Get Responses | Bookmark | Link | Print | Print (With Feedback) | Rate: Thumbs Up Thumbs Down | Bookmark and Share
We moved a ceiling light in our Dining room because it was off centered. How do I patch the existing hole in the ceiling.


Jane F. from Statesville, NC
(1x1 graphic )
Previous: Dollar General Recalls Tumblers Due to Violation of Lead Paint Standard ThriftyFun Next: Eveready Battery Co. Recalls Toy Flashlights Due to Violation of Lead Paint Standard
(1x1 graphic )
1x1
1x1
 Feedback
1x1
1x1
1x1

By Happy05 - delaware (Guest Post)
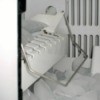
If you don't want to work with drywall patching, this idea might help. Our plumber had to cut a hole in the ceiling of our main level bath to fix the slow draining bathtub on the second floor. The plumber got a white snap-in cover panel and covered the hole without having to use drywall patch or paint. The panels come in a couple of sizes depending on the size of the hole in the ceiling. No one ever notices the ceiling in the bathroom. It might be more noticeable in the middle of your dining room but it may be an easy and inexpensive option. Good luck with your project.

Posted on 10/08/2007 | Report Spam or Abuse

By MartyD (467) Profile Contact
Sorry I forgot the drying part.... Let the area dry overnight before trying to sand or paint/texture

Posted on 10/05/2007 | Report Spam or Abuse

By MartyD (467) Profile Contact
You can get this info from Home Depot but this is what my son told me. It's important to note whether the ceiling has a texture or a flat surface. If it has texture this must be scraped off before you begin to work on the patch.
1. Cut out the hole in the ceiling to a square.
2. Cut a square of scrap drywall 1/2 in thick. If the hole in the ceiling is 4 by 4 make your drywall scrap 6 by 6.
3. Place the scrap on a table finished side down. Score a line around it so that you have a line the size of the hole. Tap the scored line on the side of a table or workbench then peel the drywall away from the paper finish. This will serve as your drywall tape to attach to the ceiling.
4. Put drywall mud on the ceiling and on the overhanging paper on the patch square, place it in the spot and apply drywall mud to the outside edges and sand and paint and/or texture your ceiling.

Posted on 10/05/2007 | Report Spam or Abuse

By MartyD (467) Profile Contact
My son is a drywall contractor... Just hang tough for a few hours and I'll ask him this afternoon. He lives in Tn so it's eastern time

Posted on 10/05/2007 | Report Spam or Abuse

1x1
1x1
 Post Feedback:
1x1
1x1
1x1

Login using the form on the top of the page to post feedback (if you are a registered user). If you have not yet registered, click here to do so. It's FREE!.

1x1
(1x1 graphic )

© 1997-2009 ThriftyFun.com - Design by Cumuli Design
Disclaimer: ThriftyFun.com cannot accept any responsibility for any injury or damage that you may cause to yourself, others, or property when following any advice given on this site. Read the full disclaimer. If you find any information on ThriftyFun.com or in our newsletters that is either erroneous and/or potentially harmful to others, please Contact Us, immediately.