This is a good food trick to do with your children. We're going to make real butter using heavy whipping cream and your blender. It's easy and a nice way to teach your young ones something about food that they may have never seen.
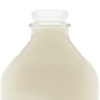
Cool your blender container with ice or let it sit in the refrigerator for about an hour. Remove from fridge and get it ready to use. Pour 16 ounces of heavy whipping cream into blender. Turn on blender for no more than 1 minute at the time. Your cream is going to turn into butter fairly quickly.
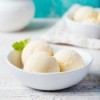
As soon as small globs of butter begin to form, shorten your blender spurts to 15 seconds at the time. The globs of butter will gather together, and when it's all in a clump, carefully pour off whey and set aside. Place butter in a bowl and refrigerate for 30 minutes.
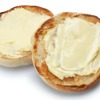
More whey will seep out and when you stir, you can get more out. When the butter is fairly free of liquid, you may add salt to taste, not too much. Stir the salt in and refrigerate for 30 minutes. If you see more liquid seeping pour it off, and shape your butter as desired.
Be sure to let them tell everyone that they made "butter" today. Have fun and enjoy watching them having fun too. You just made another memory that they'll never forget.
By Julia from Boca Raton, FL
Add your voice! Click below to comment. ThriftyFun is powered by your wisdom!
What's fun and even simpler is to have a class full of 5/6 graders, several quart jars 3/4 full of almost frozen heavy cream and have them take turns shaking it. These kids were hilarious! After they made butter, they dared each other to try the liquid. The butter was used at a spaghetti supper. It was fun and a great class activity.
Thanks for the reminder of something we can do at home that's fun and educational! :)
I think it would be more fun to let them do all the work themselves instead of using a blender. My mother gave each of us a quart jar with about 2 cups of cream in each, which we had to shake until the butter began to form. We had contests to see who could turn their cream into butter first. I remember it being a lot of fun and even some of the neighborhood kids would want to join in. We had a cow at the time so had plenty of cream to work with. My mother saved the cream in the refrigerator until she had enough to let all that wanted to, join in the fun. Everyone got to take their butter home.
If you make enough butter to keep, it's important to "wash" the butter. When it is in a clump, but it in a bowl of ice water and, using quick, light motions, "massage" the butter.
Add your voice! Click below to comment. ThriftyFun is powered by your wisdom!