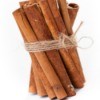
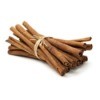
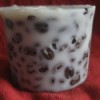
Add some cinnamon next time your making candles. It gives off a lovely fragrance as well as a rustic look to your candles.
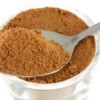
Follow your normal candle making procedures then prior to pouring spoon in some ground cinnamon or add 10 drops of cinnamon essential oil.
Purchased mold specifically for candle making or household items that are flexible and will release the hardened candle, some of these are: Light weight plastic molds like Bowls or cups, Polystyrene cups where it can be torn away from the hardened candle, Milk Or Drink Cartons, etc.
Place your required wax amount into the heavy Pan and place it on the heat. Slowly heat the pan till all the wax in your pot melts. Don't allow the wax to get too hot.
Once you have melted your wax you can add your dye, add a small amount at a time as it is very strong. Note: When dried the color is much lighter
Dip your wick several times into the melted wax to give it a Wax coating to insure even burning.
Start by cutting down your milk carton so that your candle mold is of appropriate size for the candle (or use another mold).
Next, attach your wick to a pencil or length of wood that will sit across the top of your candle mold (the top is the open end).
Next, make a small hole in the bottom of the carton to thread your wick through. Pull it tight so that the wick from the pencil to outside of the carton is firm. A loose wick will cause your candle to have problems burning later on.
Now stick down the wick at the bottom with some sticky tape, then using a piece of Blu-tack or plastercine, close up the hole so no wax can seep out.
Be careful that you do not spill the wax onto yourself and gently pour the wax into the mold. Fill it to the top but save a small amount for top ups, then allow to cool.
As it cools you will notice that the top will sink inwards, pour a small amount of wax on top of this to fill it up. And continue to allow to cool.
If it is a breakable mold then just pull it off. If it is plastic and doesn't just slip out then run the outside of the mold in hot water, this will melt the outside wax that is helping it to adhere to the mold and it should just slip out.
If your mold it not flat at the bottom then place it directly onto a hot pan service and melt it down flat to tidy it up and finish it off.
About The Author: Visit http://www.Craftbits.com for Free Step by Step Craft Lessons. 100's of Free Craft Projects, Free Patterns and weekly craft competitions. Participate in a worldwide craft swap or just get some free craft advice.
Add your voice! Click below to comment. ThriftyFun is powered by your wisdom!