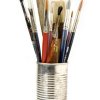
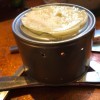
|
|
|
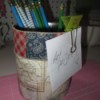
Any small items that I can to keep things from falling out of the cabinet. You could also just paint them the colors of your choice and label the cans. Either way, whenever you open your cabinet, it is pretty and cheerful to look at. I use them for my make-up items too. It's a great way to store eyeliner, lip liners, mascaras, eye shadow wands, lip glosses, and like.
It just makes things easier for me to find what I am looking for.
By Tricia M. from Ridgeway, VA
Contact paper, old wall paper, gift wrap, tissue, use a ribbon if you want to dress it up. Have fun!
Below you can read previous posts and comments about this topic. The discussions on this page has been archived 1 time. Select a discussion and read the feedback here.
(Archived Feb 23, 2010)Cans, cans, cans
Thanks - Lisa
Feedback:
By snickers689
By gravel
To make a coffee-can roly-poly, make a slit about 1/2" long in the center of the lid, and in the center of the can bottom. Run a strong rubber band through the bottom slit, so most of the rubber band is inside the can. Secure it by putting a piece of popsicle stick, pencil, stiff card, or some such, through the small loop of rubber band, on the outside of the can, and pulling the end of the rubber band that's inside the can. This will keep the rubber band from simply pulling all the way inside the can through the slit. You can tape it if you want. Tape a few washers or some other kind of weight to the center of one string on the part of the rubber band that's inside the can. Put the other end of the rubber band through the slit in the can lid, secure as before with a piece of card or whatever, and fasten the lid to the can, making sure the rubber band isn't twisted against itself. When you roll the can away from you, the rubber band will get wound up because of the weight, and will come back to you as the rubber band unwinds.
I use cardboard cans for storing plastic grocery bags. I cut an "X" in the flexible plastic lid, and just stuff the bags in or pull them out as needed. I keep these in the trunk of the car for fruit picking or car clean-up or wet-clothes/diapers containment. I also keep them in the kitchen for waste basket liners.
If the cans don't have sharp edges, you can fasten several together to use as wall cubbies. Put a can, open-end up, on a table. Surround it with 6 more cans of the same size, also open end up. This will give you a flower shape (one can in the center, and 6 "petals"). Of course you can also make pyramids, parallelograms, whatever. Fasten them together with hot glue, duct tape, what-have-you. Mount this artwork to the wall for cubbies. The "flower" shape works well in the shed for storing hoses in winter without getting a kink in them, just wrap the hose (or extension cord, or...) around the outside. For a kids' room, you could mount the "flower" cubby on the wall, then paint a stem and leaves on the wall below it.
Baby food jars can be used to make "snow globes". Fill jar with light corn syrup, add some glitter, glue a trinket to the inside of the lid (remember the lid will become the base), and glue the lid shut, or simply close it very tightly.Baby food jars can be used to contain all kinds of small things: spices, thumbtacks, touch-up paint, garden seeds, those curling-ribbon "eggs", small game pieces. Some people fasten the lids to the underside of a shelf, and screw the jars into the lids so they can easily see/retrieve the contents. - MC (02/19/2001)
By the_mouse_2b
By Dannielle Jenkins
Finally you will need some fabric. Cotton blend is best. However you can use the material of your choice, both design/print and texture. 1 to 2 yards of fabric should be more then enough. It's a trial and error kind of project but well worth it when finished and it's really rather easy to make. Again those materials needed are
How to do it: Once you have placed the cans in a circle, open end facing up (cover with lid or cardboard cut outs), secure the cans together with either duck tape or rope of some kind (eg. twine, yarn, etc.) or both. To use the string just wrap around each can in a figure 8 design so to speak making sure that the string goes around each can at least once until all are strung together. You can use tape to secure the string both at the beginning and the end. Then apply the polyfill or put the foam on top. With the polyfill, you will want to put enough to form a comfortable cushion when finished. Place one end of the fabric halfway on the bottom of the cans and wrap up to the top and continue over until you need to carefully flip the cans over to meet at the bottom matching up with the other end you started with. With the cans still in the flipped over position, trim any extra fabric left over.
Secure with duct tape or any other strong tape. Flip back over and enjoy your foot stool. There you go. Hope it's not to hard to follow my instructions. I am better at showing then explaining sometimes. :-) Sorry if it is hard to follow. You can make a pin cushion by using the same method of a much smaller scale with old medicine bottles of any kind but same height or old film containers. (03/11/2005)
By parentof2