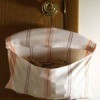
|
| Little Dress Clothespin Bag |
I found this in a very old magazine that I bought at the Goodwill store and made a cardboard pattern out of the pattern in the book. I made lots of these clothespin bags which I gave to friends and family as gifts. These were made from fabric scraps, lace, etc. that I had from leftover projects but you can use whatever you like to make them.
I received lots of compliments on how cute they were. They are very easy to make and I love to make anything easy.
Another way to make these if you don't have a pattern is to use little girl's dresses and sew up the bottom, works best with a "V" neck so you can hang it up with a wire or plastic hanger.
Use a simple dress and take it apart,make a pattern so you can make lots of these clothespins bags.
Hope you enjoy making these as much as I did. Thanks!
Measurements and Instructions for Little Dress Clothespin Bag
Body:
Cut 2 or fold and cut 2:
- 15 inch long, top to bottom
- 13 inch wide across at waistline
- 4 1/2 inch width of each sleeve
- 14 1/2 inch wide halfway between waistband and hem across
- 19 inch wide sleeve to sleeve across
- 15 inch bottom of body across
Cut bottom round on each side
Back Facing:
Cut 1 - 9 1/2 x 13 1/2 inch sew to top of body back (rt sides together) even between sleeves. Turn and press to wrong side.
L-shaped piece: (center front facings)
Cut 1, reverse and cut another one 7 1/2 x 6 x 3 x 2 x 3 x 5 1/2 inches. Lay (5 1/2 inch sides) facing each other) sides together onto front body at the top at the fold in middle of body. Sew across top and down each 5 1/2 inch side. Cut down between the two facings to end of facings. Make a small cut each side at the bottom so you can turn it. Cut corners, turn to wrong side and press.
Ruffle skirt:
11 1/4 x 8 inch, cut 1 on fold (fold is 8 inch side). Hem edges and bottom of skirt. Add lace to hem, gather long edge starting about an inch in on each end. Pin gathered skirt to waistline. Sew across.
Waistband:
Cut 1, 14 x 2 inch. Press under both long edges. Lay on top of skirt to cover gathers. Sew across both long edges.
After you attach everything to body pieces. Pin both bodies right sides together and sew around (starting 4 inches in at shoulder). I sew mine twice for strength. Turn bag right side out and press. Fold over each facing and press down then add a button to each side.
You're done!
I hope this makes sense to you,I'm trying very hard to get this info to all who inquired about these bags.
Enjoy!
By Marian from Danville, VA
Editor's Note: Thanks so much for the instructions. We look forward to seeing photos of the completed projects from our crafty readers.
|