ThriftyFun Logo
Home   Find   Ask   Share   Answer   Join   Index   Login  
 
 User Login:  Username:    Password:      Forgot It?  | Join ThriftyFun!

 - Beauty
 - Budget and Finance
 - Cleaning
 - Consumer Advice
 - Craft Projects
 - Craft Tips
 - Food Tips
 - Garage Sales
 - Gardening
 - Gifts
 - Green Living
 - Home Improvement
 - Organizing
 - Parenting
 - Parties
 - Pest Control
 - Pets
 - Product Reviews
 - Recipes
 - Repair
 - Weddings for Less

RSS Feed
About Us
Media
Advertising
Contact Us
Privacy Statement
Disclaimer

Craft Project: Hallway Picture Ledge

1x1
Date: 07/27/2009 Topics: Craft Projects > Home Decor > Decorations | Photos > Crafts  
1x1
Post Feedback | Get Responses | Bookmark | Link | Print | Print (With Feedback) | Rate: Thumbs Up Thumbs Down | Bookmark and Share
Craft Project: Hallway Picture Ledge
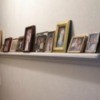
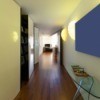
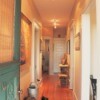
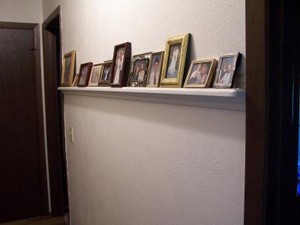
This is a ledge/shelf you attach to the wall in the hallway between your doors to sit picture frames on. It's easier then nailing a lot of nails in the wall. It's easy to rearrange pictures and change them as the families grow. I have 3 in my hallway. I love this idea. It works wonderfully!

Approximate Time: 3 hours

Supplies:

  • 2 inch pine boards
  • 1 1/2 inch molding
  • screws
  • primer
  • paint
  • sander
  • router
  • paint brushes
  • finishing nails
  • tape measure
  • stencil

Instructions:

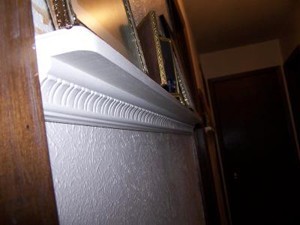
  1. Measure, measure, measure. Very important. You want to be sure to get the pine boards and molding to reach from one door to the other using one long piece without having to cut and piece 2 together. I cannot explain the kind of molding to use but you want the kind that has a flat part to attach to the wall and then a top part that is big enough to nail the pine board for the ledge to.

  2. I had someone router a finished edge to my pine boards and also a groove on the top that was big enough to sit the frame in to prevent it from sliding off. You could nail a small trim piece here instead of the groove. You could just sand the corners of the board to finish it instead of using the router.

  3. Sand, prime and paint everything.

  4. Nail or screw the molding to the wall.

  5. Nail or screw the pine board to the molding. Or you could attach the board to the molding and attach the whole ledge as one long piece to the wall instead of doing it separately.

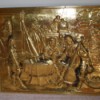
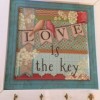
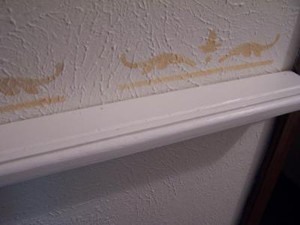
  6. I stenciled a gold design along the top. You could skip this because you really do not see it when the pictures are on the ledge. Unless you only have a few. You may want something to fill in the spaces in between the frames.

  7. Add frames with pictures and arrange as you like.

By Little Suzy from Ohio

(1x1 graphic )
Previous: Use Receipts to Make a Priority Grocery List ThriftyFun Next: Store Extra Blankets in Cushion Covers
(1x1 graphic )
1x1
1x1
 Feedback
1x1
1x1
1x1

No Feedback Yet

Be the first to post feedback! Click here to post feedback.

1x1
1x1
 Post Feedback:
1x1
1x1
1x1

Login using the form on the top of the page to post feedback (if you are a registered user). If you have not yet registered, click here to do so. It's FREE!.

1x1
(1x1 graphic )

© 1997-2009 ThriftyFun.com - Design by Cumuli Design
Disclaimer: ThriftyFun.com cannot accept any responsibility for any injury or damage that you may cause to yourself, others, or property when following any advice given on this site. Read the full disclaimer. If you find any information on ThriftyFun.com or in our newsletters that is either erroneous and/or potentially harmful to others, please Contact Us, immediately.