Home |  Index |  Submit Request |  Share Photos |  Share Tips |  Active Topics |  New Feedback  |  Contact Us  |  Search
 User Login:  Username:    Password:      Forgot It?  | Join ThriftyFun!

 Popular Topics
 - Beauty
 - Budget and Finance
 - Christmas *
 - Cleaning
 - Consumer Advice
 - Craft Projects
 - Craft Tips
 - Food Tips
 - Garage Sales
 - Gardening
 - Gifts
 - Green Living
 - Home Improvement
 - Organizing
 - Parenting
 - Parties
 - Pest Control
 - Pets
 - Product Reviews
 - Recipes
 - Repair
 - Thanksgiving
 - Weddings for Less

More Topics

Google Search:

Web thriftyfun.com

About:
RSS Feed
About Us
Media
Advertising
Contact Us
Privacy Statement
Disclaimer

Two Easy-to-Make Compost Bins

By Ellen Brown
1x1
Date: 11/28/2005 Topic: Gardening > Composting  
1x1
1x1
Post Feedback! | Email Friend | Print | Get Responses | Bookmark | del.icio.us | Link | Rate: Thumbs Up Thumbs Down
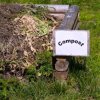
No matter how much you pay for a compost bin, breaking down organic waste requires four things: water, air, a few naturally occurring microbes and a fair amount of patience. Many manufactured compost systems come complete with various bells and whistles: special gear systems for easy mixing, ergonomic ventilation slots, and enhanced faux finishes to match your landscaping décor. Add to that a wide range of accessories-compost accelerators, pile turners, scrap carriers and soil sifters-and you're looking at spending upwards of a couple hundred dollars. Here are two cheap and easy bins you can make yourself that will result in the same nutrient-rich compost.

The Snow-Fence Bin

Snow Fence Compost Bin

Materials needed:

  • 12 1/2 feet of snow fencing (galvanized wire fencing works, too). Wooden snow fence can usually be purchased by the foot or bundle inexpensively. Don't use treated wood.
  • 4 three foot 2 x 4's
  • Nails and wire pieces (optional)

Construction Directions:

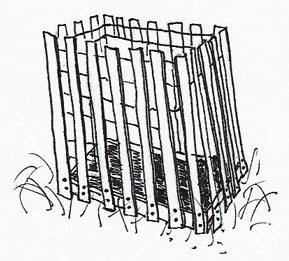
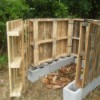
Remove the grass and sod from the area where you will construct your compost pile. Construct a 3 ft. square frame from the 2 x 4's. Wrap the snow fence around the frame to form a box. Fasten ends together with nails or wire and place in desired area.
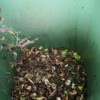
Getting Started Composting:

Place 3"- 4" of chopped brush or course waste on top of the bare soil surface at the bottom of the bin to enable air circulation around the base of the heap. Place 6" 8" of leaves, grass clippings, garden waste and other organic materials on top of the coarse layer. Mix water into the pile until damp (not soggy). Add a 1" layer of soil over this to get composting started. If more nitrogen is needed, add 1"-2" inches of manure or a handful of commercial fertilizer to the pile.

Turn the pile with a shovel or pitchfork every few weeks as you continue to mix in more waste. An alternative method is to pick up the bin, move it next to the pile and shovel the compost back into the bin at the new location. Add water when the pile is dry.

The Barrel Bin (excellent for small yards).

Snow Fence Compost Bin

Materials Needed:

  • A clean, 55-gallon barrel or drum with a secure lid (hint: paint barrels have a handy protective coating inside).
  • Metal hinge (galvanized)
  • Drill or hammer and nail (for making holes)
  • Cement Blocks, bricks or boards (to place barrel on for air circulation)

Construction Directions:

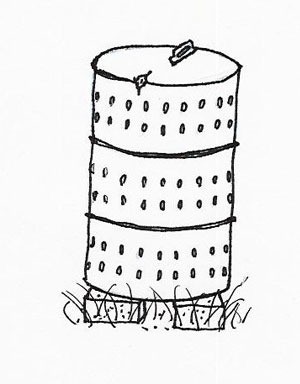
Drill or punch 1/2 inch-sized holes in several rows over the length of the barrel and on the bottom of the barrel. These will provide air circulation and drainage. Secure the barrel's lid with the hinge (attach an optional handle to make opening more convenient). Stand the barrel upright on blocks to allow air circulation around the base.

Barrel Bin Variation: construct the barrel and place it on blocks as above but remove the top and bottom of the barrel. Fill barrel with yard waste and insert a plastic tube (perforated with holes) into the center of the compost heap. The tube will help transfer air and collect rain for the pile. Remove the tube when mixing is needed.

Getting Started Composting:

Fill the barrel 3/4 full of leaves, grass clippings and other organic waste. Add 1/3 cup of nitrogen fertilizer and add water until pile is damp (not soggy). Continue to add waste to the barrel as it becomes available. To mix the compost, simply roll the barrel around on the ground. Remove the lid following mixing to allow the pile exposure to rain and air.

About The Author:
Ellen Brown is our Green Living and Gardening Expert. Click here to ask Ellen a question! Ellen Brown is an environmental writer and photographer and the owner of Sustainable Media, an environmental media company that specializes in helping businesses and organizations promote eco-friendly products and services. Contact her on the web at http://www.sustainable-media.com
Jump to Feedback | Post feedback
Related Links:
Previous: Classic Macaroni and Cheese ThriftyFun Next: Designer Plates (with Photos)
1x1
 Feedback
1x1
1x1
1x1
1x1
 Sponsors
1x1
1x1

No Feedback Yet

Be the first to post feedback! Click here to post feedback.

1x1

Post Feedback:
Login using the form on the top of the page to post feedback if you have registered with ThriftyFun. If you have not yet registered, click here. It's FREE!. If you are not registered you can post feedback as a guest below. Please don't use your email address for your name because spam robots can dredge it from our site. Please do not post your feedback more than ONCE. We need to approve all guest feedback and it may take from minutes to hours for that to happen.
(1x1 graphic )
Your Name

Subject

Feedback

text tool text tool text tool text tool

Image Upload: Add an image to your post! Click the "Browse" button below and select an image from your hard drive. Please only select gifs or jpegs. If you have any problems, just email the image to images@thriftyfun.com


If you want to post your email address for responses from readers, obscure it in some way like put spaces between the name and @ sign and service address with (remove spaces) behind it or name (at) server (dot) com . This is for your protection from those creepy Robots.

(1x1 graphic )

© 1997-2008ThriftyFun.com - Design by Cumuli Design
Disclaimer: ThriftyFun.com cannot accept any responsibility for any injury or damage that you may cause to yourself, others, or property when following any advice given on this site. Read the full disclaimer. If you find any information on ThriftyFun.com or in our newsletters that is either erroneous and/or potentially harmful to others, please Contact Us, immediately.