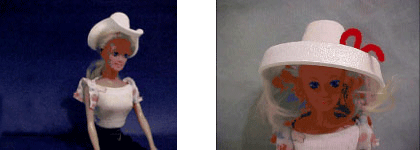
This is a project that requires supervision for the first step. Decorating will keep the little girl's occupied without much help.
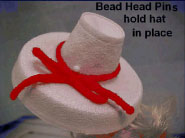
*Mom can furnish embellishments such as: nylon net, feathers, sequins, small buttons, small silk flowers, ribbons, etc.
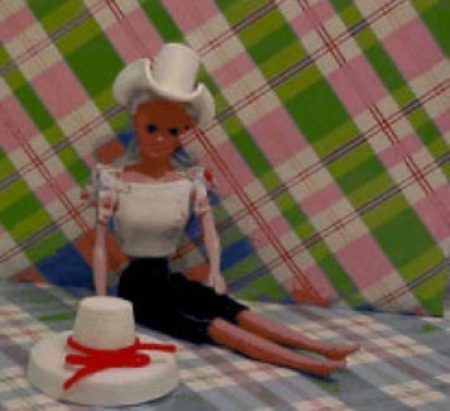
The hats may be painted with acrylic paints. These are available at Wal-Mart in 4 oz. jars.
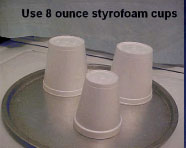
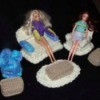
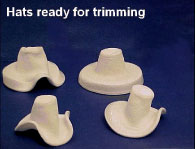
Preheat the oven at 400 degrees F. Set cups on baking sheet, leaving plenty of room for the shaping. Watch them closely as it only takes about 30 seconds to shape them as shown. Remove immediately when they are the desired size and shape. Use the ones that result in a nice hat and discard any that don't suit you.
From this point, you can let the girls take over with help from you (if needed), depending on their ages.
By Harlean from Arkansas from Hot Springs, Arkansas
Editor's Note: Harlean has also provided a PDF of this craft Click here to download it.
Add your voice! Click below to comment. ThriftyFun is powered by your wisdom!
Harlean this is just amazing. so cute. job well done. thanks for sharing
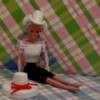
This is a terrific idea! The pictures are great, and btw, I love the pink plaid background too.
That is amazing! How did you figure that out? God bless you!
What a great idea! Wish I had someone to make Barbie hats with!
We also made these for favors at a women's meeting. I wanted to add however a word of caution. The material used to make the styrofoam cups is very toxic to the lungs when placed in the oven.
I use to work in an retirement village, and did crafts with them... I had them to fix the cups, I put them in the oven, and just like tv. I had some already for them to decorate. They had so much fun, and they gave them to their grand kids or kids that came to visit. Made their day.... kddid
Awwwww, so cute! I don't want to breathe the smell of melting styro, but with fans and windows you wouldn't get much. Way to go!
I did these many different times with Sunday School groups. It's also fun to experiment and put some egg cartons in and watch them wiggle into weird shapes.
Add your voice! Click below to comment. ThriftyFun is powered by your wisdom!