Home |  Index |  Submit Request |  Share Photos |  Share Tips |  Active Topics |  New Feedback  |  Contact Us  |  Search
 User Login:  Username:    Password:      Forgot It?  | Join ThriftyFun!

 Popular Topics
 - Beauty
 - Budget and Finance
 - Christmas *
 - Cleaning
 - Consumer Advice
 - Craft Projects
 - Craft Tips
 - Food Tips
 - Garage Sales
 - Gardening
 - Gifts
 - Green Living
 - Home Improvement
 - Organizing
 - Parenting
 - Parties
 - Pest Control
 - Pets
 - Product Reviews
 - Recipes
 - Repair
 - Thanksgiving
 - Weddings for Less

More Topics

Google Search:

Web thriftyfun.com

About:
RSS Feed
About Us
Media
Advertising
Contact Us
Privacy Statement
Disclaimer

Credit Card "Piggy Bank"

By Rela Ann
1x1
Date: 08/25/2005 Topics: Craft Projects > Recycled > Containers | Photos > Crafts  
1x1
1x1
Post Feedback! | Email Friend | Print | Get Responses | Bookmark | del.icio.us | Link | Rate: Thumbs Up Thumbs Down
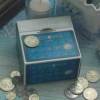
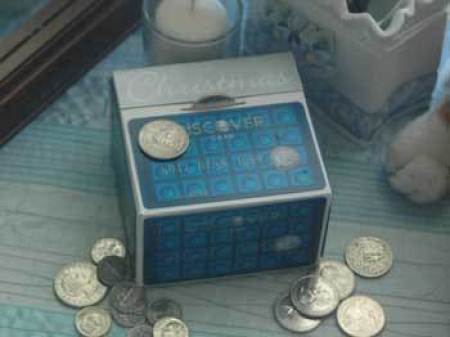
The other way we can use those sample credit cards is to make a "piggy bank" to teach your kid that an alternative to credit cards is to save up before spending. Be it for Christmas Fund or Birthday Fund or Summer Vacation Fund, saving will be fun while learning a financial lesson at the same time. Start them young!

Ingredients

  • 6 or more Sample credit cards, depending on how big the box used.
  • Small box (Substitiute: You can make your own box by using cardboard, scissors, pencil, stapler and glue.)
  • Bond Paper (Substitute: Any nice paper you would like to use.)
  • Pencil
  • Cutter
  • Scissors
  • Glue

Method/Instructions

1. If you do not have a box yet, construct the box using cardboard, scissors, pencil, stapler and glue. Consider using the sample credit card dimensions so that they can cover entire sides.

2. Select a side of the box where to place the hole where coins can enter. Select a location on that side to mark a 1" straight line. Make sure it is located/positioned where you do not need to cut through a sample credit card. Cut through the cardboard on the 1" mark.

3. Cover the box with the bond paper (or the nice paper you want to use). Cut through the paper on 1" hole location on the board to allow coins to enter.

4. Glue the sample credit cards to all sides. (You can opt not to glue one at the bottom if you do not have enough sample credit cards.)

5. Mark or decorate the "piggy bank" according to what the money being saved for is - Toys, Christmas, Birthday, Summer Vacation, Mother/Fathers' Day, Grandparents' Day, etc.

In what I've done, I used old Christmas card boxes which had a nicely written "Christmas" white text on silver background.

Jump to Feedback | Post feedback
Related Links:
Previous: Planting Hollyhock Seeds ThriftyFun Next: Grocery Shopping Tips
1x1
 Feedback
1x1
1x1
1x1
1x1
 Sponsors
1x1
1x1

Post By Diana (Guest Post) (08/25/2005)
We require our children "bank" 1/2 of any financial gift, or earned income (babysitting, etc.)
We pay an allowence and require they tithe and save 1.00$ of that as well. Our 14 year old daughter saved almost $1000 this summer and still spent unlimited hours at her favorite mall! Our 7 year old has saved almost $300 all on her own

We never use credit cards! Only debit cards!


1x1

Post Feedback:
Login using the form on the top of the page to post feedback if you have registered with ThriftyFun. If you have not yet registered, click here. It's FREE!. If you are not registered you can post feedback as a guest below. Please don't use your email address for your name because spam robots can dredge it from our site. Please do not post your feedback more than ONCE. We need to approve all guest feedback and it may take from minutes to hours for that to happen.
(1x1 graphic )
Your Name

Subject

Feedback

text tool text tool text tool text tool

Image Upload: Add an image to your post! Click the "Browse" button below and select an image from your hard drive. Please only select gifs or jpegs. If you have any problems, just email the image to images@thriftyfun.com


If you want to post your email address for responses from readers, obscure it in some way like put spaces between the name and @ sign and service address with (remove spaces) behind it or name (at) server (dot) com . This is for your protection from those creepy Robots.

(1x1 graphic )

© 1997-2008 ThriftyFun.com - Design by Cumuli Design
Disclaimer: ThriftyFun.com cannot accept any responsibility for any injury or damage that you may cause to yourself, others, or property when following any advice given on this site. Read the full disclaimer. If you find any information on ThriftyFun.com or in our newsletters that is either erroneous and/or potentially harmful to others, please Contact Us, immediately.