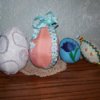
If you're looking for a fun craft that all the family can do at Easter, then why not try decorating some eggs with eggshell mosaic. All you need to do is to save some eggshells after cooking, paint them and break the segments into lots of little pieces to make your mosaic designs. Arrange your finished eggs to display in your home or give away as presents to family and friends.
Approximate Time: 30 minutes plus drying time
Supplies:
- eggs - plastic or wood
- clean eggshells
- acrylic paints
- a paintbrush
- non-toxic PVA glue
Instructions:
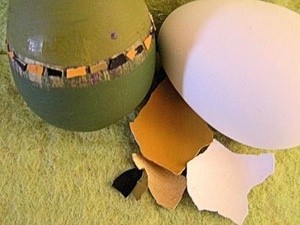
- Firstly, paint an egg in a colour(s) of your choice. Use the paint fairly thickly, as if it is too thin, it will run on the round surface of the egg. It is also a good idea to paint your egg in stages to allow part of it to dry; this way you can hold it without putting your fingers on the wet painted part. Note: some craft stores sell egg-holders that hold an egg.
- Wash a selection of eggshell segments in lukewarm soapy water. Let dry.
- Paint the inside of the pieces - the white membrane will hold the colour better than the porous outer shell. Leave the shells to dry thoroughly.
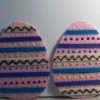
- Then, break the segments into pieces and start to glue each one on to your painted egg. How you design the mosaic is up to you - a central band of shells, cover half the egg or even decorate the whole, top and bottom.
For children, a nice idea is to get them to draw their first name in pencil on the egg and stick shells to follow the individual letters; they will end up with their own personalised mosaic Easter egg.
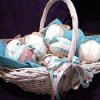
- To finish, place your mosaic eggs in a basket to decorate a room for the Easter festival, or put each egg in an eggcup and gift-wrap for a special Easter treat. Have fun!
By Anne from Cheshire, UK

About The Author: Anne has written a range of educational articles for publications worldwide, whose readers include teachers, home-schooling parents and craft therapists. She is based in the United Kingdom.
Add your voice! Click below to comment. ThriftyFun is powered by your wisdom!