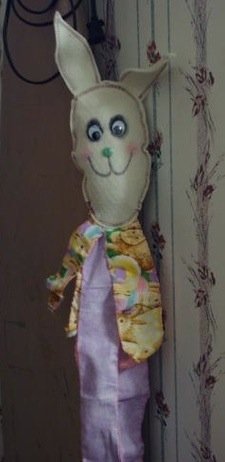
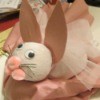
Create a cute bunny windsock for your outside trees or porch to twirl in the breeze.
Approximate Time: 20-30 minutes
Supplies:
- fabric strips various lengths that are 2-3 inches wide (cotton is best)
- thick polyester batting fabric (like a polyester blanket made from any color)
- sewing machine
- polyfill fiber
- scissors
- ribbon for hanging
- fabric glue (for eyes with buttons for no sew)
- embellishments for bunnies face such as buttons, ribbons, etc.
Instructions:
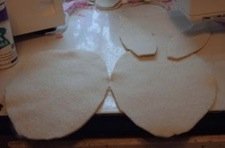
- Cut out an oval face and bunny ears from the polyester thick fabric you will need one each of the ears and 2 for the face. I buy polyester blankets at Wal-Mart for $5 in any color as my thick polyester fabric for his face and ears. I use that blanket time and again for all my craft needs where a thick stable but soft batting is needed.
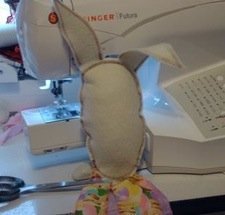
- Place your bunny ears slightly inside the bunny top head sandwiching the ears inside the 2 face pieces. Now stitch around the complete face circle, but leave a bottom section open to fill with polyfill fiber. Do not fill at this time, but still leave open for now. Also stitch around the bunny's ears outer edge as detail. I used a pretty dark pink thread and gave it a zigzag stitch.

- Now cut strips of cotton fabric into 2-3 inch wide pieces at different lengths. You can leave these with raw selvage edges, but I like to serger stitch around my outer edges and taper my ends off at a point on the ends. But you can leave straight across if you like on the bottoms of each strip. I like my strips to be different sizes you can have them all one length if you desire, but I like mine to have both shorter and longer lengths so it looks like he has shoulders and a bit of a collar. I used a combination of solid colors and a cute bunny print as well for my strips.
- Place your strips (I used 9 strips) slightly inside the bunny's bottom chin where you still have your opening. The head has already been filled with polyfill fiber. Turn your strips facing each other on both the front and back sides (so you see just the right sides of the fabric strips). Now after you have slightly placed your strips in a bunch up into the bunny's bottom face, sew up that opening on your machine with whatever stitch you prefer.
- Now take a very long piece of ribbon and loop it and sew it onto the back top center ear section of the bunny's head. This will be your hanger for the tree limb or nail hook outside so it can twirl.
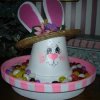
- Add any facial expressions to your bunny on one or both sides, using any number of embellishments like buttons, ribbons, etc.
- The reason I told you to stitch the bunny's outer ears is because it gives them added strength to hold up and not flop so much. You can also sew on pipe cleaners to the ears to give even more stability and beauty.
- I used fabric glue to put on my eyes and nose so the damp weather or hot sun will not let them loosen like hot glue will. That way I can wash it too as needed.
Hang up, watch it twirl and enjoy.
By Julie from TN