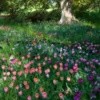
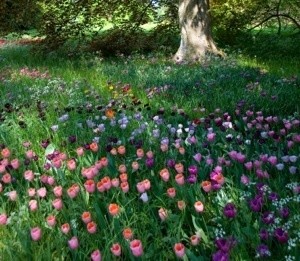
We've all seen the pictures. Masses of tulips or hyacinths growing like wildflowers among trees or in grassy meadow, looking like they've been there since the beginning of time. These bulbs have been naturalized. Achieving this look isn't hard, as long as you keep a few basic principles in mind.
To achieve the "wildflower effect" naturalized bulbs are usually set in a woodland or grassland environment. For gardeners limited by space, a cluster of bulbs planted in uncut grass around the base of a tree, or a small patch left wild in the corner of the garden can create a striking effect.
Mixing multiple types of bulbs or planting a single species will give you radically different looks, so search online and in gardening books to get ideas. Also keep in mind that if you choose spring-flowering bulbs, you'll need to wait for the flowers to go to seed and the foliage to fade (up to 6 weeks) before cutting the grass. This is so that the bulbs have time to produce and store food for next year's color. If you choose fall-blooming bulbs, you'll need to stop cutting grass in late summer/early fall to allow the shoots ample time to grow and bloom.
Ideally, the bulbs you choose should:
Use a spade for mass planting instead of digging hundreds of individual holes. Start by cutting the grass, Then peel back the sod and remove the soil to the required depth (approx. 2 inches for small bulbs and 4 inches for larger bulbs). After loosening the surface of the exposed soil, place the bulbs where you want them and replace the sod. Water the area thoroughly.
Wildflowers don't grow in perfectly spaced rows, and neither should naturalized bulbs. Dropping handfuls of bulbs and planting them wherever they land will help create a more natural look.
About The Author: Ellen Brown is an environmental writer and photographer and the owner of Sustainable Media, an environmental media company that specializes in helping businesses and organizations promote eco-friendly products and services.
Add your voice! Click below to comment. ThriftyFun is powered by your wisdom!
Could you please tell us some of these bulb names in your photo, thanks
I really love this idea. I never knew I could sort of "peel back the soil." We had a tropical storm over our area about two years ago that dropped over 11 inches of rain, and the next spring, we had bulbs coming up that we never even knew were there. They are really beautiful.
Add your voice! Click below to comment. ThriftyFun is powered by your wisdom!