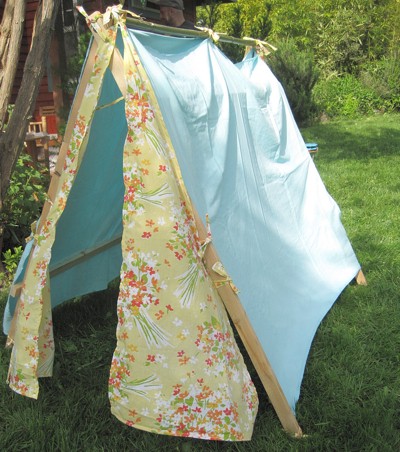
A cute little tent to set up and let your kids have all sorts of fun with through out the summer! And if your kids are a bit older (say age 9 and above), this could be a fun project for you and them to work on together. The frame and sewing portions of the project each took about 2 hours to complete.
Approximate Time: 4 hours
Cost: All in all, we spent about $16 for wood and hardware and $8 at a thrift store for the sheets/fabric. If you are lucky enough to have most of these materials just lying around, you could make your tent for less.
Supplies:
- seven 4 foot long 1x2s (renewable modification alert!) Use a 4 foot long length of bamboo for side braces or top ridge. We only had one piece of bamboo that our neighbors gave us and we used it for the top ridge.
- 2 inch and a half long carriage bolts
- 8 wood screws on the smallish side
- 2 quarter inch wooden washers, measuring about 2x2 inches
- 2 panels of fabric measuring 51x52.5 inches (this includes seam allowance) these will be the walls of the tent, (re-usable alert!) Use old bed sheets, that's what we did for this project.
- two 41x48x48 inch triangular panels of fabric. These will be the doors.
- 17 feet of ribbon or twine for the ties (I made my own ties out of fabric thinking it would look really cute. It totally did, but was also really time consuming. I would use ribbon next time.)
Instructions:
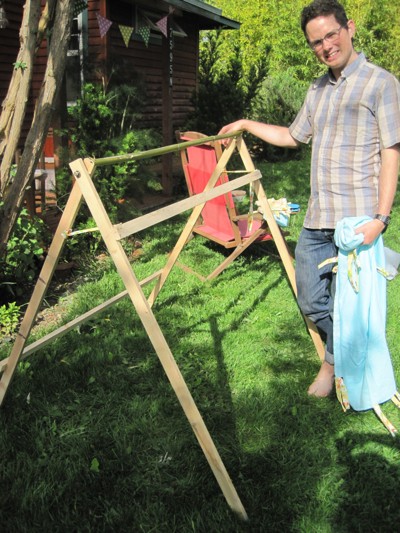
Frame:
- Basically you are making a triangle tent frame, with two side braces and a top ridge. Take all your 4 foot long pieces of wood or bamboo to drill pilot holes at all the necessary points, to prevent splitting. We used the one eighth inch drill bit.
- Drill a quarter inch hole about 1/2 inch away from the top of the frame on four pieces of wood. Take two pieces and connect them with the carriage bolt, with wooden washer. These are the two "triangle" portions of the frame.
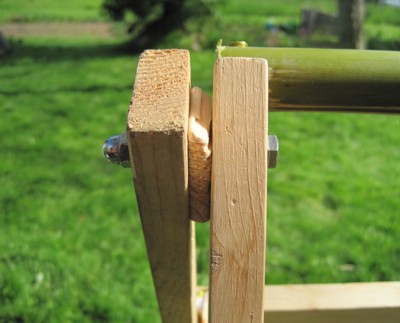
- Now attach the top ridge and braces to the frame, using the wood screws. I would say this is the part of the project where a second set of hands would come in handy.
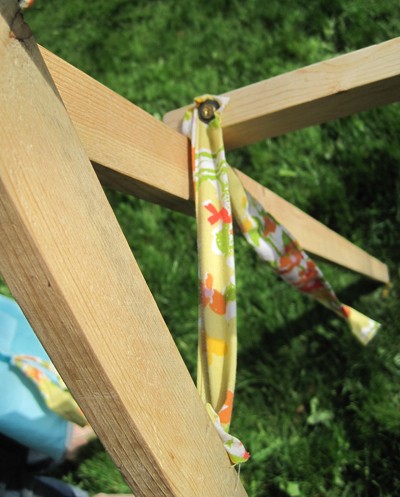
- Open up your frame to its desired width, somewhere near the top, take a piece of ribbon and drill it into the frame on the both sides. This essentially keeps the frame from opening up too far and falling over. By now, the frame should be completed.
Fabric Panels:
- Take your two 51 inch x 52.5 inch pieces of fabric and hem them. I made a newspaper pattern and laid everything out on the floor to cut out what I needed from the bed sheets.
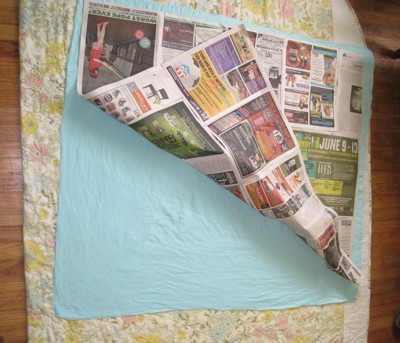
- Sew ribbon ties along three sides of the panels. I did three 1 foot long ties along each side, which makes seven ties for each panel. Sew right through the middle of the ribbon, giving you 6 inches on each side of the stitch to use for tying
- Cut your 41x48x48 inch triangular panels in half from the point and hem them. For the triangle panels, I added one tie at the top and one to attach to side of the frame.
- Take all your panels and tie them on to the completed frame, the tent is now done. Next, make a sandwich and enjoy it in your new summer play tent!

Source/inspiration: From the June/July 2010 issue of ReadyMade
By Ms. Chelsea from Seattle, WA