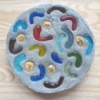
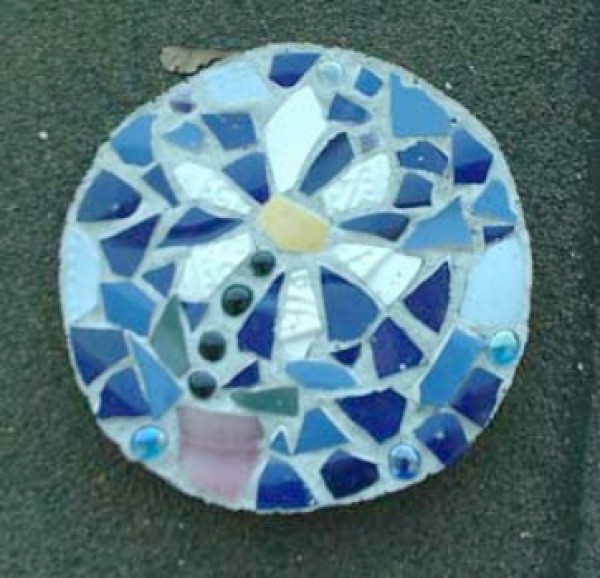
Stir up your own cement and add seashells, broken pottery, and glass to create a colourful stepping-stone for the gardener on your Christmas list.
Materials and Equipment:
- a large plastic bag or several sheets of newspaper
- one small bag of cement, the finer grained the better (available at craft centers or building supply stores)
- pieces of broken pottery or china, seashells, glass beads, etc.
- one or more aluminum pie plates OR flat bottomed plant saucers
- a large bucket or wheelbarrow
- a large jug filled with water
- a wooden stick or spade to stir cement
- a pencil
- pieces of paper, one for each stepping-stone (must be at least as wide as the bottom of your pie plate or saucer)
Instructions:
- Create this project outdoors or cover your work surface with a large plastic bag or newspapers to keep it clean.
- Before mixing the concrete, spread your shells, glass, and pieces of broken pottery out in front of you. On a piece of paper, trace out the circumference of your pie plate or saucer. Create a "practice" design for your stepping-stone within the circle you have drawn. Do one for each stone you plan to make.
- Mix concrete in a bucket or wheelbarrow according to the instructions on the package. Determine the amount you need for the number of stepping-stones you will be making. If you are making several stepping-stones, do not make more than two or three at a time. The mixture should be thick, but not runny. Add water and stir with wooden stick or spade until it is the desired consistency. Do not breathe in the concrete dust. Be sure to follow the safety precautions on the package.
- Pour concrete into pie plates or plant saucers, whichever you are using.
- Place your plate or saucer on a flat, even surface. Transfer your design from the paper to the pie plate or saucer. This method allows you to recreate your original design accurately. Be sure to press the pieces of pottery, shells, and glass into the concrete so that the edges are flush with the surface of the concrete. Because these stones may be stepped on with bare feet, no rough edges should be visible.
- Set the finished stepping-stone aside to dry. If drying outside, make sure it is in a covered area. The stones should take from one to two days to dry, depending on the weather. Once dry, they are easily removed from the pie plate or saucer, which can be reused to make more stepping-stones. Do not reuse the pie plate to hold food!
Give your completed stepping-stone to your favorite gardener!
Add your voice! Click below to comment. ThriftyFun is powered by your wisdom!
By IMAQT1962 (Guest Post)
December 8, 20050 found this helpful
MY DAUGHTER DID A STEPPING STONE FOR ME ONE YEAR AND USED PICTURES FROM WHEN SHE WAS LITTLE ON IT. IT IS ONE OF MY MOST CHERISHED GIFTS
By Impressed! (Guest Post)
March 12, 20080 found this helpful
Beautiful! I had to compliment you. What a lovely gift this would make. Thank you!

April 5, 20170 found this helpful
Can you just write something into the cement?? And perhaps fill in the writing afterwards with patio paint? I'm thinking of making memorial ones for the pets we have lost; maybe put a paw print on the stone.
How do you suggest I make a "stamp" for the paw print?
Add your voice! Click below to comment. ThriftyFun is powered by your wisdom!