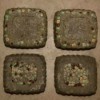
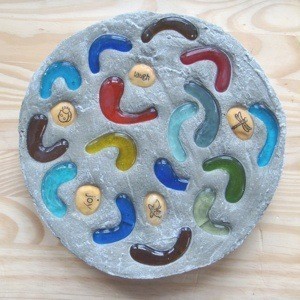
Stepping stones are an easy way to add functional creativity to your garden. Here's a simple and inexpensive way to make your own in just 10 easy steps.
Advertisement
Supplies:
Mold. This can be made out of anything that will hold cement: pizza boxes, disposable pie tins, cake pans, vinyl pot saucers, plastic take-out containers, etc.)
Non-stick agent. This will "grease" your mold so the finished stone releases easily from the mold. You can use Vaseline, cooking spray, or plastic wrap.
Quickrete (or other fast-setting concrete). If you want to add embellishments, choose a product with a sandy texture for a smoother finish.
A bucket, stir stick, and large spoon. A one gallon ice cream pail is large enough to hold cement for one mold the size of a pie tin.
Chicken wire or hardcloth. This will give the finished stone extra strength. Cut a piece to fit your mold before you mix up the concrete.
Embellishments. Use your imagination here!
Directions:
Gather supplies.
Protect your work surface. It's helpful to use a piece of plywood or another movable surface for your work surface so you can move them to another location for curing. Then cover it with an old tarp, vinyl table cloth, or lawn-sized trash bags.
Advertisement
"Grease" your mold. Cover your mold with a heavy coating of cooking spray, Vaseline, or line the bottom of the mold with plastic wrap. This will help your stone release easily from the mold. Pizza boxes, plastic saucers, and pie tins generally don't need to be sprayed. Simply peel the sides of the mold away from the stone after it sets.
Mix up the concrete. Follow the directions according to the product's package. If necessary, add in more mix or water until the mix reaches the consistency of thick brownie batter. Take care to protect yourself with eyewear, gloves, and a face mask. Concrete dust can be hazardous when inhaled, and once mixed, cement can cause severe burns upon contact with your skin.
Scoop half of concrete mixture into the mold. Level out the surface by gently tapping it on your work surface.
Add chicken wire. Press the edges down so that no sharp ends are sticking up.
Advertisement
Scoop remaining concrete into mold.
Tap the mold gently (several times) on a hard, flat surface. This will level the surface and help release any air bubbles that might be trapped.
Add embellishments. Press them gently into the surface. Use stones, tiles, stained glass, leaves, pine cones, pot shards, scrapbooking embellishments, or whatever captures your imagination. Letters and numbers made specifically for stamping imprints into stepping stones can be found at most large craft stores. Cookie cutters are also great for stamping and making imprints.
Let it cure. Leave your stone to dry for 2-3 days before attempting to remove it from the mold. Plan to let it cure for at least another week before taking it outdoors and walking on it. As the stone continues to harden, mist it with water once or twice a day and keep it covered with plastic wrap. This will prevent it from drying too quickly and give it added strength.
Advertisement
Additional Hints:
Mix up only enough concrete to make one mold at a time.
Grease your mold, cut your chicken wire to size, and lay out your embellishments BEFORE mixing up the cement. Depending on what cement product you use, once it's mixed it usually sets up within a matter minutes.
DON'T wash cement products down the sink! To save your bucket to reuse, wipe it out with moist paper towels and throw them in the garbage.
Change the final color of the stone by adding acrylic or latex paint or cement dye to the mix. Stones decorated with paint after they cure should be sealed before being placed outdoors.
Place stepping stones in the ground so that no more than 1/2 to 3/4 inch of the stone breaks the surface of the ground. This will protect the stone from cracking while being walked on and help people avoid tripping.