Home |  Index |  Submit Request |  Share Photos |  Share Tips |  Active Topics |  New Feedback  |  Contact Us  |  Search
 User Login:  Username:    Password:      Forgot It?  | Register

 Popular Topics
 - Beauty
 - Budget and Finance
 - Christmas *
 - Cleaning
 - Consumer Advice
 - Craft Projects
 - Craft Tips
 - Food Tips
 - Garage Sales
 - Gardening
 - Gifts
 - Green Living
 - Home Improvement
 - Organizing
 - Parenting
 - Parties
 - Pest Control
 - Pets
 - Product Reviews
 - Recipes
 - Repair
 - Thanksgiving
 - Weddings for Less

More Topics

Google Search:

Web thriftyfun.com

About:
RSS Feed
About Us
Media
Advertising
Contact Us
Privacy Statement
Disclaimer

Make Your Own Butterfly Feeder

By Ellen Brown
1x1
Date: 08/09/2006 Topic: Craft Projects > Garden & Yard > Yard Art  
1x1
1x1
Post Feedback! | Email Friend | Print | Get Responses | Bookmark | del.icio.us | Link | Rate: Thumbs Up Thumbs Down
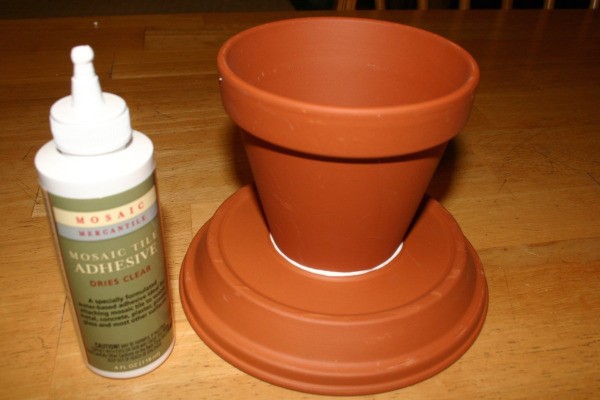
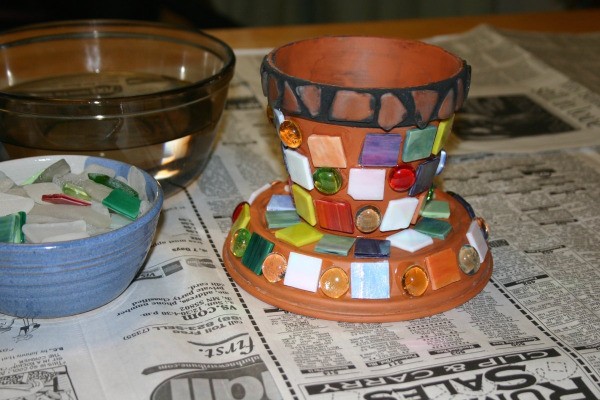
For many species of butterflies, flower nectar is the favorite entrée on the menu. If you want to take your butterfly garden to the next level, try adding a small feeding station that offers them rotting fruit. Red Admirals, Red-Spotted Purples, Commas and Mourning Cloaks all appreciate an occasional bite of rotting "fruit cocktail." Here are directions for an easy-to-make feeding station that will also add a bit of color and whimsy to your garden.

Make Your Own Butterfly Feeder

Materials:

  1. One 4" terracotta flower pot (this will be the body)
  2. One 6" terracotta saucer (this will serve as the rim)
  3. Tile grout rated for indoor/outdoor use. I happen to choose black.
  4. Mosaic tile adhesive. Make sure it dries clear.
  5. Embellishments. I used sea glass I picked up from walks on the beach; shells I collected on vacation; and some craft-sized tile pieces leftover from other projects. You might want to use buttons, old costume jewelry, nuts and bolts, pieces of broken dishes or mirrors, or any other odds and ends you have lying around.

Keep these handy:

  • Newspaper to work on
  • Bowl of water
  • Sponge
  • Pair of rubber gloves
  • Paper towels (for messes)
  • Pencil (optional)
  • Tile nippers (optional)

Directions:

  1. Lay down some newspaper-you're about to make a mess!

  2. Turn your flowerpot over. This is your pedestal. Using the tile adhesive, make a miniature "birdbath" by gluing the saucer, right side up, onto the bottom of your flowerpot.

    Make Your Own Butterfly Feeder 2

  3. Once the glue dries, use more adhesive to add your embellishments to the pot and/or saucer. My embellishments were a mish-mash of leftovers. I glued them on randomly without altering their size (I'm lazy!). For a more elaborate design, I would suggest sketching your pattern onto the flowerpot before you start gluing and if necessary, using tile nippers to cut and shape your pieces of tile.

    Make Your Own Butterfly Feeder 2

  4. After your embellishments dry (I gave mine 2 good hours), it's time to apply the grout. I found it easiest to slather the grout on with my hands (use gloves!). Squirt the grout onto the flowerpot and work it in until all the spaces around your embellishments are filled in. At this stage, don't worry about covering up them up, because you'll be sponging them off later.

    Make Your Own Butterfly Feeder 3

  5. After the grout has firmed up a bit it starts to develop a thin film. This is a good time to run a damp sponge over everything to remove any excess grout. Once it has thoroughly dried, come back over the pot with a damp sponge as many times as you need to until your embellishments show through.

  6. Butterflies like perches to sun on, especially those light in color. I glued a large shell on the rim of my feeding station to serve as a perch.

Add Fruit

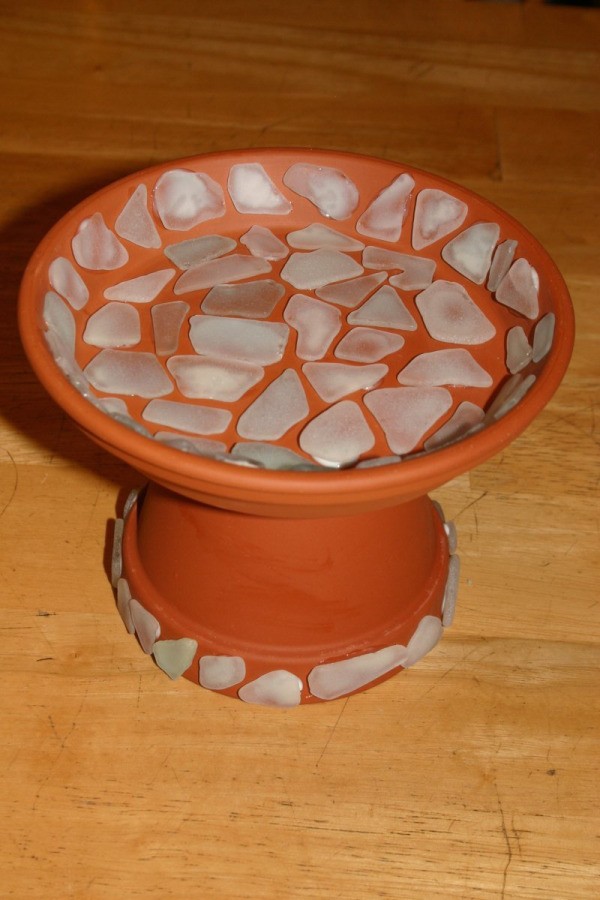
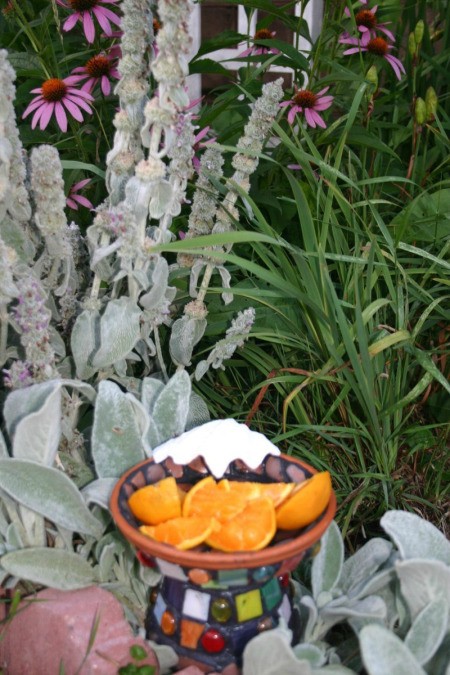
There is no need to add any additional sealants. Once the grout has dried, you're ready to add fruit. Try strawberries, watermelon, mango, oranges or bananas. If you're worried about attracting rodents, use a rubber band to cover the top of your feeding station with a small screen. This will allow the butterflies to feed, while keeping other critters from running off with your fruit. If the idea of rotting fruit makes you nauseous, fill the station with wet sand and offer the butterflies a place to "puddle."

Make Your Own Butterfly Feeder 4

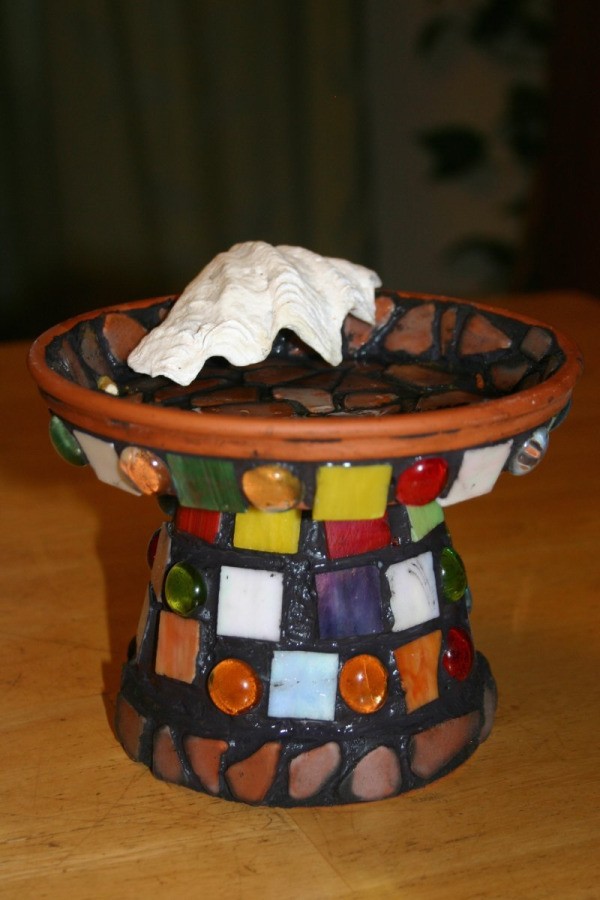
About The Author:
Ellen Brown is our Green Living and Gardening Expert. Click here to ask Ellen a question! Ellen Brown is an environmental writer and photographer and the owner of Sustainable Media, an environmental media company that specializes in helping businesses and organizations promote eco-friendly products and services. Contact her on the web at http://www.sustainable-media.com
Jump to Feedback | Post feedback
Related Links:
Previous: Almost Free Boredom Busters ThriftyFun Next: Uses for Wood Cigar Boxes
1x1
 Feedback
1x1
1x1
1x1
1x1
 Sponsors
1x1
1x1

Post by wyoKrista (45) | (08/13/2006)
Profile |Contact
I love your mosaic work and putting the two pieces together like that is really creative!
Thanks for the great idea
WYOKirsta


Post by grammar (177) | (08/13/2006)
Contact
Luv it...........I love butterflies and have been trying to figure out someway to attract more to my home.......this is excellent........thanx for sharing


Post by imaqt1962 (365) | (08/10/2006)
Contact
VERY BEAUTIFUL. BUT WOULDN'T THE FRUIT ALSO ATTRACT ANTS?


Post by mobo (170) | (08/09/2006)
Profile |Contact
Very pretty!
Looks like a fun project to try with the whole family!
And a great homemade gift idea for butterfly lovers!
Thanks for sharing!


1x1

Post Feedback:
Login using the form on the top of the page to post feedback if you have registered with ThriftyFun. If you have not yet registered, click here. It's FREE!. If you are not registered you can post feedback as a guest below. Please don't use your email address for your name because spam robots can dredge it from our site. Please do not post your feedback more than ONCE. We need to approve all guest feedback and it may take from minutes to hours for that to happen.
(1x1 graphic )
Your Name

Subject

Feedback

text tool text tool text tool text tool

Image Upload: Add an image to your post! Click the "Browse" button below and select an image from your hard drive. Please only select gifs or jpegs. If you have any problems, just email the image to images@thriftyfun.com


If you want to post your email address for responses from readers, obscure it in some way like put spaces between the name and @ sign and service address with (remove spaces) behind it or name (at) server (dot) com . This is for your protection from those creepy Robots.

(1x1 graphic )

© 1997-2008ThriftyFun.com - Design by Cumuli Design
Disclaimer: ThriftyFun.com cannot accept any responsibility for any injury or damage that you may cause to yourself, others, or property when following any advice given on this site. Read the full disclaimer. If you find any information on ThriftyFun.com or in our newsletters that is either erroneous and/or potentially harmful to others, please Contact Us, immediately.