Home |  Index |  Submit Request |  Share Photos |  Share Tips |  Active Topics |  New Feedback  |  Contact Us  |  Search
 User Login:  Username:    Password:      Forgot It?  | Join ThriftyFun!

 Popular Topics
 - Beauty
 - Budget and Finance
 - Christmas *
 - Cleaning
 - Consumer Advice
 - Craft Projects
 - Craft Tips
 - Food Tips
 - Garage Sales
 - Gardening
 - Gifts
 - Green Living
 - Home Improvement
 - Organizing
 - Parenting
 - Parties
 - Pest Control
 - Pets
 - Product Reviews
 - Recipes
 - Repair
 - Thanksgiving
 - Weddings for Less

More Topics

Google Search:

Web thriftyfun.com

About:
RSS Feed
About Us
Media
Advertising
Contact Us
Privacy Statement
Disclaimer

Making Concrete Patio Blocks

1x1
Date: 07/23/2007 Topics: Gardening > Advice | Make Your Own > Garden  
1x1
1x1
Post Feedback! | Email Friend | Print | Get Responses | Bookmark | del.icio.us | Link | Rate: Thumbs Up Thumbs Down
Making Concrete Patio Blocks
How do you make concrete blocks? Advice from the ThriftyFun community.

Using Buckets

We just poured leftover concrete in buckets, had everyone sign and hand print one. When the concrete is dry, they come right out. We have used them as stepping stones for more than twenty years!

By Tedebear

Practical Experience With Concrete Stepping Blocks

When we poured our sidewalks and mowing strips, what was left over, we made concrete stepping blocks. My kids made the forms out of old wood, square, and poured in the cement. We put some small gravel on top and pushed them in a little so they could be walked on. We have had them for over 20 years. We also used benderboard and made round ones. It actually was quite fun doing this and making our own designs on top. The square ones, we added cement dye and made them the color of the brick on our house and put the brick design on each one. In a couple days they were ready to use. Another thing that is good about using them as walkways and between places, is they can be picked up and moved if you change your landscaping.

By Eletha Cole

Rhubarb Leaf Stones

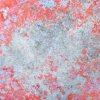
I made stepping stones with imprints of my rhubarb leaves and they are still around 3 years later; even after Nova Scotia winters.

Lay down plastic, lay down a good size leaf, messy but put cement on the leaf to cover not quite to the edges, put some chicken wire or some other type of reenforcement and more cement. Give some support with dirt around the form, cover with plastic and in 3-4 days VIOLA! Wash off any leaf that maybe left on the hardened stone, let set for a few days before using.

By Streatch

Lots Of Work

A friend had the forms where she could make pretty shapes. They looked pretty but she said she would never do that again. Lots of work.

By Sandy

Do you have any tips for making your own concrete patio blocks? Post them below.

Jump to Feedback | Post feedback
Related Links:
Previous: Will Dry Heat Harm Wool Clothing? ThriftyFun Next: Beaded Thong Bookmarks
1x1
 Feedback
1x1
1x1
1x1
1x1
 Sponsors
1x1
1x1

Post by MartyD (57) | (08/28/2007)
Profile |Contact
You can use aluminum pie tins or oblong aluminum baking pans for molds. Place buttons, shells or other "pretty things" in the bottom, pour the concrete over them and when you turn them out you have decorated stepping stones. It's almost like a concrete upside down cake. This would be a good craft project for kids.


Post by BABBIE (69) | (08/23/2007)
Profile |Blog! |Contact
I have made stepping stones.I use foam letters that they use in crafts, a real large bowl from the dollar store and clear contact paper. I cut it to the shape of the bottom of the container, and write on the smooth side what I want to say, peeled the backing off. On the sticky side I put the letters in reverse making sure they have stuck down well. I use a couple of pieces of double stick tape to hold it to the container bottom so it won't shift. I mix up my concrete wearing gloves and mask, pour it slow into the container over the contact paper, I make it about 3 in. deep. I tap the sides of the container several times to try to get out any air bubbles. Leave it on a flat surface for at least 3 days (that's the hard part) then carefully flip it over not letting it drop.
If there is any holes I take a little concrete and fill them. At this point you can peel the letters out, wash them and use them again.


1x1

Post Feedback:
Login using the form on the top of the page to post feedback if you have registered with ThriftyFun. If you have not yet registered, click here. It's FREE!. If you are not registered you can post feedback as a guest below. Please don't use your email address for your name because spam robots can dredge it from our site. Please do not post your feedback more than ONCE. We need to approve all guest feedback and it may take from minutes to hours for that to happen.
(1x1 graphic )
Your Name

Subject

Feedback

text tool text tool text tool text tool

Image Upload: Add an image to your post! Click the "Browse" button below and select an image from your hard drive. Please only select gifs or jpegs. If you have any problems, just email the image to images@thriftyfun.com


If you want to post your email address for responses from readers, obscure it in some way like put spaces between the name and @ sign and service address with (remove spaces) behind it or name (at) server (dot) com . This is for your protection from those creepy Robots.

(1x1 graphic )

© 1997-2008ThriftyFun.com - Design by Cumuli Design
Disclaimer: ThriftyFun.com cannot accept any responsibility for any injury or damage that you may cause to yourself, others, or property when following any advice given on this site. Read the full disclaimer. If you find any information on ThriftyFun.com or in our newsletters that is either erroneous and/or potentially harmful to others, please Contact Us, immediately.