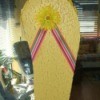
Summer is here and Flip Flops to enjoy wearing are a must for comfort and style. Ever see all those beautiful embellished flip flops in all the stores that cost $10 or more and wish you could buy them but can't afford to splurge and do so? Well, here is the most simple and low cost way to make your own. You can use beads/ribbon/silk flowers/decorative buttons - any thing that has a hole in it or that you can push a needle through can serve as your beautiful embellishment for your flip flops band.
Here I will show you how to create your own embellished Flip Flops with strands of beads using clear nylon thread and needle, that will appear to float on the flip flops band and not come off like the glued ones you buy for triple the price in stores. Using this sewn on method, you will not see or feel the nylon string on the band at any point. This string back through and needle inserted method will double strengthen your strand of beads as well to hold it on in place and last, without breaking or coming off as glued on beads or embellished items do.
Before I begin, just a helpful note as to where and what items you can buy to have many choices for your embellishments.
Approximate Time: 30 minutes or less
Steps for stringing on your beads onto your clear nylon string.
First, pull out a long piece of your clear nylon string about 20-24 inches long and run it through your needle then match up both ends and tie it off in 2-3 knots.
Now run your beads on the string with your needle in a matching pattern you like, using the same design on each half (here I used a variation of small beads then my largest in the center which will be in the center of my band when completed).
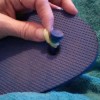
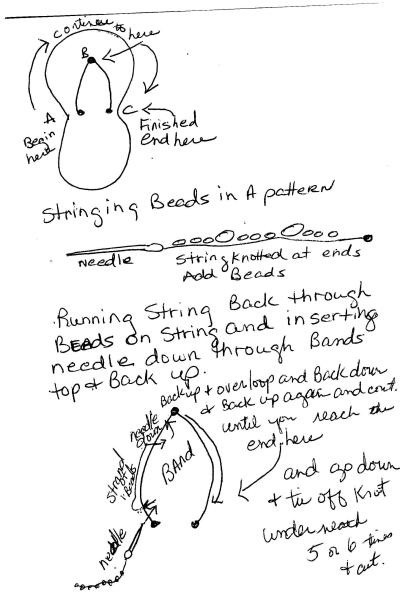
After your strand is complete, take your needle to one side of the end of the band on the flip flop (I'm right handed so I began on the left side of the band). Now insert your needle down through the band and pull the strand of beads until it is flush with the band and then push your needle back up through the band right beside of where you just came down through it and again pull taut. Then take your needle and go back through the beads as though you are stranding them. Stop halfway up the strand and come out thorugh the beads.
Continue through until you reach the center point of the band (where your toes are split at the bands center) and here you will just repeat that same process of going up and down through your band with the needle and restringing it through your strand of beads until you reach the other end of your band on your flip flops. There you will go down the last time with your needle and cut your string there, leaving a long tail so you can tie it off in knots about 3-4 tight. Cut your string tail closer to your tied knot.
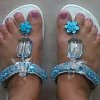
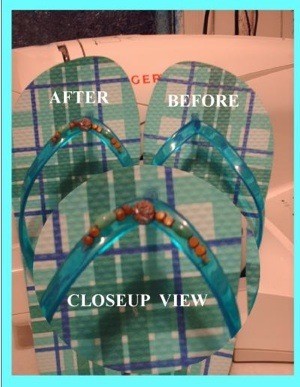
Your finished item will result in your string beads floating on top of the band that are double stringed by the method you took and no nylon string will be visible anywhere nor will you feel it on the under side of the band against your foot. And this method will result in beads not falling off from glue when your flip flops become wet.
Once you create your first pair and see how easy it was with beautiful results you will be hooked and look for more ideas to create.
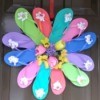
NOTE* Flip Flops are just $1 at the Dollar Tree and $2 at Walmart. They come in lots of colors so you can really add colors with different embellishments and create one of a kind designs that others will think you payed lots of money for. You can make the cutest ones for your kids too and match up to their theme clothes, like lady bugs or watermelon for girls, or firetrucks or bugs for boys.
I tried to also give you a written diagram (below) of how to insert your needle through your band as well as tell you. It seems as though it sounds difficult but its not and goes really fast. You simply want to pass in and out through your band to achieve two things. One is to hold it on and two is to secure your beads again by restringing through them while on the band and going in and out through your band at separate intervals so it stays in place at even points.
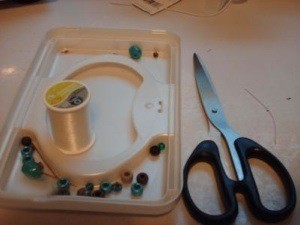
The funnest part is creating your strand the way you like which I did by laying my beads first in a tray lined up the way I wanted then began the procedure. Have fun with it and Enjoy!
By Julie from Tenn
Add your voice! Click below to comment. ThriftyFun is powered by your wisdom!
What a great idea and your instructions are very easy to follow. I'm going to have to make a couple of pair for myself.
Really good instructions. I appreciate the drawing. I have trouble visualizing written instructions.
This really is a good idea. I have done it on other inexpensive summer sandals too. It's a good way to use old beaded necklaces and bracelets that you don't wear anymore. Thanks for the great, easy to follow instructions.
Add your voice! Click below to comment. ThriftyFun is powered by your wisdom!