I am looking for recipes for making my own easter egg dye for my 4H group. Does anyone have any recipes to share?
Thanks,
Diane
Add your voice! Click below to answer. ThriftyFun is powered by your wisdom!
I saw this on Martha Stewart last year and it works great!!! Take Hard boiled eggs and wrap with an old tie. (buy from thrift store). After egg is wrapped in it put a rubberband around it. Take a pot and add vinegar to pot. Slightly heat until luke warm. Put eggs into vinegar and cover. Let sit for about 30 min. Take out and take off ties, great designs on eggs!!!
When I was a little girl, my mother used to make her own dyes because she didn't have money to spare for store bought ones.
She boiled onion skins in water for a sort of yellow color, some she dipped in tea and coffee to stain shades of brown, used beet juice for red, grape juice for purple, Those are the ones that I remember, but you could experiment with other colorful food items. And she would take a paraffin cake that she used to preserve jellies with and use the corner to write names on the eggs before she dyed them, and the color would not "take" where the wax was, and you could read the names.
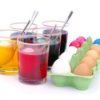
Make Your Own Easter Egg Dye from Food Colors
To make your own dye gather together enough cups for each color you want to create and that are big enough to hold the liquid dye and a submerged egg. Mix 2/3 cup of water and 2 tsp. distilled vinegar and food coloring in each cup. Add food coloring one drop at a time until you obtain the desired color (about a 1/4 tsp or about 24 drops of food coloring). Be sure to completely cool this mixture before allowing children to use it.
Experiment with creating colors. Here are some ideas to create different colors with the four colors (red, blue, green, yellow) that you usually get in food coloring packages.
Orange - mix about 10 drops of red with about 15 drops of yellow
Turquoise - mix about 5 drops green with about 20 drops of blue
Violet - mix about 12 drops red with about 12 drops blue
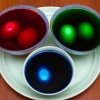
Coloring the Easter Eggs
Allow your eggs to sit in the dye mixture about two to five minutes depending how deep you want the color. Here are some ideas to make neat eggs:
Before dipping the eggs in the dye, use a wax crayon and draw on the egg. Where ever you write on the egg, the egg will remain white.
Get a assortment of rubber bands and put them on the egg. The egg will remain white under the rubber bands. You can also use masking tape to keep areas of the egg white.
1. I can only get dry powdered food coloring here in Japan. Does anyone know how to make egg dye with that?
2. How long after you make the dye from food coloring will it be safe to use and then eat the egg (in case some color gets inside)? I asked the PAAS company this and they said not very long since there are no preservatives in their egg dye tablet.
Thank you! Julie
Hard cooked eggs can be kept in the refrigerator for about a week. I'm sure the food dye will last that long with no problems.
As for the powdered dye, I would just put a spoonful in a small glass of water (that will fit an egg), mix it up and see how it works. More dye will give you a darker colored egg, as will leaving it in the dye longer. Use chopsticks or tongs to remove it and use the egg container to allow it to dry.
Let us know how it turns out!
NATURAL DYE FOR EASTER EGGS-from A to Z Recipes ezine
Different Shades of Red: beets, raspberries, cranberries, grape juice, or red onions
Different Shades of Yellow: Yellow onion skins, orange peels, lemon peels, shredded carrot, celery seed, ground cumin or ground turmeric
Place hard-boiled eggs in a single layer in a large pot (do not stack them). Pour in just enough water to cover the eggs, add about 1 teaspoon vinegar and the desired natural dye to the water.
Bring the water to a boil; reduce heat and simmer for about 15 minutes.
Make Your Own Easter Egg Dye from Food Colors
To make your own dye gather together enough cups for each color you want to create and that are big enough to hold the liquid dye and a submerged egg. Mix 2/3 cup of water and 2 tsp. distilled vinegar and food coloring in each cup. Add food coloring one drop at a time until you obtain the desired color (about a 1/4 tsp or about 24 drops of food coloring).
Experiment with creating colors. Here are some ideas to create different colors with the four colors (red, blue, green, yellow) that you usually get in food coloring packages.
Orange - mix about 10 drops of red with about 15 drops of yellow
Turquoise - mix about 5 drops green with about 20 drops of blue
Violet - mix about 12 drops red with about 12 drops blue
Coloring the Easter Eggs
Allow your eggs to sit in the dye mixture about two to five minutes depending how deep you want the color. Here are some ideas to make neat eggs:
Before dipping the eggs in the dye, use a wax crayon and draw on the egg. Where ever you write on the egg, the egg will remain white.
Get a assortment of rubber bands and put them on the egg. The egg will remain white under the rubber bands. You can also use masking tape to keep areas of the egg white.
I found this site for home made Easter dyes. Hope it helps.
www.celestialseasonings.com/
Not sure if this would work with eggs, but I remember in "Little House in the Big Woods' Ma would grate a carrot, take the juice to dye her butter...why wouldn't it work with eggs? (I tried the carrot juice with butter, and it works!)
We have tried beet juice and purple grape juice and they work great!! :0)
Dyeing Eggs The Old Fashioned Way
Prep Time: 30 Minutes
Comment: Comment:
This Easter try a new technique for dyeing eggs. This unique method lets you experiment with natural ingredients. The kids will have a ball inventing new colors.
Use 4 cups of each ingredient per quart of water to create the desired color. Theses amounts will color approximately 6 eggs.
Crimson: fresh beets
Copper: yellow onion skins
Green: spinach, fresh or frozen
Yellow: marigolds
Blue: crushed blueberries
Directions:
In a large pot, place 6-8 eggs in a single layer. Add enough water to
cover eggs by 1 inch. Add 2 tablespoons of white vinegar per quart of
water. Add dye ingredients and bring to a boil. Turn heat to low and
simmer for 10 minutes. Let eggs sit in the dye for approximately 10
minutes or until the desired color is achieved. Dry eggs on paper
towels or in egg cartons. When the eggs are dried, rub the eggs with
vegetable oil for a glossy shine.
From www.recipezaar.com #160383
Egg Dye
10 drops food coloring
1 teaspoon white vinegar
1/2 cup boiling water
1 tablespoon olive oil (optional)
glitter (optional)
white craft glue (optional)
For each dye bath combine 1/2 cup boiling water with 1 tsp vinegar and 10 drops of food coloring in a bowl. Start with 5 drops red and 5 drops yellow, for orange for example, or 6 drops blue and 4 drops green for turquoise.
Dip hard-cooked eggs in dye bath for 3-5 minutes, extend time for richer color. Try using tongs to dip only half an egg in one color, then dip other half in a different color.
Use tongs or a slotted spoon to remove eggs and place on wax paper to dry, blot any excess with a paper towel.
For tie dyed eggs, add 1 tbsp olive oil to the mixture and stir with a fork. Roll egg gently in bath to pick of streaks of color. Remove egg from bath and blot oil off with a paper towel, then dry on wax paper. Once dry, lightly dip in another color if desired.
For glitter eggs, brush dried dyed egg with a thin layer of craft glue. Spoon glitter over egg, allow to dry on wax paper. To put glitter on only part of an egg (half blue, half red for example), use masking tape over the un-glittered part (or use stickers for shapes) and once dry remove masking tape and glue/glitter the remaining area.
For letters, numbers or shapes use small vinyl stickers (office or hardware supplies) and place them on the egg before dying. Once slightly dry peel off stickers gently. You can also use a white crayon to write names or draw pictures.
If you plan to eat your easter eggs, never leave them unrefrigerated at any point for more than 2 hours.
We always used the directions on the box of food coloring, food coloring and vinegar plus water, we used crayons like while yellow, pink light colors work best to draw designs on the eggs before we dyed them.
Add your voice! Click below to answer. ThriftyFun is powered by your wisdom!