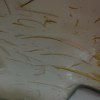
The sheetrock in our ceiling developed a slight crack from a leak. We had a new roof put on, but after several years, one side of the weakened sheetrock next to the lengthening crack began to sink lower than the other. The crack finally extended from the center of the raised roof, all the way down to the outside wall, and the crack was so big that roof insulation was sifting in and valuable heat was being lost!
I spent HOURS from time to time - looking all over the internet for how to make a repair that would either last until we could afford to replace the ceiling panels, or maybe would last forever if it didn't look too bad. Nothing workable ever came up, no matter where I looked. And, yes, I know that the 'proper' way to repair it would be to remove the whole 4x8 foot ceiling panel sections and put new ones up, but it's expensive to hire it done, and we are not physically able to do it ourselves now after both having recent health issues. Hubby now can't climb a ladder because of knee problems, and I have a weak arm since breast cancer surgery, so bad timing for a ceiling repair. We finally gave up that we simply couldn't tackle it ourselves. Sheetrock is VERY heavy, and the blown-in roof insulation would have made a huge mess, anyway.
So, what to do. Logic seemed to tell me that the crack was between two ceiling joists, and since I could push up the falling side with my hand, it'd not take much pressure to hold it in place. Still, it would need to be strong and attached to both ceiling joists on either side of it, and it would need to be materials we already had on hand, because money is very tight, or if I had to buy something, it would have to fit in the trunk of our car to get it home.
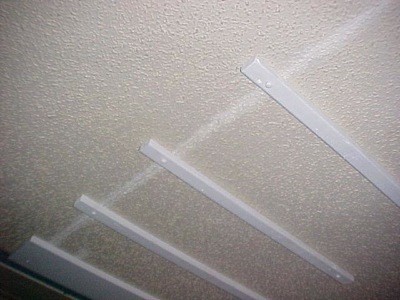
Ta-da! We had some leftover 1x2 inch furring strips that wouldn't look too bad. For most of them, they only needed to be a little longer than the distance between the joists. I wanted 2 inches to extend past each joist for strength, so I cut each board 4 inches longer than the distance between the joist centers. Because someday we MIGHT be able to afford to have it fixed properly, and because hubby didn't look as if he thought much of my idea, lol - I wanted my 'repair' to be easily removable.
Hmmmm. Well, screws could be used, but they'd need to be sunken in and protected from paint so they could be unscrewed. I had some little rounded wooden 'plugs' from a craft project! (Can be found at craft stores in the wood section, or also at a home improvement center.)
First, I measured the 'plugs' to find the drill bit size for a hole, and drilled part way into the 1x2, just far enough that the plug would set firmly into the hole. Then, I pre-drilled in the center for the screw and set each screw in part way.
To mark where the ceiling joists were, I used thumbtacks. Took me while, measuring and testing, before I remembered we had one of those laser levels that shoot a red line out straight. Well, duh! I thumbtacked that little thing to the ceiling and just followed the line, measuring off about every 12 inches. It took 12 strips of wood to cross the ceiling.
It took me a few days to put them all up, using a screwdriver bit put into the drill, but I did it, starting by standing on a chair near the low part of the ceiling and ending up on a ladder on my tippy toes st the high side. I could only put up a few at a time with a weak arm holding me back, most people could do this in only a day.
The ceiling sheetrock is all pulled back up perfectly level and the crack closed nicely. Now, when time and energy allows, I have only to finish spackling the narrow crack and repaint the ceiling so that it all matches. Hopefully, anyone who sees it will think it's just some odd architectural feature, lol, but I don't really care. It's our home and personally, I think it looks a lot better than half a sheetrock section hanging down, letting the blown-in roof insulation fall onto our heads! :^)
By Mary LaCaze from Mtn. Pine, AR
What a great example you set and to be able to do this with one weak arm is amazing. I hope your "temporary" repair lasts forever! Good luck to you.
Joan from Chesterfield, MI