 This is a cute project to make with your children. It would also be a great gift for the Easter Bunny to deliver to grandparents! Inexpensive and fun to make!
Approximate Time: 1 hour plus drying time
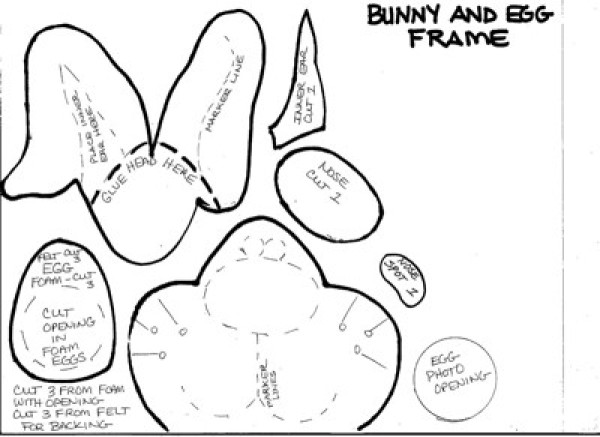
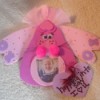
Cut out foam parts using pattern.
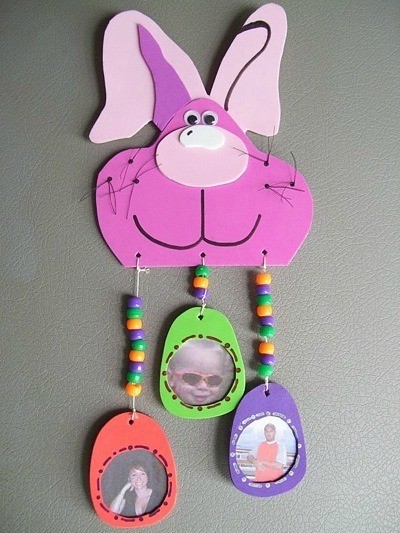
Tip: Use sticky back foam for bunny head, but do not peel backing paper off. This will make bunny firmer. You can punch a hole at top of head to hang as a mobile or glue magnet on back.
Glue bunny pieces together. Use black thread for whiskers and insert with needle. Tie knots in back of head. Draw features using black marker.
Depending on how many eggs you want, punch holes at bottom of bunny. Just alternate lengths of string when hanging eggs so all photos show. Knot strings on bunny head and thread beads on.
Cut two pieces for each egg and insert photo between and glue closed. Decorate eggs, if desired. Punch hole at top of each egg and tie with knot to each string.
Happy Easter!
By Mary from Palm Coast, FL
Too cute!