Jackie H. Silver Post Medal for All Time! 355 Posts
April 4, 2007
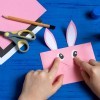
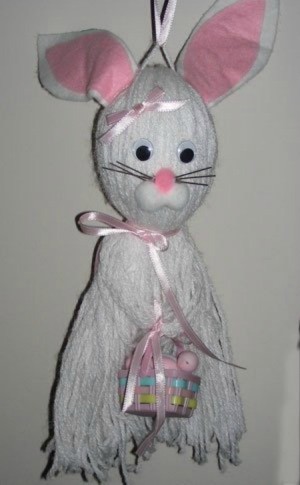
It's not too late to make this adorable bunny. It is quite easy and fun to do with the kids.
Items you will need:
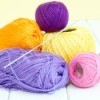
1 3 oz. skein of white craft yarn
Advertisement
8x8 inch squares of felt, in pink, and white
1 small spool of 1/2 inch pink satin ribbon
1 Styrofoam egg shape 3 inch ball
1 small pkg. of movable eyes, 1/2 inch
1 small pkg. of white pom poms 1 inch
1 small pkg. of pink pom poms 1/2 inch
black wire, that can be cut into 2 inch pieces for whiskers
a decoration, for the bunny's hands
I used a small miniature plastic square basket and filled it with mini plastic eggs.
Directions:
Take the skein of yarn and cut off the wrapper, it should unfold in 1/2.
Cut the skein of yarn in 1/2, keeping it still together, like in a long strips of yarn.
Take the egg you are using for the head, holding it, place half the skein over the head evenly, so that each side hangs even.
Now, take the second half skein of yarn and fold it in the opposite way over the head. So now you will have four parts of yarn, hanging over the head.
Take an elastic band and tightly hold all four parts of yarn together in your hand and wrap the elastic around until tightly wrapped. Now, you should have made the head and it should look like a mop head.
Advertisement
With a 12 inch piece of pink ribbon, gather a good amount of yarn from the top of the head and feed the yarn through and tie in a knot at the end. This makes a pretty hanger for your bunny.
Take another 12 inch piece of pink ribbon, and just tie it around the neck to hide the elastic and make a bow tie.
To make arms to hold any object you choose, just take about 6 strands of the white yarn from each side of the dangling yarn, give each arm a twist, and place the arms together in the front. Tie with a 6 inch inch piece of pink ribbon. Now you can attach to the arms the basket with eggs, or just leave it with the ribbon tied in a bow.
Now, for the ears, take one piece of white felt square and fold it in half. Draw with a pencil, long oval pointed ears. Cut both at the same time, so the ears will be the same size.
Advertisement
Do the same thing with the pink square felt. Fold in half, but cut just a bit smaller pointed ovals. These will be hot glued in the center of the white ears.
After you are finished making the pink and white ears, take your hot glue gun and just put two lines of glue across the top sides of the head. Hold tightly until dry. They should stand up just fine.
And lastly, the face. Glue on two eyes. The nose is made of one pink pom pom. Right below the nose, place two white ones. These will be hot glued on. Finally, take each whisker, put a dab of hot glue on the end and stick it in between the nose and mouth. I use three on each side.
This sounds like long directions, but it is a very easy fun project to do with the kids!
 It's not too late to make this adorable bunny. It is quite easy and fun to do with the kids.